Set up the Arduino IDE for the Feather nRF52840 Sense
Table of contents
- Installation Instructions from Adafruit
- Simplified Installation Instructions
- Test the Factory Code
- Run the
blinksketch.
Installation Instructions from Adafruit
Adafruit has detailed instructions for setting up the Feather nRF52840 Sense. Those instructions provide a lot of background information that is helpful in understanding the board. However, it is easy to get lost in those details, especially if you do not have much prior exposure to using the Arduino programming software called the IDE (Integrated Development Environment).
Simplified Installation Instructions
On this web page we provide a simpler approach using these steps.
- Install the Arduino IDE from the Arduino.cc web site
- Add Path of Board Support Packages to the IDE preferences
- Add the library for the Arduino Bluefruit Sense
These are the same steps given by Adafruit, but in a more succinct format. Please consult the Adafruit documentation if the steps given here do not work.
Note that in some of the Adafruit documentation, the Adafruit nRF52840 Sense is referred to as the “Adafruit Bluefruit Feather Sense”.
Install the Arduino IDE
We recommend that you download and install the stand-alone Arduino IDE. Windows users have the option of installing an app, but some users report mixed results
- Download the installer from the Arduino.cc web site
- Extract the Arduino IDE application from the zip archive
- Follow the installation instructions for the operating system of your computer
DO NOT simply double-click the zip archive and run the app from wherever it landed on your computer during download process. You need to install the Arduino IDE in the standard location – the Programs folder on Windows or the Applications folder on a Macintosh.
Add Path of Board Support Packages to the IDE preferences
- Launch the Arduino IDE
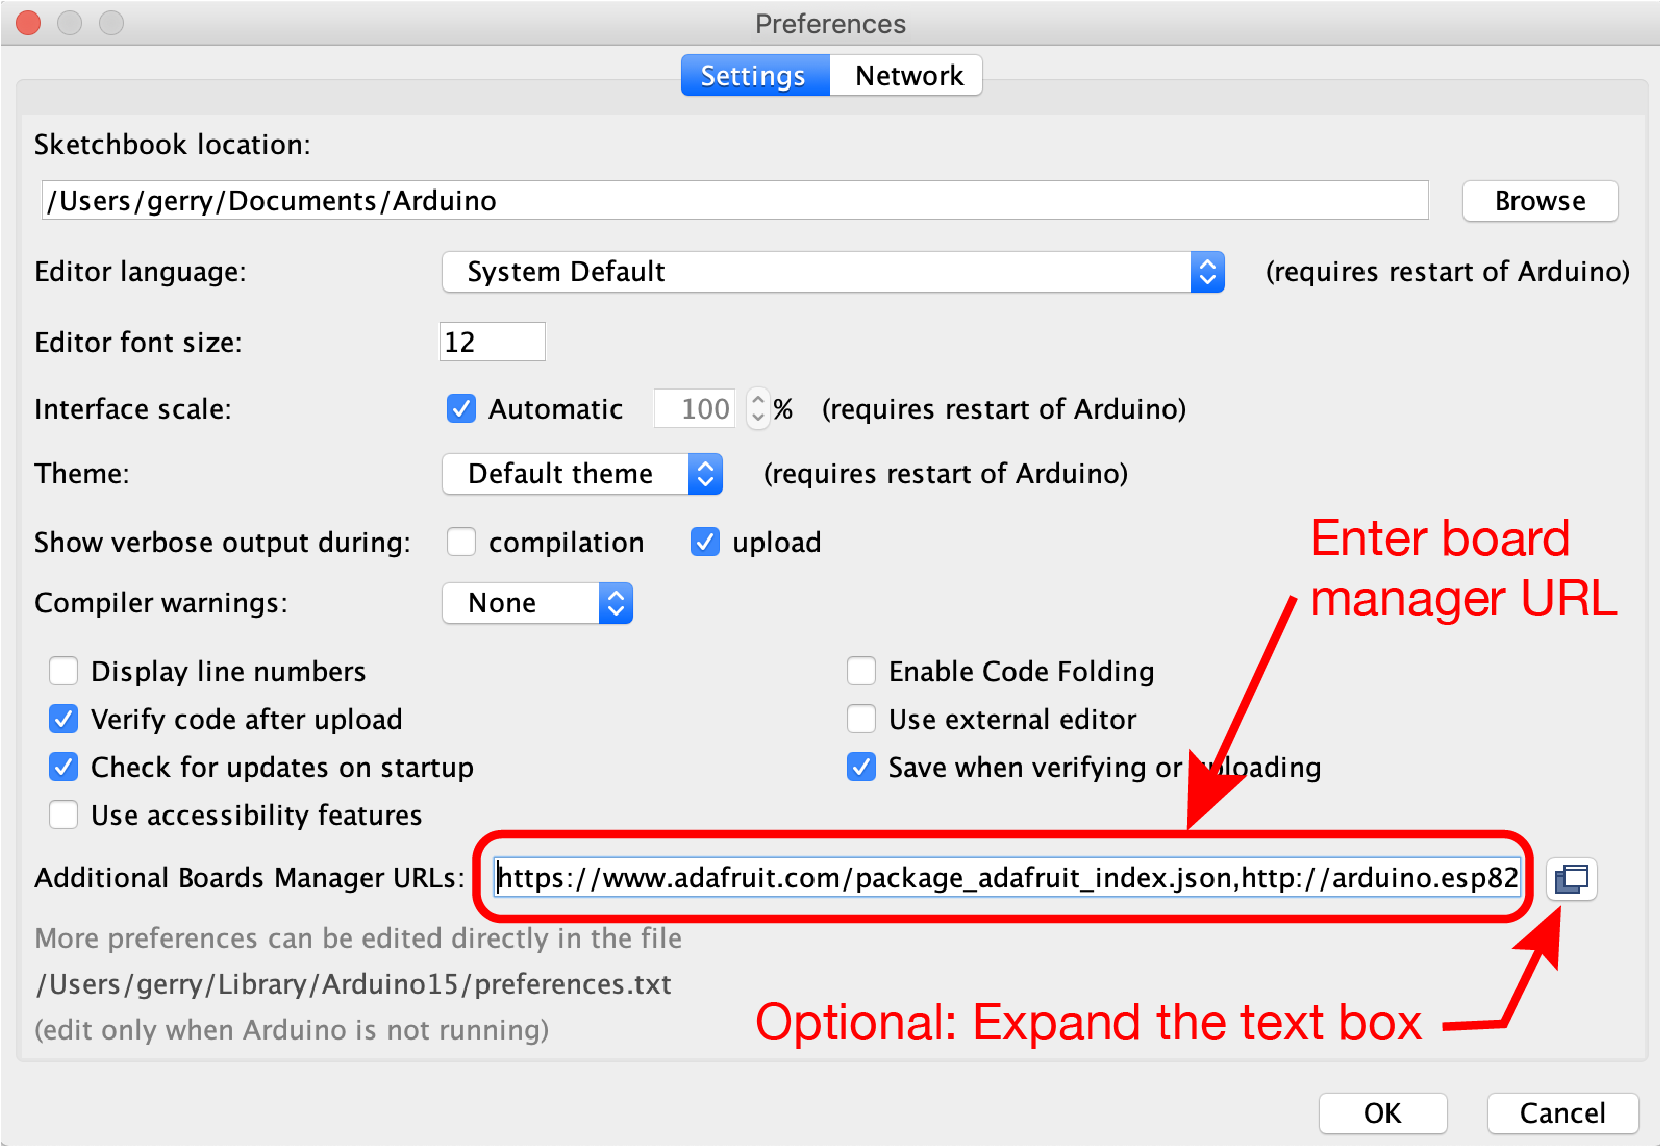
- Select “Preferences” from the drop-down menus at the top of the window
- Click into the “Additional Boards Manager URLs:” box, and enter
https://adafruit.github.io/arduino-board-index/package_adafruit_index.json. Hint: a copy and paste operation will save typing and avoid errors.
Note: If you have other boards installed in the Additional Boards Manager, the individual URLs should be separated with a comma, or on separate lines. Clicking on the icon to the right of the text input box will expand the box so that you can easily add multiple libraries on separate lines.
- Click OK to close the dialog box.
Add Arduino Support for the Adafruit nRF52 boards
Additional software resources for the Feather nRF52840 Sense need to be added to the Arduino IDE. The first addition is support for the Feather board. Later we will add the software libraries necessary to communicate with individual sensors.
In the Arduino IDE select Tools –> Board –> Boards Manager …. to open the Board Manager. In the search box enter adafruit sense
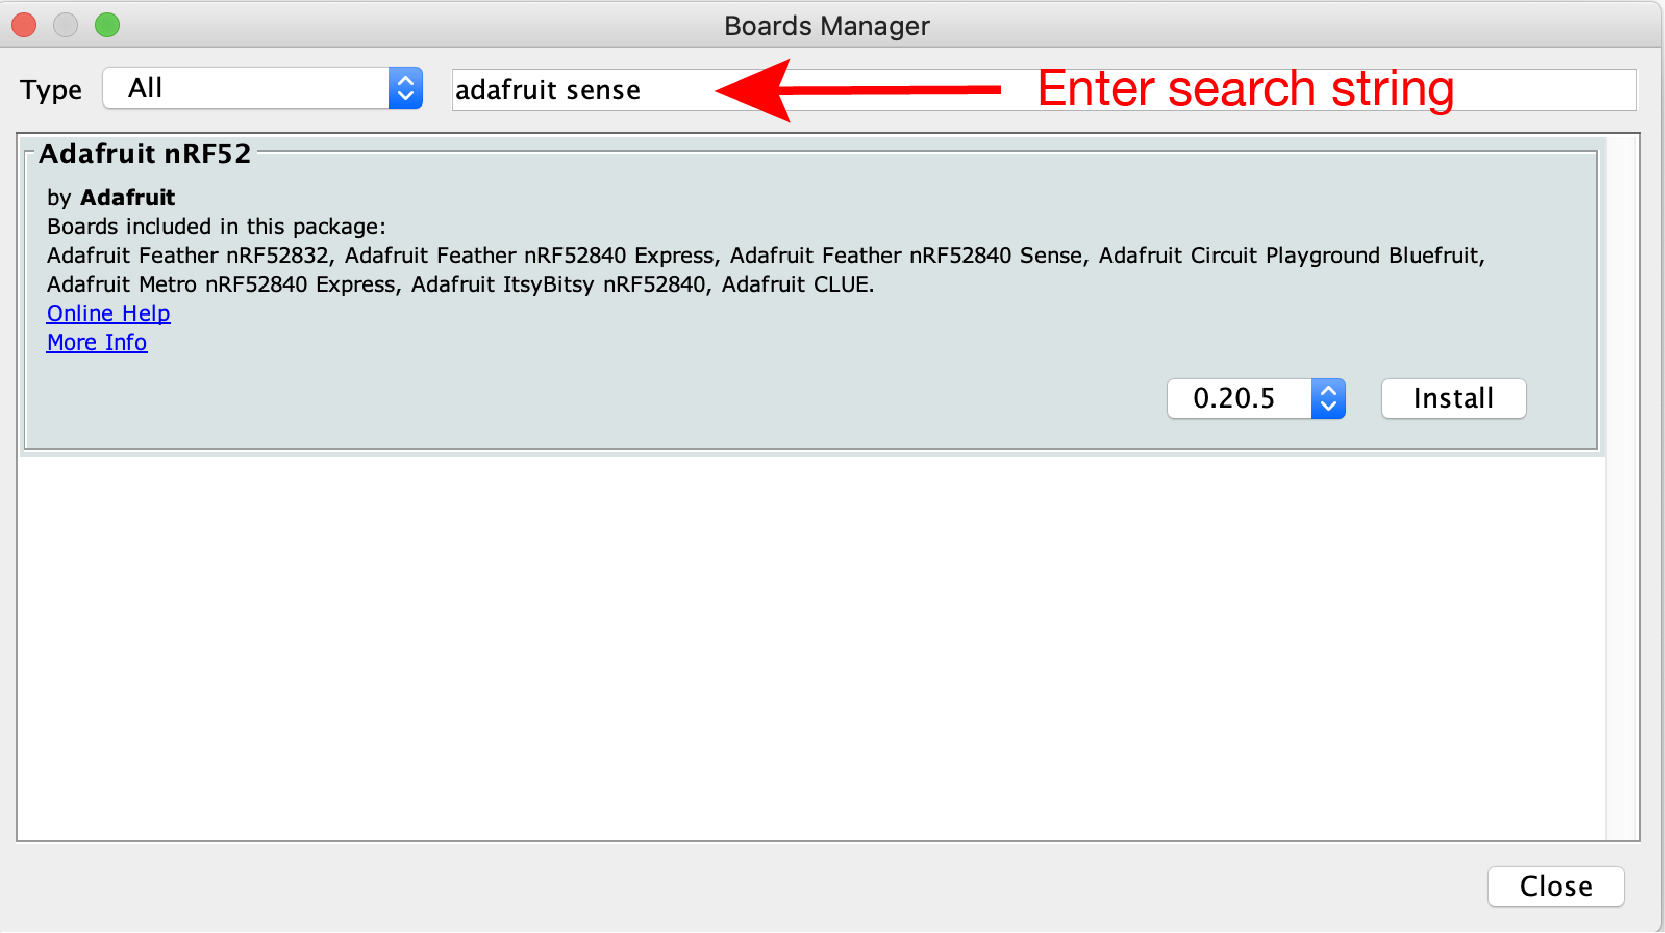
With the search feature narrowing the options, the board manager should show the installation panel for Adafruit nRF52, as in the preceding image.
If you don’t see the Adafruit nRF52 panel
If the Adafruit nRF52 option is not displayed, you may have incorrectly entered the URL to the Adafruit board support package. Alternatively, you may simply need to restart the IDE.
- Try quitting and re-launching the IDE. Then open the Board manager again and serch for
Adafruit nRF52 - Go back to the preceding step of configuring the Preferences and check the spelling of the URL, or whether multiple URLs are separated by commas or are on separate lines.
If you see the Adafruit nRF52 panel
If the Adafruit nRF52 option is displayed, click the Install button and wait. It may take several minutes to complete the installation.
Test the Factory Code
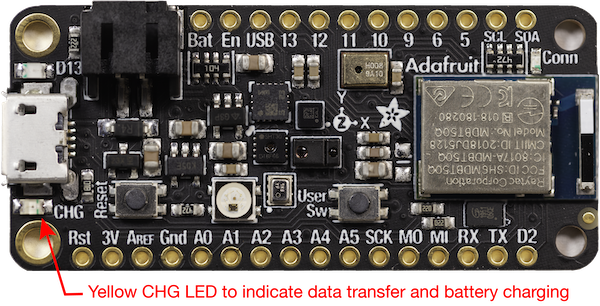
With the feather board support installed, you should connect the board to your computer and verify that the factory-installed test code is running. Select a USB cable compatible with the Feather board and plug the cable into your computer and the feather.
The CHG LED next to the USB port should blink rapidly when power is supplied via the USB cable. The blinking indicates that the feather is sending serial data back to the host via the USB cable.
Select the serial port
Use the Serial Monitor of the Arduino IDE to display data sent from the Feather.
From the Tools menu, select port, and choose the appropriate port. The naming of ports depends on your operating system
- On Windows:
COMnwherenis an integer - On Macintosh:
\dev\cu.usbmodemxxxxxxwherexxxxxxis an integer like 14201
An addition label such as (Adafruit Feather nRF52840 Sense) may be appended to the port name.
Open the Serial Monitor to see messages from the Feather
Open the Serial Monitor and set the baud rate to 115200, as required by the the code in the sketch running on the board.
If the connection between the Feather Sense and your computer is working, you should see data from the sensors displayed in text format.
If the text in the Serial Monitor is garbled, or not being displayed at all, check that you have the correct baud rate selected via the pop-up menu at the bottom of the Serial Monity window. The correct rate is 115200 baud.

Run the blink sketch.
Success up to this point, means that your Feather board is running the factory sketch and communicating with your computer.
The next test of your IDE setup is verify that you can upload a new sketch to the Feather. The standard test is to upload and run blink sketch.
From the File menu of the Arduino IDE, select Examples –> 01 Basic –> Blink. This will open the code for the blink sketch. click the right arrow at the top of the window containing the blink code. The IDE will compile the code and upload the new firmware to the Feather. If successful, you should see the red LED labeled D13 (above the USB port) blinking on and off at a rate of one blink per second.