I2C Devices
I2C (Inter-Integrated Circuit) is a serial communication protocol that can simplify the connection between a microcontroller and external devices such as sensors and displays. You will also see I2C written IIC or .
This page gives an overview using I2C to connect a Circuit Playground Express to an external device such as a sensor breakout board. Details of connecting and using specific devices with I2C are described on their respective pages. For example, there is a page on connecting a micro-OLED board and another page on connecting an SGP30 air quality sensor.
Table of contents
- I2C
- STEMMA/QT and Qwiic
- I2C with the Feather
- Be careful when plugging STEMMA/QT (Qwiic) plugs into sockets
I2C
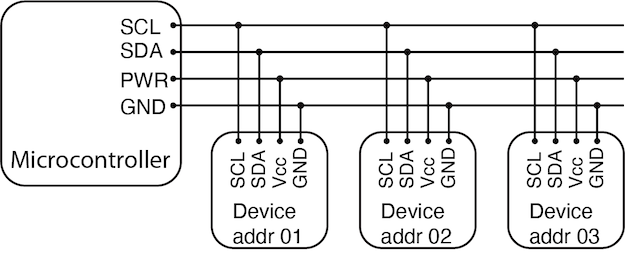
I2C requires four wires: two for communication in addition to power and ground. The four wires have these common labels:
- SCL: Clock
- SDA: Data
- PWR or Vcc: 3-5V supply
- GND: Ground
We’ve chosen sensor and OLED display breakout boards with STEMMA/QT connectors, which simplifies making connections. The only time we need to explicitly worry about the four signal lines listed above is when we connect the Circuit Playground Express to the STEMMA/QT connector.
Multiple devices on an I2C bus
I2C is a serial bus architecture. That means multiple devices share the same data and control/clock lines (SDA and SCL), and should also have a common GND. The I2C protocol allows 3.3V and 5V logic. STEMMA/QT boards from Adafruit are compatible with both 3.3V and 5V logic. Qwiic boards from Sparkfun are designed for 3.5V logic.
Devices on the bus must all have a unique address. The following diagram represents a set of I2C devices sharing all four lines, which is a typical arrangement when I2C is used to connect a microcontroller to sensors and displays.
Since each device on a single I2C bus must have a unique address, it may not be possible to have multiple identical I2C sensors on the same bus. There are three workarounds to this limitation. Some I2C sensor breakouts have a jumper that allows selection between (typically) two addresses. Some microcontrollers have multiple I2C channels. And finally, it is possible to use an I2C multiplexer to manage separate addressable busses.
STEMMA/QT and Qwiic
STEMMA/QT and Qwiic are brands of Adafruit and Sparkfun, respectively.
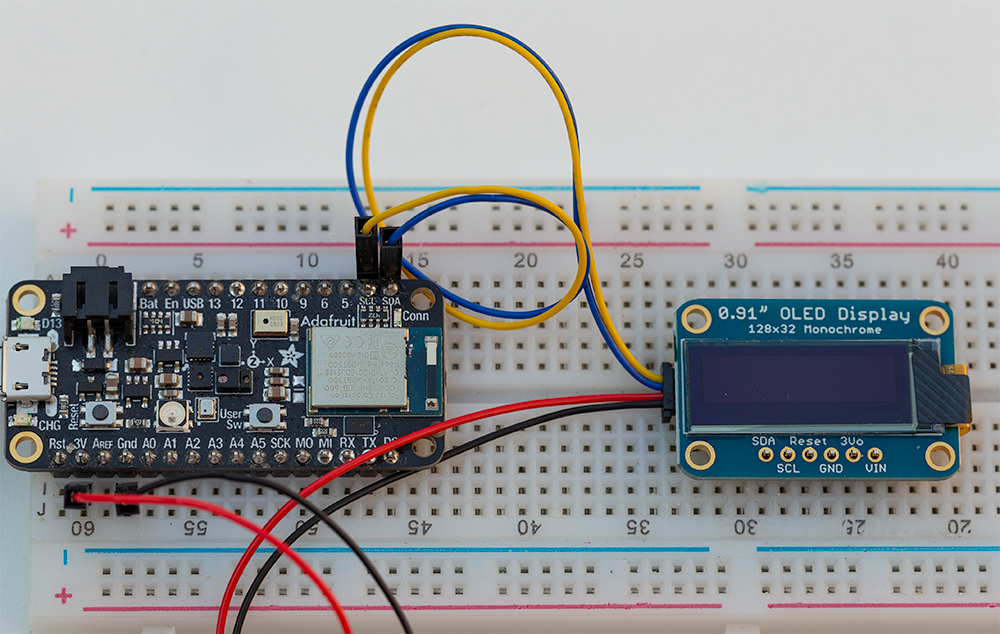
The wires of the STEMMA QT connector have four colors, which correspond to the I2C communication protocol. Insert the male end of the STEMMA QT cable into the sockets adjacent to the pins on the Feather with the labels corresponding to the following color scheme.
Black:   GND
Red:     3.3V for Qwiic,  3 - 5 V for STEMMA/QT
Yellow:  SCL
Blue:    SDA
For a mnemonic, think SCL and yellow both have the letter “L”.
I2C with the Feather
Adafruit sells a STEMMA/QT Qwiic JST SH 4-pin connector that can be attached to a Feather. The following image shows how that cable can be connected to a 128x32 OLED display.
Be careful when plugging STEMMA/QT (Qwiic) plugs into sockets
The following images show the STEMMA/QT socket on a breakout board and a plug at the end of a STEMMA/QT cable. In the bottom image, the offset of the pins is highlighted.
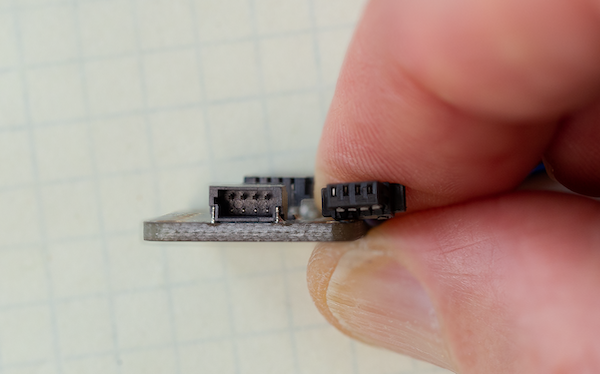
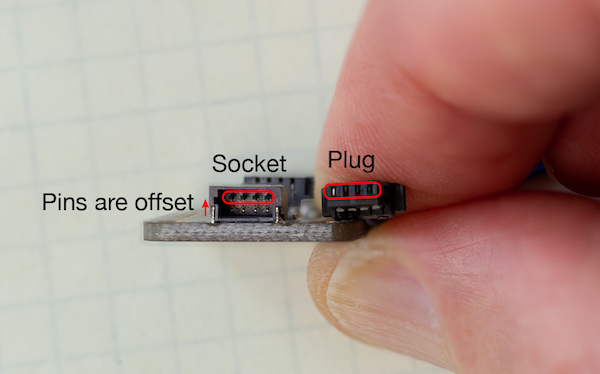
The plug had socket have physical tabs that make it easy to connect when the plug and socket are aligned. Be careful, make sure that the offset of the plug is aligned with the offset of the socket. If the plug and socket are not aligned and you force the plug into the socket, you will flatten the pins inside the socket, making it unusable.