Setting up the Circuit Playground Express
This page describes a set of important tasks that you (should) only need to perform once to use your Circuit Playground Express with the Arduino IDE (Integrated Development Environment). To shorten the text, we will use CPX as an abbreviation for Circuit Playground Express.
Table of contents
- Setting up the Circuit Playground Express
- Test with the Blink Code
Installation Instructions from Adafruit
Adafruit has detailed instructions for setting up the Circuit Playground Express (CPX). Those instructions provide a lot of background information that is helpful in understanding the board. However, it is easy to get lost in those details, especially if you do not have much prior exposure to using the Arduino programming software called the IDE (Integrated Development Environment).
Simplified Installation Instructions
On this web page we provide a simpler approach using two steps.
- Install the Arduino IDE from the Arduino.cc web site
- Add Path of Board Support Packages to the IDE preferences
- Include the board support library for the CPX
You should only need to perform these steps once.
These are the same steps given by Adafruit for setting up the CPX and Arduino IDE, but in a more succinct format. Please consult the Adafruit documentation if the steps given here do not work for you.
Install the Arduino IDE
We recommend that you download and install the stand-alone Arduino IDE. Windows users have the option of installing an app, but some users report mixed results.
- Download the installer from the Arduino.cc web site
- Extract the Arduino IDE application from the zip archive
- Follow the installation instructions for the operating system of your computer
DO NOT simply double-click the zip archive and run the app from wherever it landed on your computer during download process. You need to install the Arduino IDE in the standard location – the Programs folder on Windows or the Applications folder on a Macintosh.
Add Path of Board Support Packages to the IDE preferences
- Launch the Arduino IDE
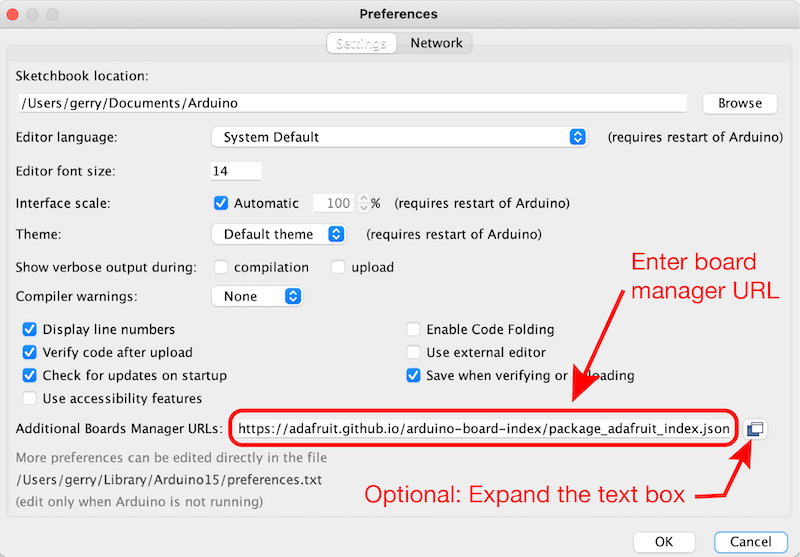
- Select “Preferences” from the drop-down menus at the top of the window
- Click into the “Additional Boards Manager URLs:” box, and enter
https://adafruit.github.io/arduino-board-index/package_adafruit_index.json. Hint: a copy and paste operation will save typing and avoid errors.
Note: If you have other boards installed in the Additional Boards Manager, the individual URLs should be separated with a comma, or on separate lines. Clicking on the icon to the right of the text input box will expand the box so that you can easily add multiple libraries on separate lines.
- Click OK to close the dialog box.
Install the Board Support for SAMD Microcontrollers.
After you install the Arduino IDE, you need to include additional support for the Circuit Playground Express (CPX). There are two methods for completing this step and both involve the Boards Manager
- Installation from a pop-up menu that appears when you first plug into CPX
- Manual installation with the Boards Manager
You only need to install the board support once. The installation from the pop-up menu is the most convenient methods, but if you fail to notice (or choose) the pop-up option, you will need to use the manual methods.
Nerd Details: Both methods of installing board support refer to “SAMD Boards”. SAMD is a brand of Microchip and designates a family of high performance and low cost microcontrollers. The microcontroller on the Circuit Playground Express is an 32 bit ATSAMD21 ARM Cortex M0 Processor, running at 48MHz. This microcontroller is significantly more powerful than the 16 bit AVR microcontroller running at 16 MHz on the classic Arduino UNO.
Method 1: Add Support for the Arduino SAMD Boards Via Pop-Up menu
After you install the Arduino IDE, use a USB cable to connect your CPX board to your computer. A small pop-up menu should appear at the bottom of the IDE editor as shown below.

If the pop-up menu appears, click on the “Install this package” link and wait for the board installation to complete
It may take several minutes to complete the installation of the board tools. Do not click Cancel or otherwise interrupt the installation. Wait until the Cancel button has become a Close button. Then click Close.
If you can install the CPX support using the pop-up menu, the skip to the test with blink section, below. If not, follow the instructions for manually installing the board support in the next section.
Method 2: Manually Add Support for the Arduino SAMD Boards
If you skipped over the pop-up menu of Method 1, or if the pop-up menu did not appear, you can easily install the board support manually. The pop-up menu just automates the first steps of opening the Board Manager and selecting the correct package.
In the Arduino IDE select Tools –> Board –> Boards Manager …. to open the Board Manager. In the search box enter Arduino SAMD

With the search feature narrowing the options, the board manager should show the installation panel for Arduino SAMD Boards, as in the preceding image. Click the Install button and wait until the installation is complete.
It may take several minutes to complete the installation of the board tools. Do not click Cancel or otherwise interrupt the installation. Wait until the Cancel button has become a Close button. Then click Close.
Test with the Blink Code
With the CPX board support installed, you should connect the board to your computer and verify that the factory-installed test code is running. Select a USB cable compatible with the CPX board and plug the cable into your computer and the CPX.
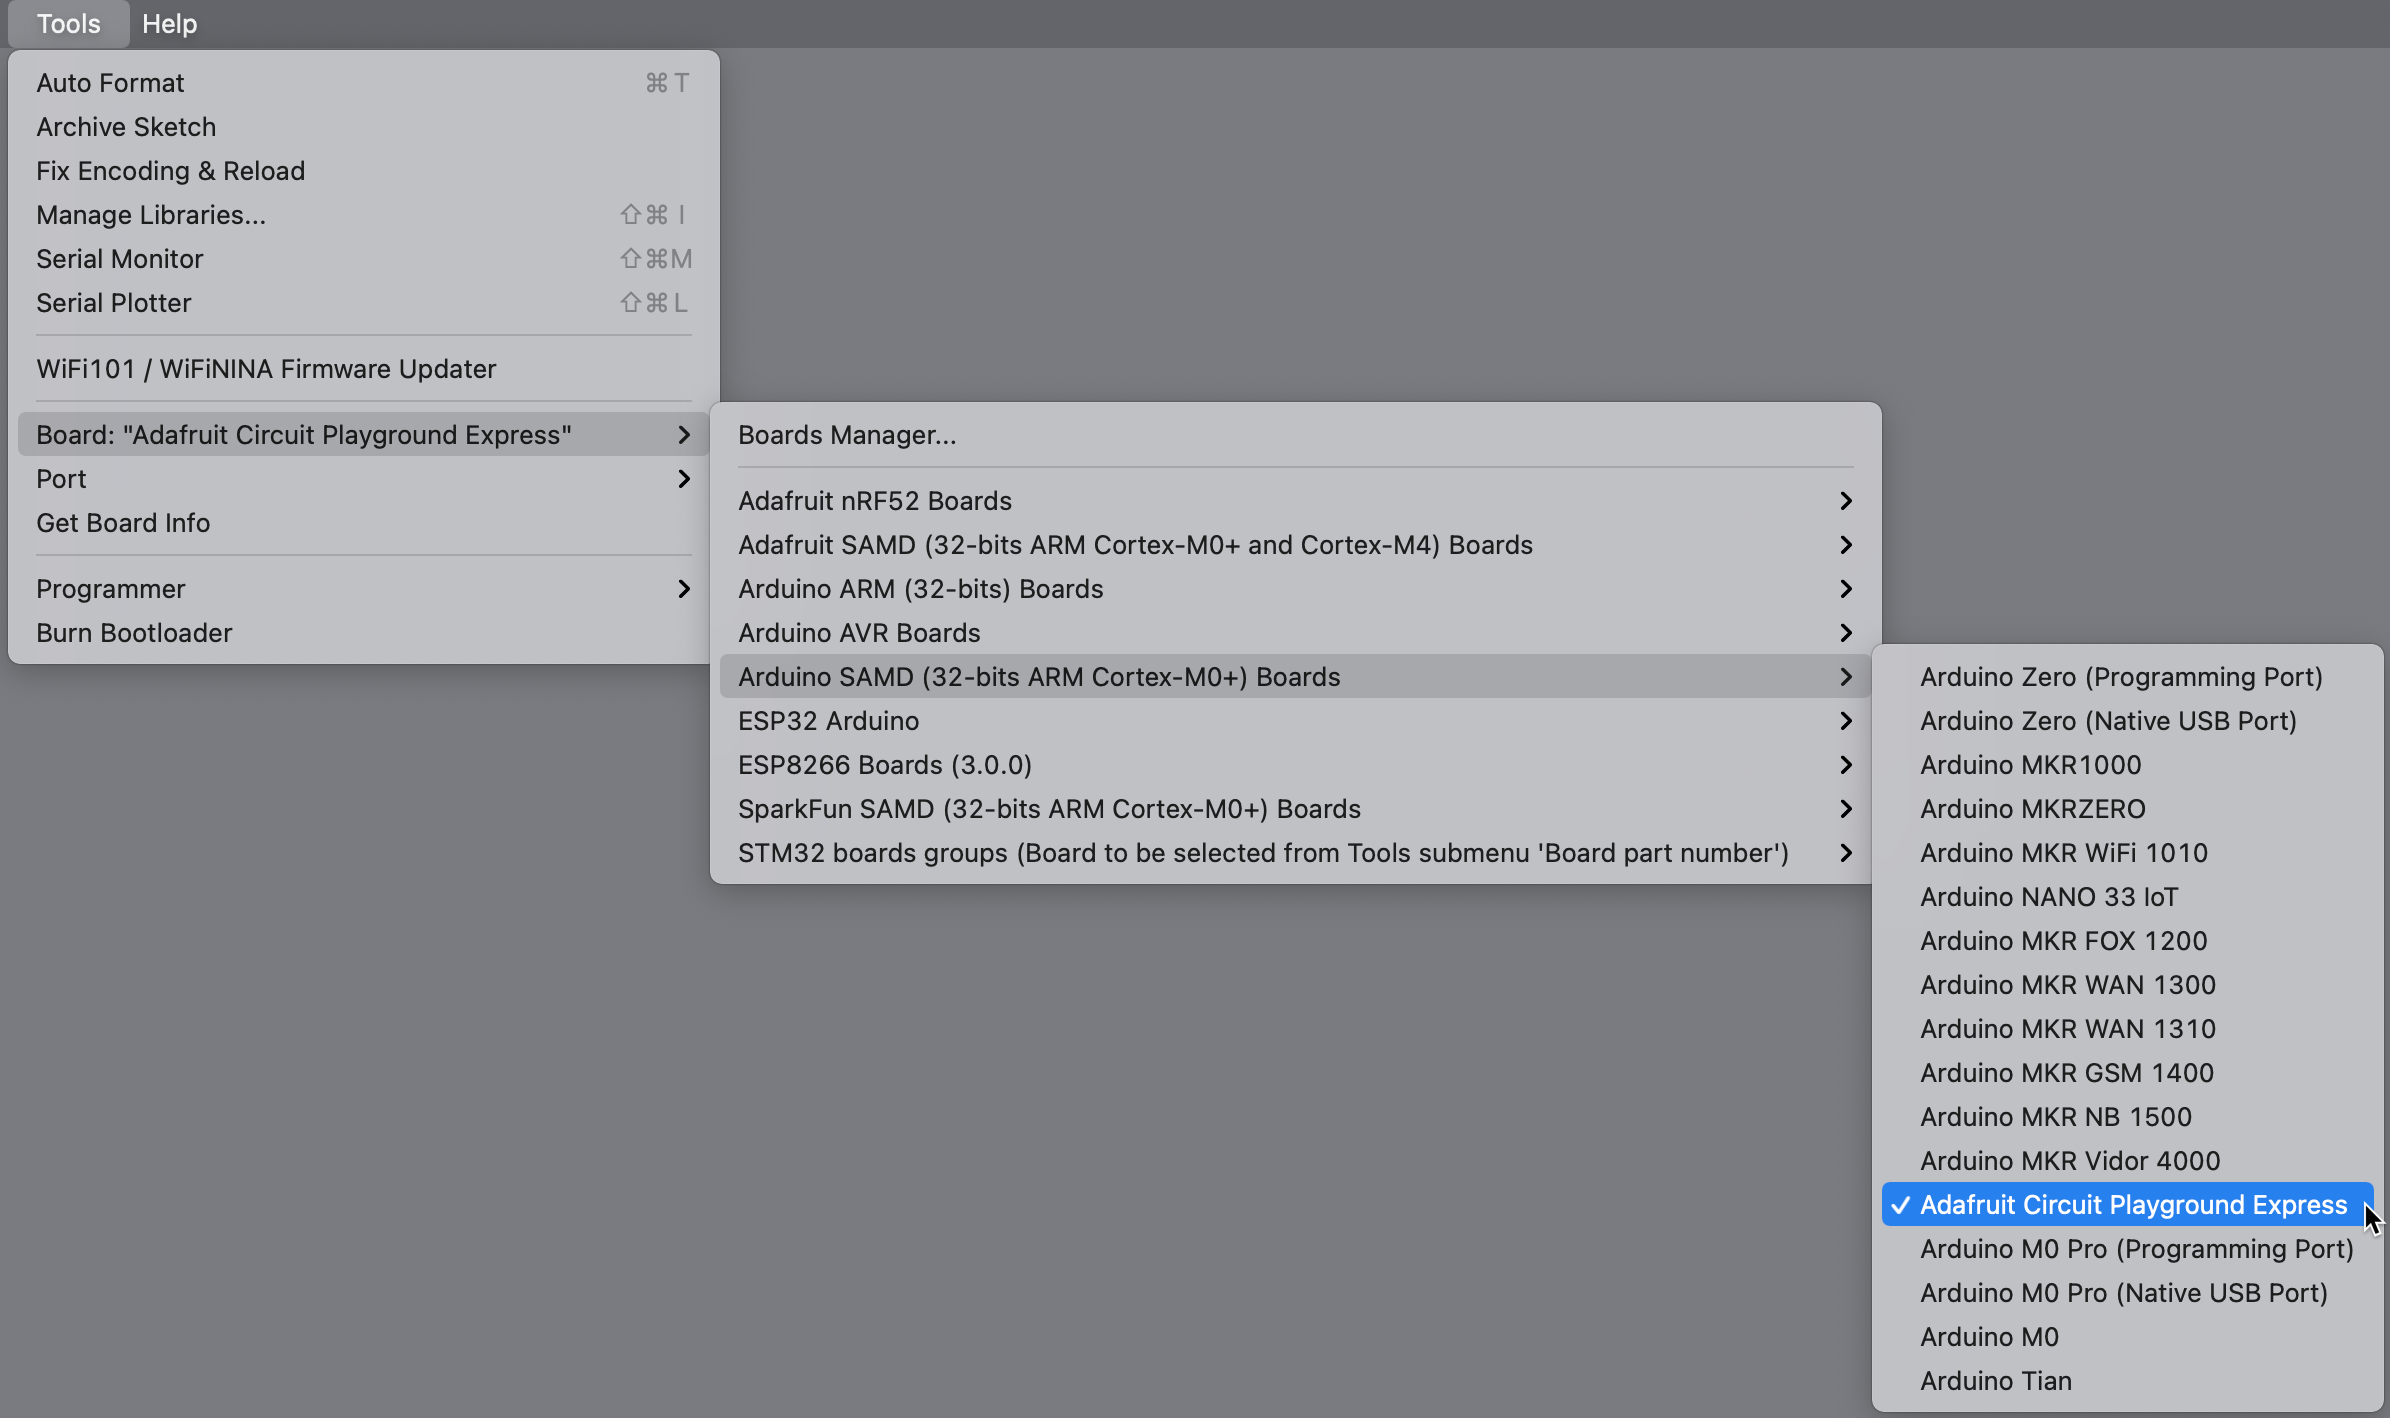
Select the Board
Select the Port
Use the Serial Monitor of the Arduino IDE to display data sent from the Feather.
From the Tools menu, select port, and choose the appropriate port. The naming of ports depends on your operating system
- On Windows:
COMnwherenis an integer - On Macintosh:
\dev\cu.usbmodemxxxxxxwherexxxxxxis an integer like 14201
An addition label such as (Adafruit Circuit Playground Express) may be appended to the port name.

Run the Blink sketch.
From the File menu of the Arduino IDE, select Examples –> 01 Basic –> Blink. This will open the code for the Blink sketch. click the right arrow at the top of the window containing the Blink code. The IDE will compile the code and upload the new firmware to the CPX. If successful, you should see the red LED labeled D13 next the USB port blinking on and off at a rate of one blink per second.