- Press F2 to view the contents of the Failure Model Library for the highlighted model. The display includes the full model equation and the assumptions and validations.
- Select the Complete command from the Display menu. The window in Figure 32 appears.
- Press Esc to close the window and return to the Reliability screen.
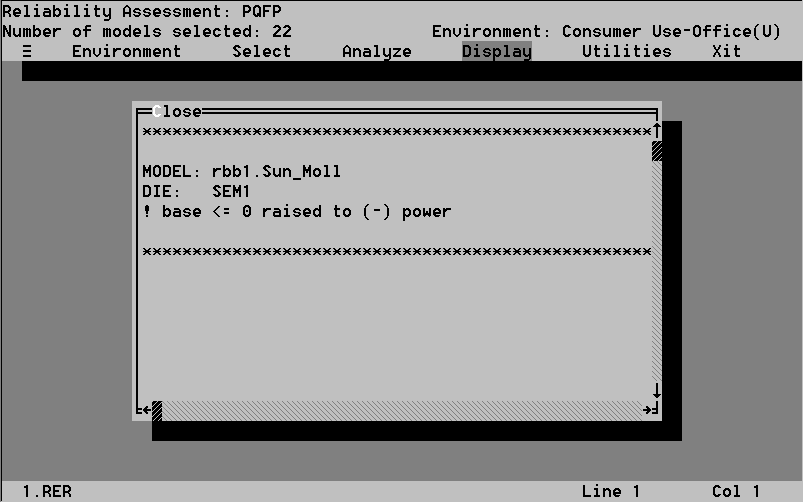
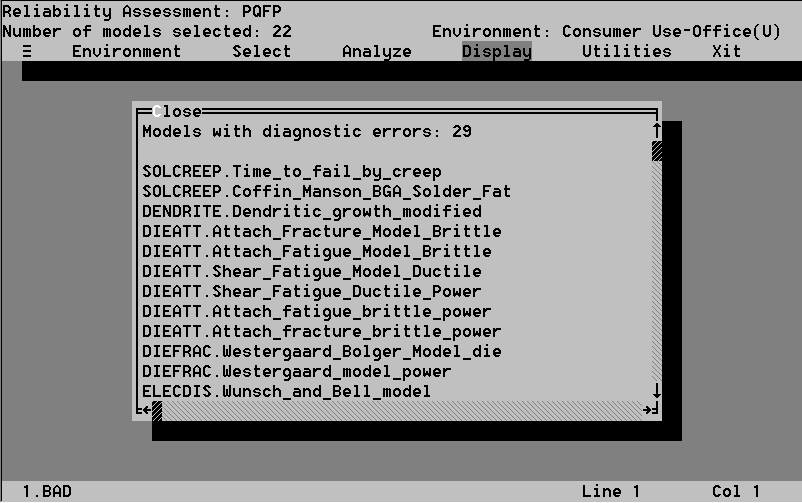
- Select the Error Log command from the Display menu. The window in Figure 33 appears. The window lists the models evaluated, the element(s) the models were evaluated against, and whether element(s) failed the evaluation.
- Press Esc to return to the Reliability screen.
- Report enables you to print a reliability report.
- Attributes enables you to respond to the failure analyses results by changing parameter values.
- Select enables you to pick from the attribute list which parameters you wish to change.
- Search enables you to find attributes quickly.
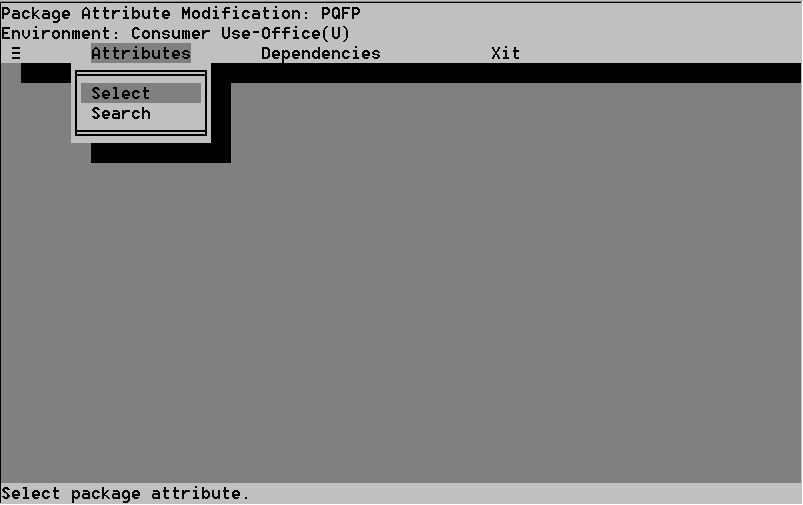
- Select the Attributes command in the Utilities menu. The screen in Figure 37 appears.
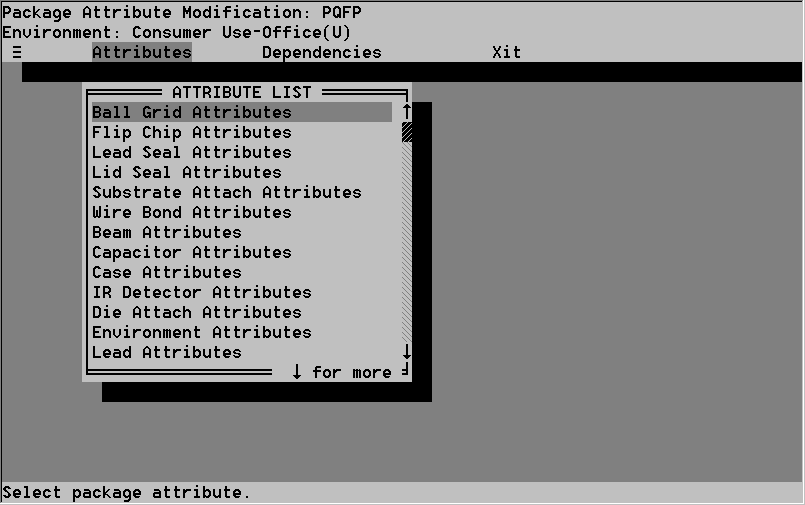
- Select the Select command in the
- Attributes menu. The attribute category list
- appears (see Figure 38).
- Select the attribute category you want to modify.
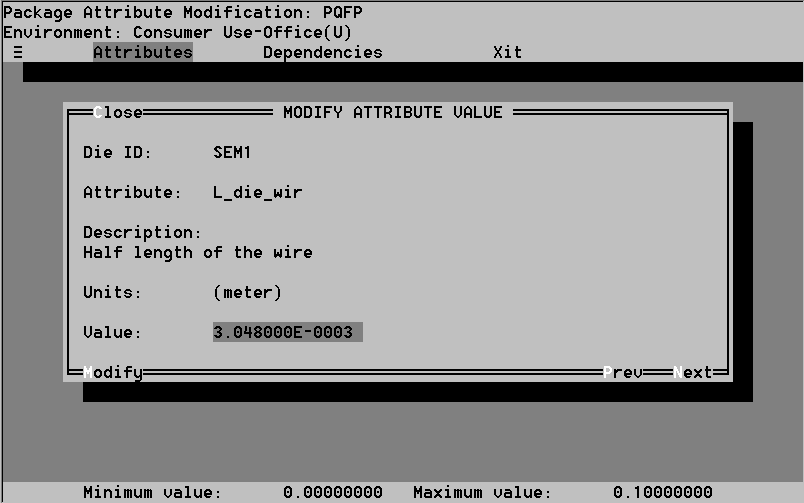
- Select the attribute you want to modify. The window in Figure 39 appears.
- Type a new value in the Value field. Acceptable ranges appear in the help message bar. You cannot modify the Attribute or Description fields.

7.2.2.4.2 The Complete Command
This window contains the complete results of the failure analysis.
Select the Screen Log command from the Display menu.
The window lists the number of requests for evaluations, model expressions and expanded expressions, number of tokens used in the expression, and number of dies included in the expression. If a model could not be evaluated because of errors, you are informed at the end of its entry. For example, unrecognized or undefined symbols, truncated expressions, dividing by zero, insufficiently defined models added to the Library by the user, or undefined or inadequately defined fields in the Design, Mission Profile, or Library options will result in errors. The errors are reported as models which could not be evaluated (see Figure 34).
You can review errors and the corresponding model in the Failure Mechanism Library to pinpoint the attributes wrongly selected.
You can also use the Attribute command in the Utilities option (see Section 7.2.2.4.2) to assign new parameter values to package components or environments.
Remember that if you do make a change which would allow you to utilize a previously screened out model, you must exit the Reliability Analysis and then re-enter it. This must be done so that CADMP can re-evaluate the models and determine if the changes you made were ample enough to render that model, or any other model, usable.
The Utilities option contains two commands:
Before using the Report option, you must create a cadmp\user\rpt directory with the DOS mkdir command. Report displays the Report screen described in Section 5.7, and operates as described in that section. The Complete command report is created in this option. (See Figures 35 and 36.)
7.2.3.2 The Attributes Command
The Attributes command calls a screen with one option, Attributes, containing two commands, as seen in Figure 37: