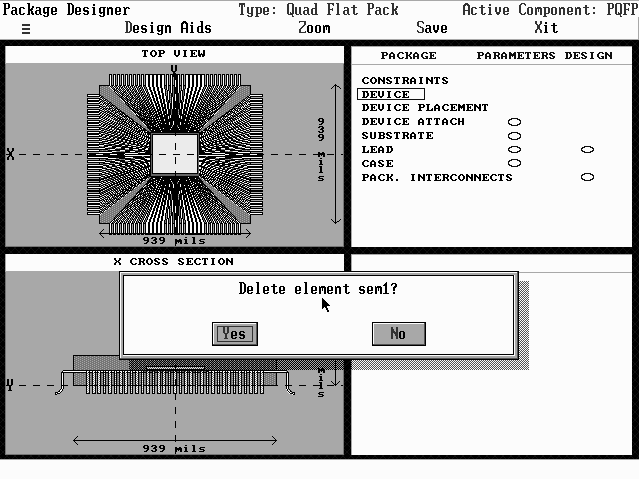
- Select the device you want to remove in the Device command window.
- Select the Remove button. A window appears asking you to confirm removal (see Figure 33).
- Select Yes to remove device, No to cancel.
- If you select Yes, the Package graphical interface appears with the device removed. You remain in the Device command window.
- Select the Placement command in the upper right quadrant. You must already have placed devices in the package for the command to work. Select Manual to position them yourself, Auto to have CADMP-II perform placement for you.
- For Manual placement, first Select the device you want to reposition by clicking on it with the left mouse button. Move it to a new position (see Figure 34). Move the pointer or the arrow keys to position the device. Press the left mouse button or Enter when the device is positioned correctly. You cannot place the device on top another device. If you attempt to do so, an error message appears.
- 6.3.4.2.2
The Duplicate Button
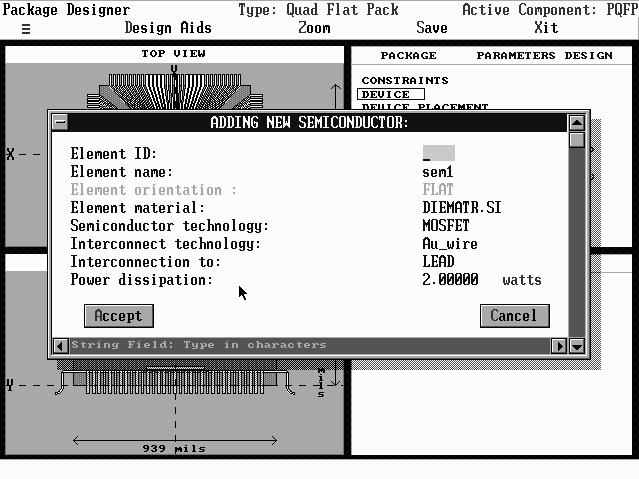
1. Select the device whose values you want to duplicate.
2. Select the Dupl button in the Device command window. The window in Figure 32 appears.
3. Choose or type new device data. Select the Accept button to accept, Cancel to cancel.
1. Select the device whose values you want to edit.
2. Select the Edit button in the Device command window. The window in Figure 34 appears.
3. Choose or type new device data. Select the Accept button to accept, Cancel to cancel.

Use Placement to reposition or resize devices.
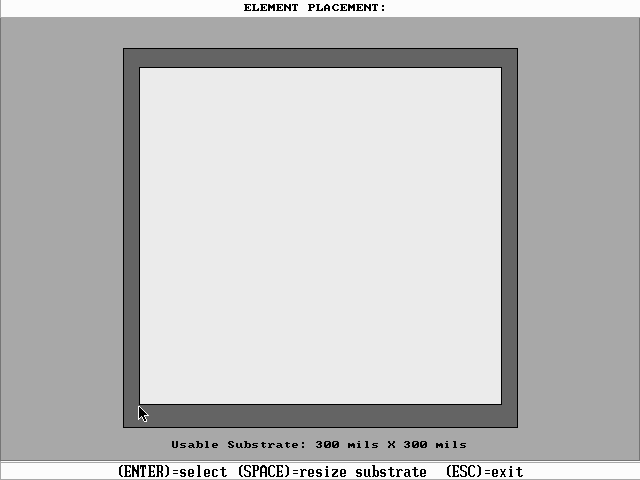
You can resize the substrate. Press the Space bar. A Substrate Size message appears. Press the left and right arrow keys to decrease or increase the length, the up and down arrow keys to decrease or increase the width, respectively. You will be constrained by the base length and width and the size of any dies already placed. Press Esc when finished resizing the substrate. You can now place devices.
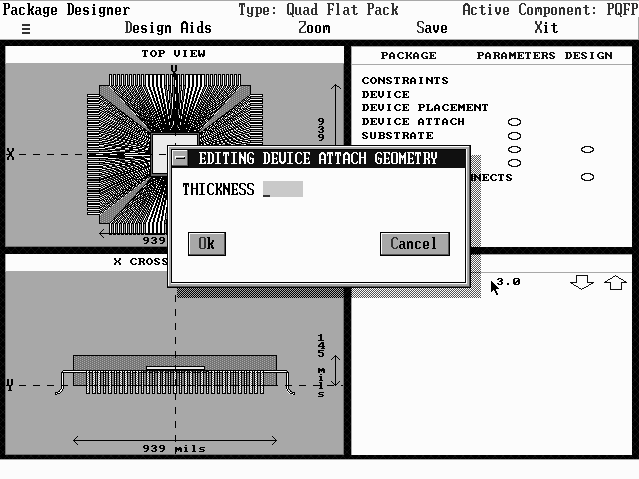
6.3.4.4 The Device Attach Command
Device attach refers to the die-die attach and is analyzed by declaring substrate material in CADMP-II as die material.
Select the Device Attach command. The lower right quadrant window is activated (see Figure 35). You can now vary the thickness of the material attaching the device to the die. There are two ways to enter new values for the thicknessby selecting the arrows in the lower right quadrant or by selecting the thickness value field and entering a value in the window that appears.
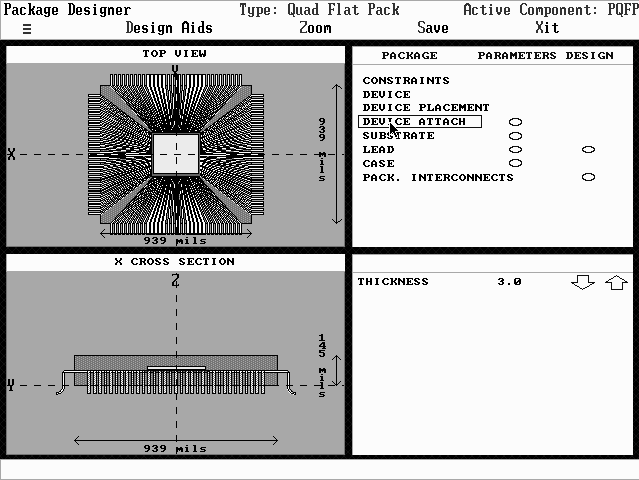
To use the arrows in the quadrant, select the up arrow to increase or a down arrow to decrease the thickness value. Press your + key to increase the quadrant arrow increments and your key to decrease them. The increment value can be read in the Inc: field in the extreme bottom right corner of the quadrant. Notice the views in both left-hand quadrants will change as you assign new thickness values. Press Esc when you have selected the thickness value you want. To enter thickness values through a window, select the thickness value field. A Editing Geometry window appears (see Figure 36). Type the new dimensions in the Thickness field. Select the OK button to confirm, Cancel to discard. You return to the package screen.