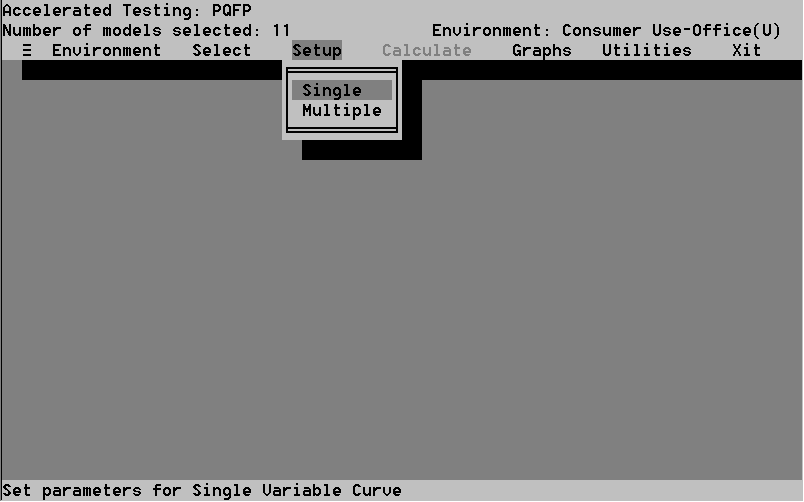
- Single enables you to run a single variable analysis.
- Multiple enables you to run a multi-variable analysis.
- Select the Multiple command. The window containing the list of failure models, as determined by the stresses or modes you chose, appears. Highlight one at a time and hit Enter to set each model up. The window in Figure 65 appears. The highlighter bar is in the Independent Attribute Field. If you have just run a single variable analysis, that variable will appear in this field.
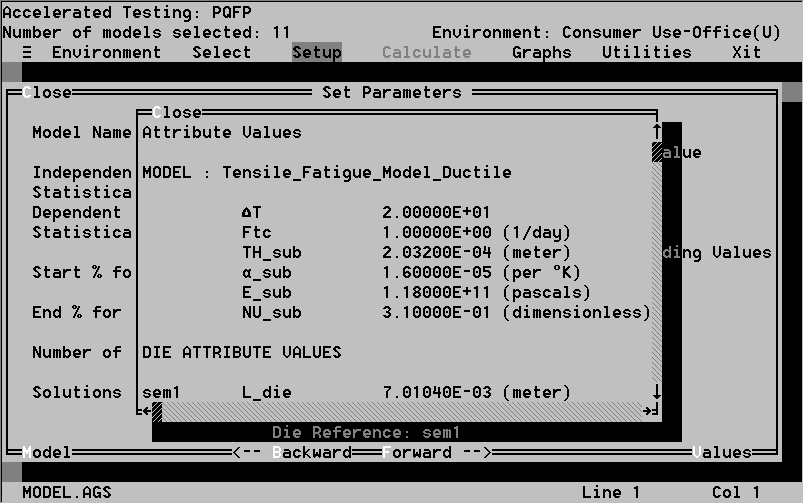
- If you wish to use a different attribute Press the Space bar. A list of attributes appears for the active model. Select the attribute you want from the list. To see the current value for the available attributes use the Values hot key (Figure 66).
- Input the values for the remaining fields, which are defined below. Select Close to accept or hit Esc to cancel to return to the Accelerated Testing menu.
- Attributes enables you to quickly change package and environment parameter values, see Section 7.2.6.2.
- Error Log enables you to view calculation errors, see Section 7.2.6.3.
- Screen Log displays the screened out models, see Section 7.2.6.4.
- 7.4.4.2 Mode
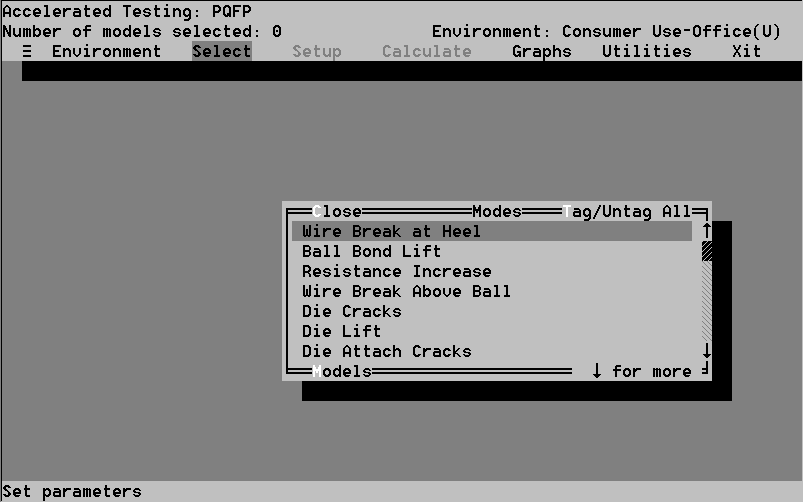
Failure Modes are selected in the same way that the stresses are selected (Section 7.4.4.1). Figure 63 shows the Mode list.
As seen in Figure 64, the Setup option has two options
The Single variable analysis setup procedure is identical to that of the Function Curve in Derating, see Section 7.3.5.1 for more details.
7.4.5.2 Multiple Variable Analysis
It is advised that you run the single variable analysis first for a given model to gain an idea of what range the function value is in. This will provide you with a starting point for the function values in the multi-variable curves.
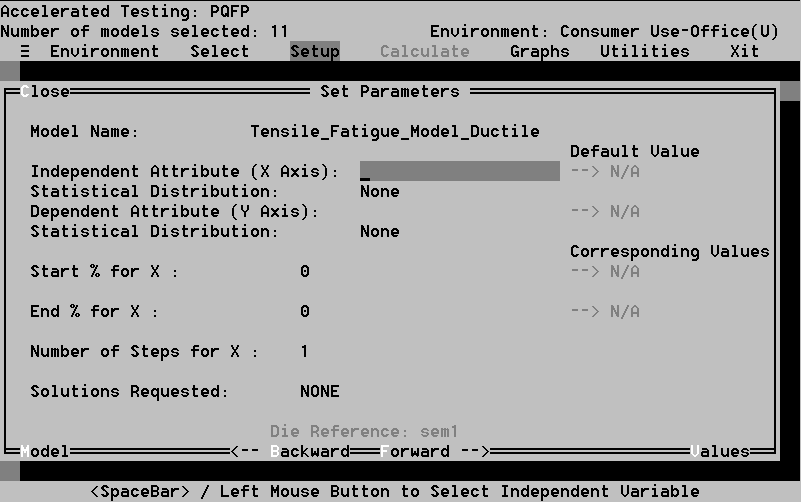
Dependent. Attribute (Y Axis): Press the Space bar to select the attribute which will be used as the y-axis variable.
Start % for X: The lowest attribute value to be used in the calculation. Enter a percentage deviation from the current value here. See the discussion on Start % in Section 7.3.5.1 The Function Command, for more detail.
End % for X: The highest attribute value, in terms of percent deviation, as described in Start %.
No. of Steps for X: The total number of calculations you wish to make over the range specified by the Start and End %. Note that as you increase this number, calculation time increases. However, accuracy and curve smoothness also increase.
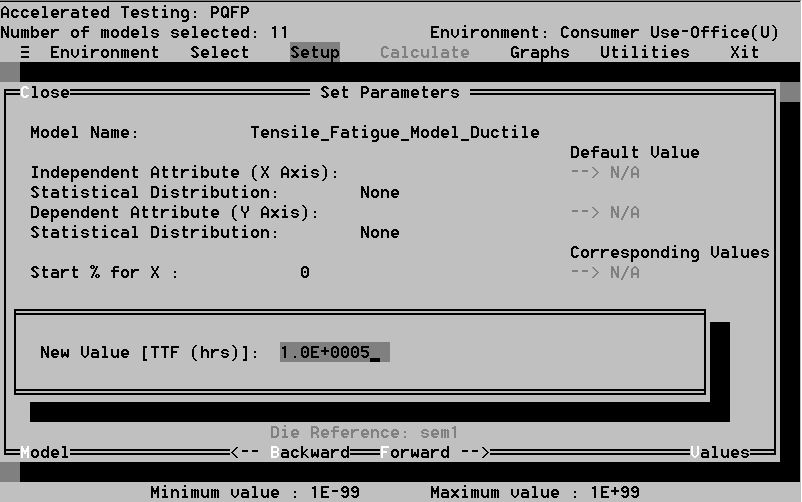
Solutions Requested: This field shows the number on function values you wish to calculate for. This field will appear as "None" until you have entered one or more values. To do this, hit Enter when "None" is highlighted and a window asking for a new function value will appear (Figure 67). It contains a default of 1E5. Type in the first function value you wish to perform the analysis for. If you want to add more function value, hit Enter on the Solutions Requested field and a window listing all of your requests will appear. Using Add, insert additional function values into the list, see Figure 68. Use Edit to change a give value, or Delete to remove values. The solutions are values for the time to failure by the chosen failure mechanism.

This command puts the calculations into motion. A window will appear which tracks the calculations as they are performed. Press Esc at any time to abort the calculations.
Invoking this command will start the Derating Graph Manager. This is described in Section 7.3.7.
The Utilities option contains three options, all of which have been covered in the description of the Reliability Analysis: