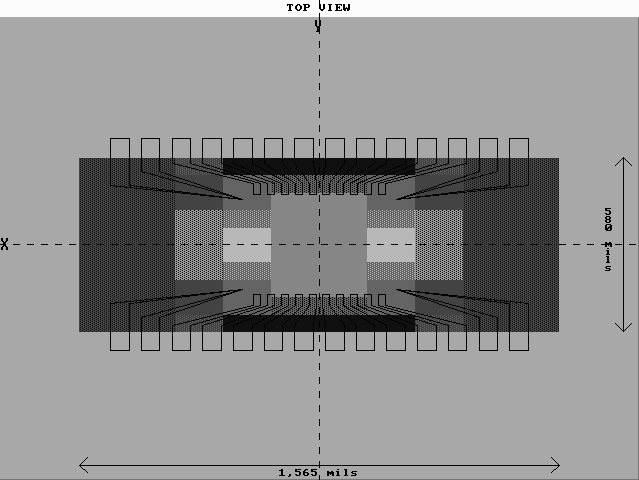
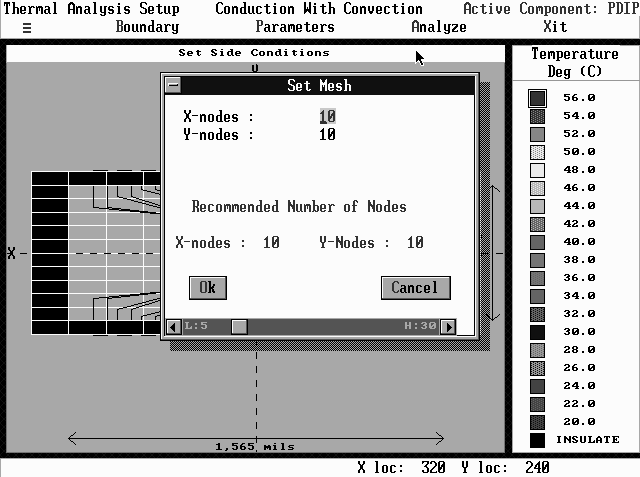
- Select the Grid command from the Parameters option header menu. The Set Mesh window in Figure 11 appears. At the bottom of the window, CADMP-II recommends the number of x and y nodes that will produce optimum results.
- Select the x-node value field. Type a number between 5 and 30.
- Select the y-node value field. Type a number between 5 and 30.
- Select the OK button to save the values. Select the Cancel button to cancel them.
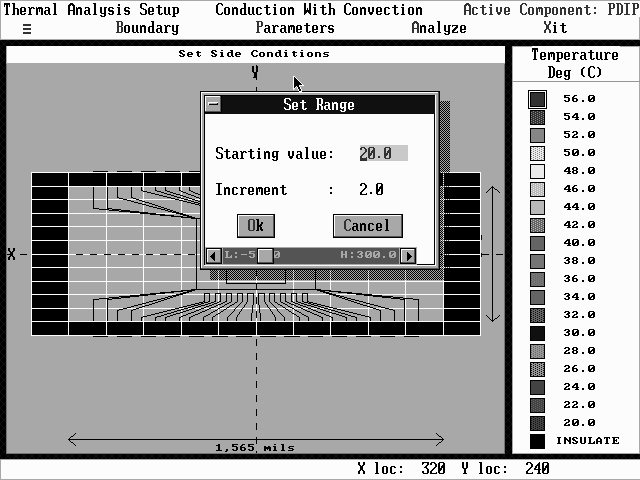
- Select the Legend command in the Parameters option header menu. The Set Range window in Figure 12 appears.
- Assign a Starting Value within a range of -55 to 125 degrees Celsius. The highlight bar moves to the Increment field.
- Assign an Increment value within a range of -55 to 125 degrees Celsius.
- Select the OK button to accept the entries. Select the Cancel button to cancel.
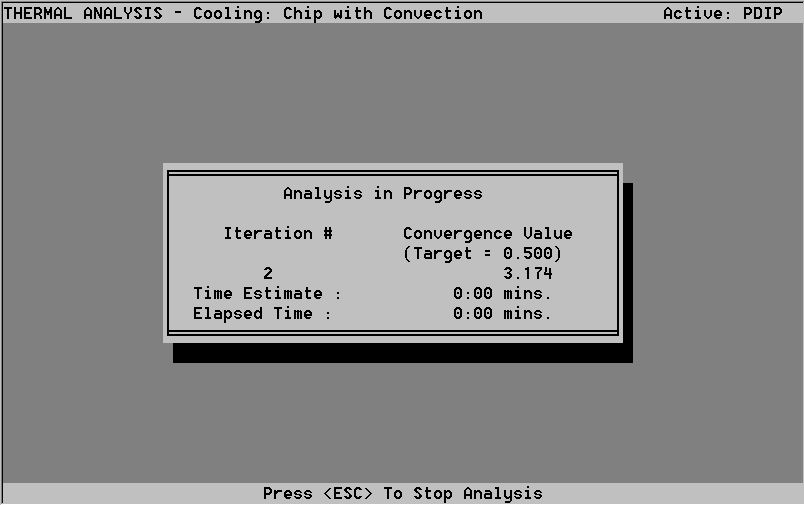
- Select the Analyze option header from the Thermal top level menu. If you have not assigned all boundary conditions, CADMP-II prompts you to do so.
- CADMP-II performs the thermal analysis. A series of windows appears, informing you that various calculations are being performed. An error message appears if the material data in Design is incomplete.
- After a few moments, a window appears informing you that iterations are taking place (see Figure 13).
- When CADMP-II completes the calculations, it will inform you of the maximum percentage difference between the room temperature thermal conductivities of the package materials and their conductivities at the temperatures calculated. You may then to perform several iterations of thermal analysis using even more accurate values of the thermal conductivity to generate even more accurate temperature profiles. If you choose YES, when asked if you want further analysis, the analysis will be re-run with the temperature dependent values of thermal conductivity. If you select NO or if the conductivities of the package materials converge to <1% the Thermal Display graphical interface window in Figure 14 will appear. It is explained in the next section.
- Topviews enables you to view the package with the top lid attached or with the top lid, die, or substrate removed.
- Crossviews enables you to view individual package layers.
- Range enables you to adjust the temperature range.
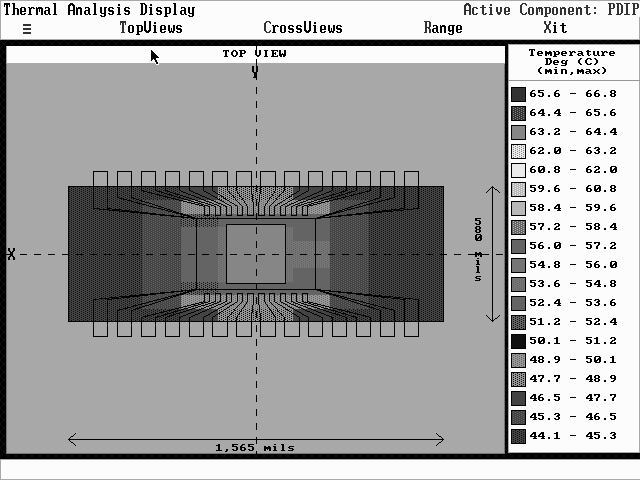
- Top View lets you to view the package top temperature.
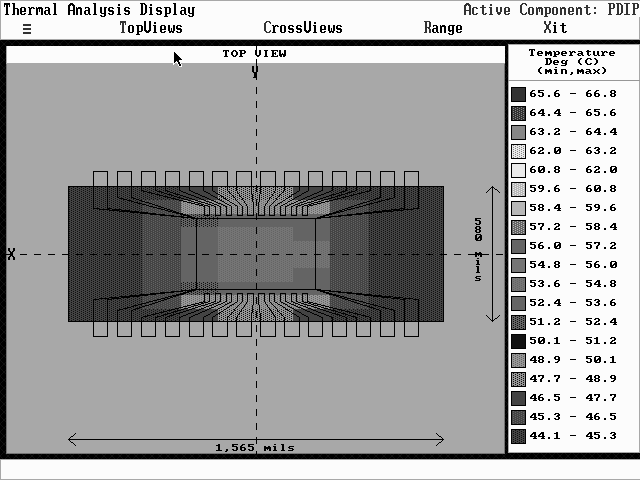
- Lid Off lets you to view the package and die temperature after removing the lid.
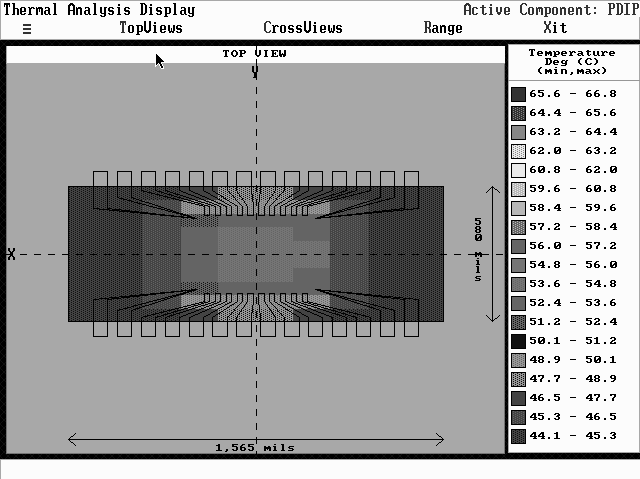
- Die Off lets you to view the substrate temperature.
- Substrate Off lets you to view the bare package temperature.
- Zoom lets you view enlargements.
- Select the Top View Command in the TopViews option header menu. A view of the package with the lid attached appears.
- Select the Zoom command to view an enlargement. (See Figure 15.)
- Select the Lid Off command in the TopViews option header menu. A view of the package with the lid detached appears.
- Select the Zoom command to view an enlargement. (See Figure 16.)
- Select the Die Off command in the TopViews option header menu. A view of the package with the top and die detached appears, showing the entire substrate. (See Figure 17.)
- Select the Zoom command to view an enlargement
- Select the Substrate Off command in the TopViews option header menu. A view of the bare package appears. (See Figure 18.)
- Select the Zoom command to view an enlargement
- 7.1.3.2 The Grid Command
Use the Grid command under the Parameters option header to vary the number of nodes, which is accomplished by changing the size of the nodes. Smaller node size leads to a greater number of nodes and thus greater resolution. However, the time required for the analysis increases as node size decreases, and you must often optimize the analysis to complete it in a reasonable time. CADMP-II recommends the number of nodes that should be used, based on the type of analysis.
X-nodes represents the number of horizontal node points. Y-nodes represents the number of vertical node points. The maximum number of nodes allowed is 30 x-nodes and 30 y-nodes. The default is 10 x-nodes and 10 y-nodes.
Use the Legend command to redefine the range of the temperature scale on the right side of the screen.
After you assign boundary condition temperatures and parameter values, perform the thermal analysis.
You may receive a message: "Values are beginning to diverge. Please
reduce the relaxation factor." If you receive this message, press Enter.
You return to the Thermal graphical interface. A window informs
you the thermal analysis has not been performed. Select the OK
button. You return to the CADMP Manager. You must now return to the Thermal
option in the Analysis option header menu. Select the Runtime
command in the Boundary menu and enter a lower relaxation factor.
Then return to Step 1.
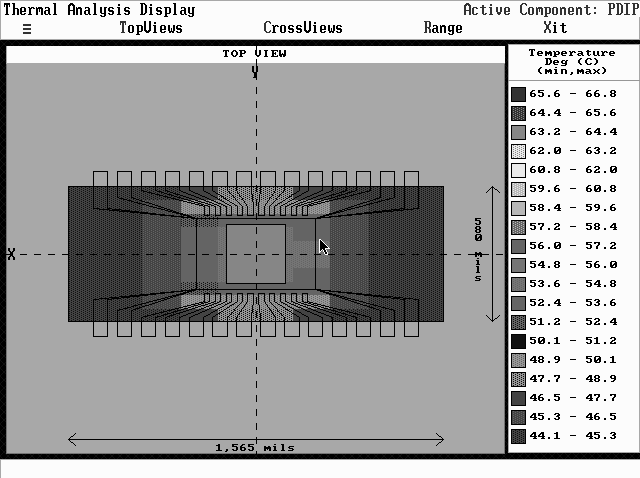
7.1.5 The Thermal Display Graphical Interface Window
The Thermal Display graphical interface window appears after CADMP-II finishes the thermal analysis.
The Thermal Display window looks much like the Thermal window, except the grid is not present at first. The Thermal Display menu contains three commands (see Figure 14):
Use the TopViews option to view the color-coded thermal analysis results. The node temperature is found by matching the color with the corresponding value in the temperature legend. The TopViews option contains five commands.