- Program and file names are printed in a small font, as exemplified by this text.
- Options and commands are printed in bold.
- Useful information one may need to consider before making data entry decisions or entering data is set off with a bullet, like this:
- When a specific key from the keyboard is referenced, it will be written in italic with the letters in the same case as displayed on the IBM keyboard, as in Esc, Enter, Home, F5, F10, Page Up, Page Down, Home, and Crtl.
- Place Disk 1 in the floppy drive.
- Type the drive letter of the floppy drive where was he CADMP-II floppy disk was placed and press Enter. For example, if the CADMP-II disk was placed in the A: drive, type:
- To begin installation, type
- In each field, type the requested information and press Enter. Be sure the drive designation is correct.
- Press Alt-A. A window containing disk information appears briefly. Then a PKUNZIP® screen appears and tracks the installation.
- Remove Disk 1, insert Disk 2, and press any key. Installation restarts. The same windows that appeared in Step 5 appear.
- Repeat this procedure until all disks are installed. A window informs the user when installation is complete.
- press Esc key, or
- press the right mouse button.
- simultaneously press the Alt key and the key of the letter highlighted in blue on the screen; or
- use the mouse to move the pointer over the hot key command and click the left mouse button.
3.1 Style Notes for This Manual
To improve the readability of this manual, several conventions are used.
3.2 Installing CADMP-II Software
If the user has downloaded the file from the web sight, then the user simply follows the directions that come with the downloaded file.
However, if one must install from floppy disks, then first a DOS window in WINDOWS® must be accessed, and the user's location must be initially set to the root of the target drive on which CADMP-II will be installed. There is no need to create a directory for CADMP-II. A directory is created on the target drive during installation for the user.
The window in Figure 1 appears. Press Alt-I (Info) to see product information.
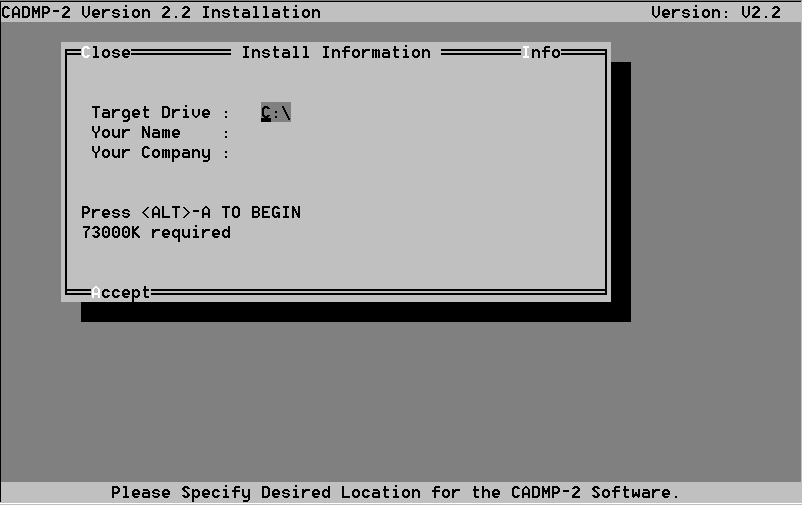
Figure 1. Installation
Information window
When Disk 1 is installed, the user is prompted to install Disk 2.
d:\cadmp\exe\cadmp2.bat (Again, d is the drive letter for CADMP-II, and cadmp is the actual name of the main CADMP-II directory.)
Hit "Next". Then "Select a name for the shortcut:" and "Finish". The shortcut works now, but it's not perfect. Reverse click on the shortcut just created to look at "Properties" at the bottom of the pick list. The different versions of WINDOWS® all have a similar Properties window. Click on the "Shortcut" tab. Then "Change Icon". When the icon choices come up, choose "Browse". Trace through the directory structure to d:\cadmp\exe where there are several choices of icons to pick from. After applying and exiting, the shortcut is finished.
NOTE: It isn't necessary to go through the following "Creating A Personal Username" steps to operate CADMP. It will function as first installed, on one machine for one user, using the default USER ID and PASSWORD that comes with CADMP. These special, additional steps are ONLY for multiple users on a disk drive on one machine (or on a network drive), who may or may not share data files for projects and devices, but it's desired that they all use the same failure model and material libraries.
Steps for multiple users on one
disk drive.
STEP I: Creating A Personal Username
First, you must make a personal, or local directory. It can be done in DOS, but with WINDOWS® Explorer, working with these directories is fast and easy. Simply duplicate d:\cadmp\User, the default user directory, by highlighting it and copying it to the same cadmp directory it is already in. This will create a "Copy of User" directory in d:\cadmp. Using Rename, change "Copy of User" to any desired identifying name (Frodo, for example). Now CADMP has two identical user directories of the same original device files (User and Frodo), which can be changed independently. Also make sure there is a empty "Global" directory in the d:\cadmp\User\Calce directory. This will make it possible for users to share packages.
Next, in a DOS window go to the d:\cadmp\EXE directory. There enter the User Manager by typing userdm at the prompt.
Select Add from the top menu. A window will appear asking for your personal information. (See Figure 2.) Answer as follows:
USER ID: make your ID the same as the directory name you made above, noting that CADMP-II will force upper case here (i.e., FRODO)
FULL NAME: your first and last name (i.e., Frodo Baggins)
PASSWORD: you decide, but remember, for PASSWORD, CADMP-II is case sensitive
USER DIR: d:\cadmp\userID, (for example, C:\CADMP2_3\FRODO)
Hit Alt-C or click on Close to accept. Hit Esc to cancel.
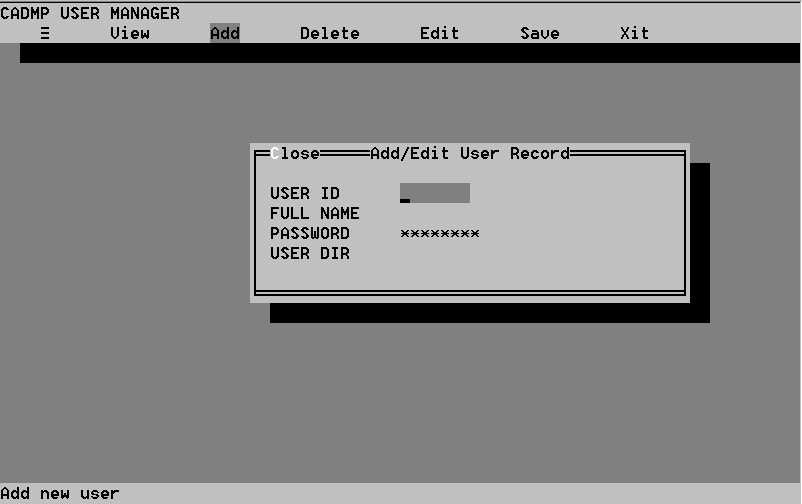
Figure 2. The Add/Edit
window
Select Xit to exit. You will
be asked if you want to save your changes. Say OK.
STEP II: Logging on to CADMP-II
Either enter CADMP by clicking on the shortcut, or create a DOS window, and make sure you are in the d:\cadmp\EXE directory. There type CADMP2, and the logon screen will appear. Press a key and the User Log window appears. (See Figure 3.) Type in the USER ID you entered in Step I (FRODO, because uppercase is forced), press Enter. Then type in your password (remember case sensitive). Then, hit Alt-O or click on the OK button to enter CADMP-II. You should now see the System Executive menu.
You now need to tell CADMP-II your directory structure. Select the Options menu option, and select Directories. The Directory window will pop up, showing three path names. Make sure the directories are entered as follows:
User Path: d:\cadmp\userID,
(for
example, C:\CADMP2_3\FRODO)
Global Path: d:\cadmp\USER
Library Path: d:\cadmp
Hit Alt-O or click on the OK button to save your changes.
After performing all the steps above, it is now possible to have multiple users of CADMP-II on one drive.
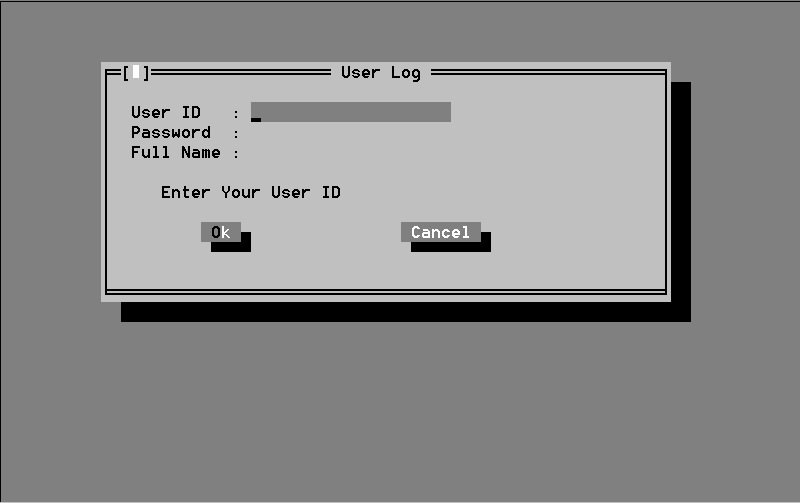
Figure 3. The User Log
window
3.4 Explanation of CADMP-II Screens
CADMP-II operations are controlled from screens that share basic features. The System Executive screen appears after log on. It is a typical CADMP-II screen.
The top-level menu
A top-level menu is at the top of every CADMP-II screen (see Figure 4). The top left corner of the top-level menu displays the screen name. If a part is currently being designed or evaluated, its name appears in the upper right portion of the top-level menu. The screen in Figure 4 indicates the part currently being designed is C22.
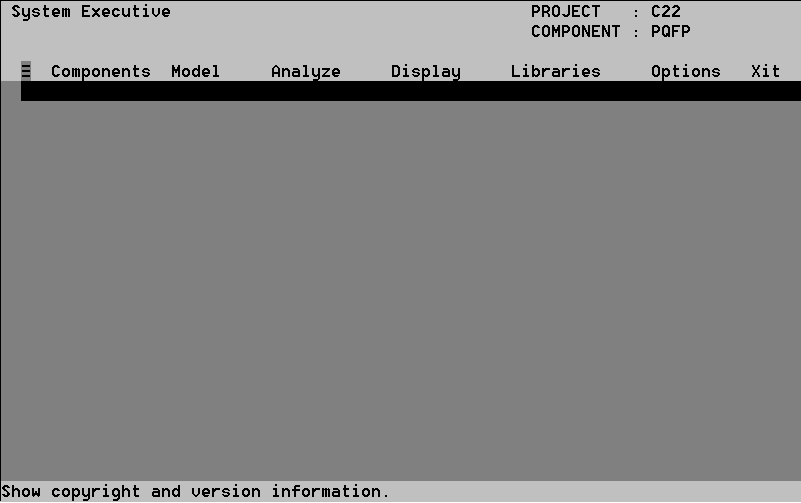
Figure 4. The System Executive
Option headers in the top-level menu
The top-level menu of a screen will always contain option headers, or the names of options controlled through the menu. Selecting an option header usually displays a menu (see Figure 5).
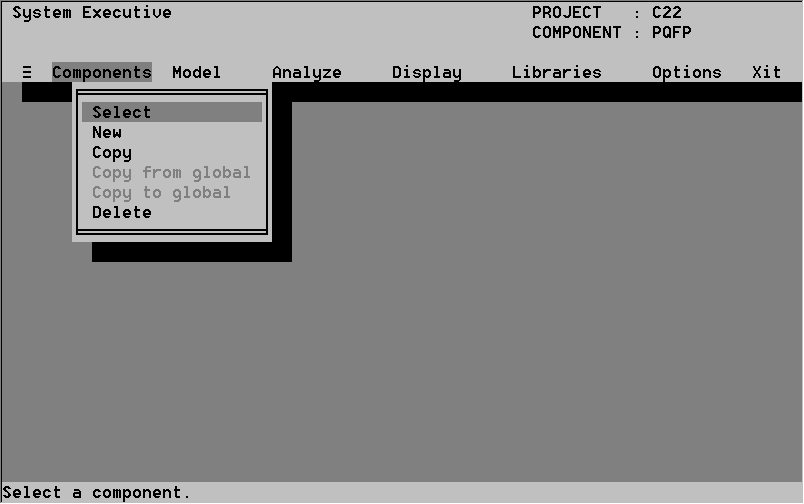
Figure 5. Typical CADMP-II
menu
Notice that one of the screen option headers is covered by a blue highlighter bar. The bar is used to highlight an option and display its menu. For example, Select is highlighted in Figure 5.
Top-level menu header hot keys
All options have one character highlighted in red. These characters are hot keys and can be used to invoke options. For example, in the screen in Figure 5, the hot key for the Analyze option is A. By pressing the a key on your keyboard, you can display the options under the option header Analyze.
Selecting an option
Select options with the mouse or arrow keys. When you select an option you highlight it by using the arrow keys to move the highlighter bar over the option and pressing Enter or by using the mouse to take the pointer to the option and clicking the left mouse button. You can also select an option with a hot key if one is available.
Help message bar
Many CADMP-II menus display a help message bar at the bottom of the screen, containing a brief message about the highlighted option header or other hints.
Exiting
There are two ways to exit from any menu and return to the System Executive screen (you can use the same method to exit almost any CADMP-II menu or window);
Hot Keys
Many CADMP-II windows have command hot keys on their borders (see Figure 6). Their key letters are always colored blue. The hot key command can be selected in one of two ways:
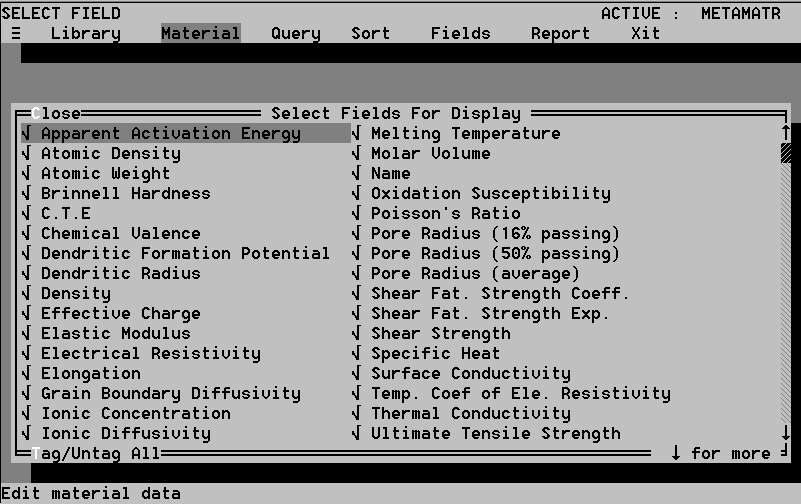
Figure 6. Example hot keys: Tag/Untag All
Some libraries and applications in CADMP-II are displayed through spreadsheet screens (see Figure 7). Moving around in these is accomplished by scrolling:clicking with the mouse on the scroll bars located to the left and at the bottom of the screen.
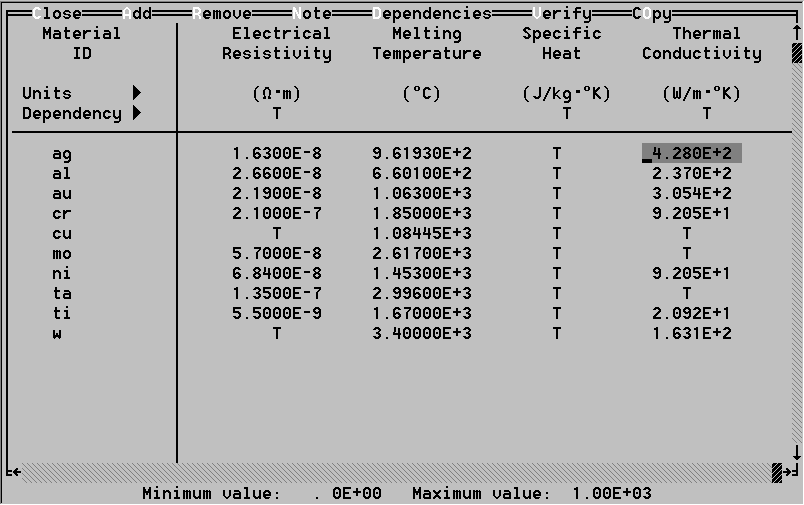
Figure 7. A CADMP-II spreadsheet
screen from the Materials Library
If you are using the keyboard only, press the up and down arrow keys to move the highlight bar through the list vertically, the Tab key to move it to the right, and the Shift-Tab key combination to move it to the left.
Graphics Screens
Some CADMP-II options invoke interactive graphics screens that display package designs and graphs (see Figure 8).
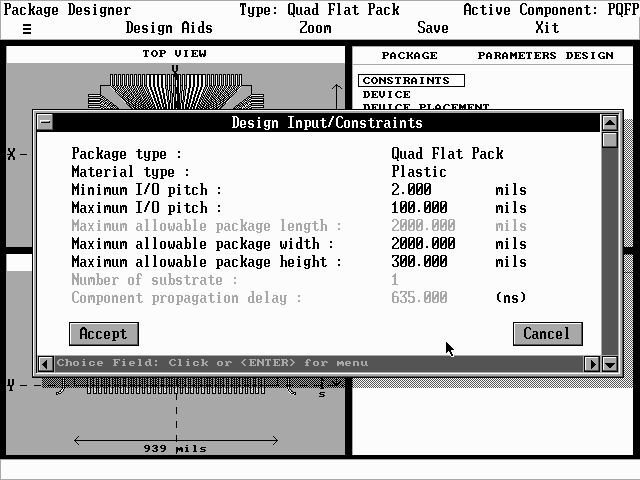
Figure 8. A CADMP-II graphics
screen from the package designer
If you use the arrow keys, you may want to change the arrow key increment - the distance the pointer moves per key press. This is accomplished by pressing the - key on your numerical keypad to decrease the arrow key increment. Increase it by pressing the + key. The Tab key is used to select the buttons located at the bottom of the graphic windows (i.e. Accept or Cancel). Pressing Tab will cause a red box to appear around the button; pressing Tab again moves the box to the next button, and so on.