VM Setup on macOS (UTM)
VM Setup on macOS without paying for virtualization software
Requirements
You will need at least 40GB or so of free space on your hard drive for this class. We won’t likely use it all, but it needs to be there.
Common tools
Setting up a VM on macOS is relatively straightforward. While you could spend lots of money to get a commercial hypervisor like Parallels Desktop or VMware Fusion, that’s…ridiculous. Sure, they can do some fancy stuff, but we are sticking with open source solutions! Plus, they cost lots of money, and that’s just wrong.
So, what can we use? Well, there’s the option of VirtualBox if you’re on an Intel Mac. But a) that requires you are on an Intel Mac, b) that requires you interact with Oracle, and c) it has been nothing but trouble in my past classes. So, don’t use it. Instead, we’ll use the Universal Turing Machine (UTM) software. It’s free, it’s open source, and it’s pretty easy to use. It’s also a Universal app, so it runs on both Intel and Apple Silicon Macs. More importantly, it provides an easy-to-use wrapper around the QEMU hypervisor, which is what we’ll be using to run our VMs.
Alternatively, if you’re a brew user, you can use
$ brew install --cask utm
to get UTM installed. If you’re really feeling like you want to do things “The Linux Way”, you can install libvirt and virt-manager via brew, and use that to manage your VMs. I’m not going to cover that here, but it’s an option.
Or, you can go full masochist and use qemu directly. I’m not going to cover that here, either. And if you think it makes sense, why are you here? Go away. Or better yet, talk to me about becoming a TA.
VM Installation, Step by Step
-
Download your image:
❯ #for ARM64 Macs ❯ curl -LO https://cdimage.ubuntu.com/releases/noble/release/ubuntu-24.04.4-desktop-arm64.iso ❯ #for Intel Macs ❯ curl -LO https://releases.ubuntu.com/noble/ubuntu-24.04.4-desktop-amd64.iso -
Checksum your image:
❯ #for ARM64 Macs
❯ shasum -a 256 ubuntu-24.04.4-desktop-arm64.iso
c2610520bf582976839a1724c669e1cfed0547427be5a0ad12d457b92b46ffbe  ubuntu-24.04.4-desktop-arm64.iso
❯ #for Intel Macs
❯ shasum -a 256 ubuntu-24.04.4-desktop-amd64.iso
3a4c9877b483ab46d7c3fbe165a0db275e1ae3cfe56a5657e5a47c2f99a99d1e  ubuntu-24.04.4-desktop-amd64.iso
In the instructions below, ignore the mentions of freebsd. I simply don’t have a system handy with which to take new screenshots. The process is the same, regardless.
-
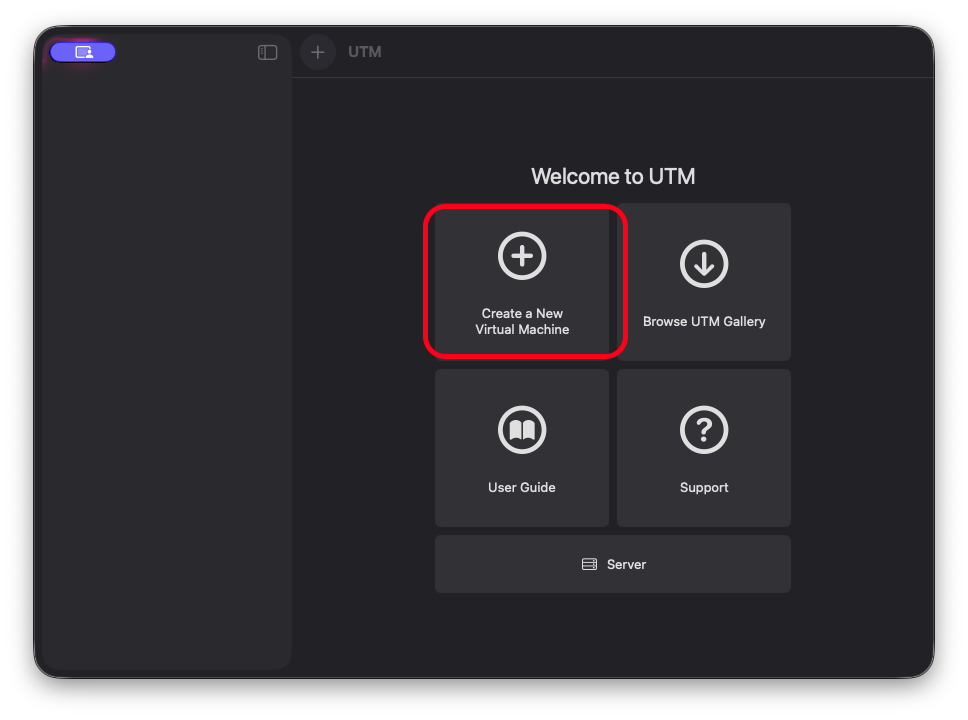
Create a new VM in Hyper-V by selection “New” and “Virtual Machine” from the right side of the Hyper-V Manager window.
-
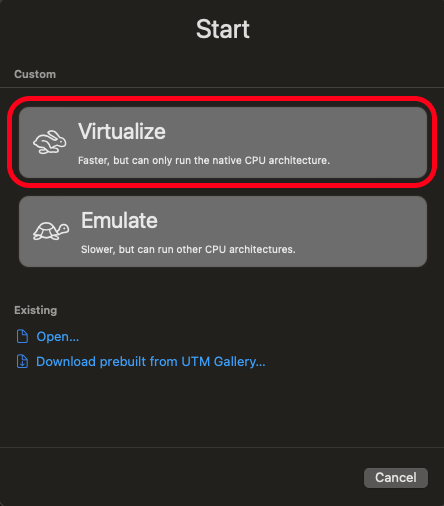
We want to virtualize, regardless of which underlying architecture we are using.
-
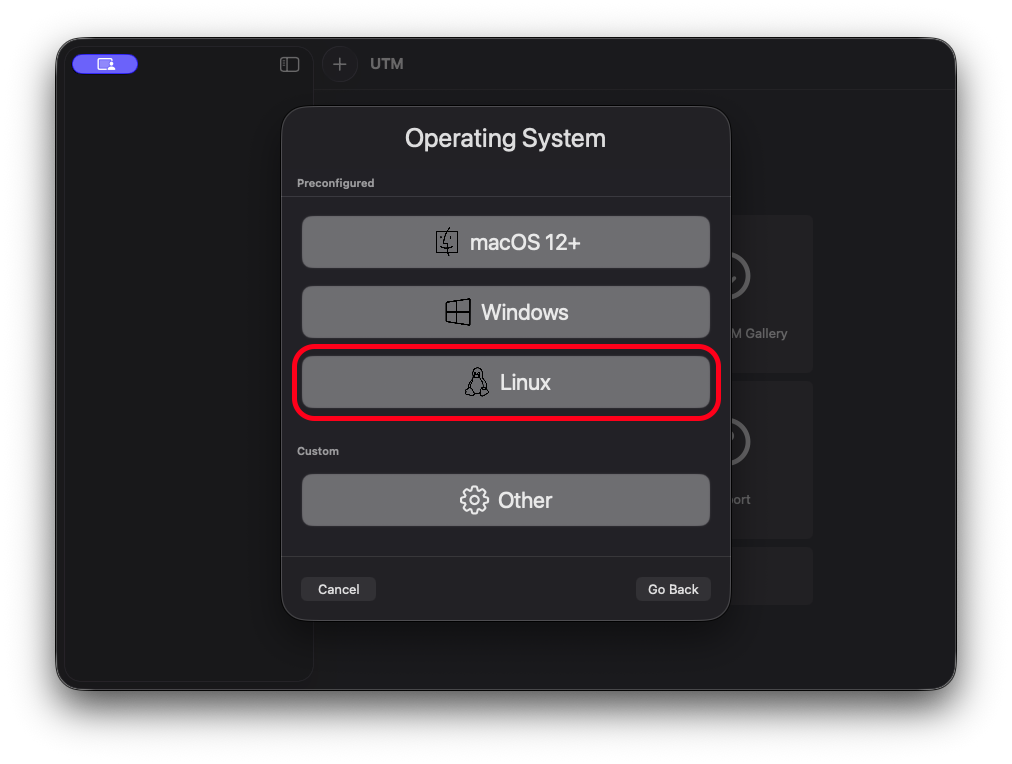
We are Linux, so select it:
-
I would suggest you give your VM at least 4GB of memory, since it’s going to be the primary external interface to your work environment for this class. As for the cores, leaving it at
defaultis fine, unless you want to limit it to a specific number of cores (at least 2!). Click continue. -
Browse to wherever you downloaded the image, and select the ISO that you downloaded. Click continue.
-
For storage, 64GB should be plenty. We can resize later as needed. Click continue.
-
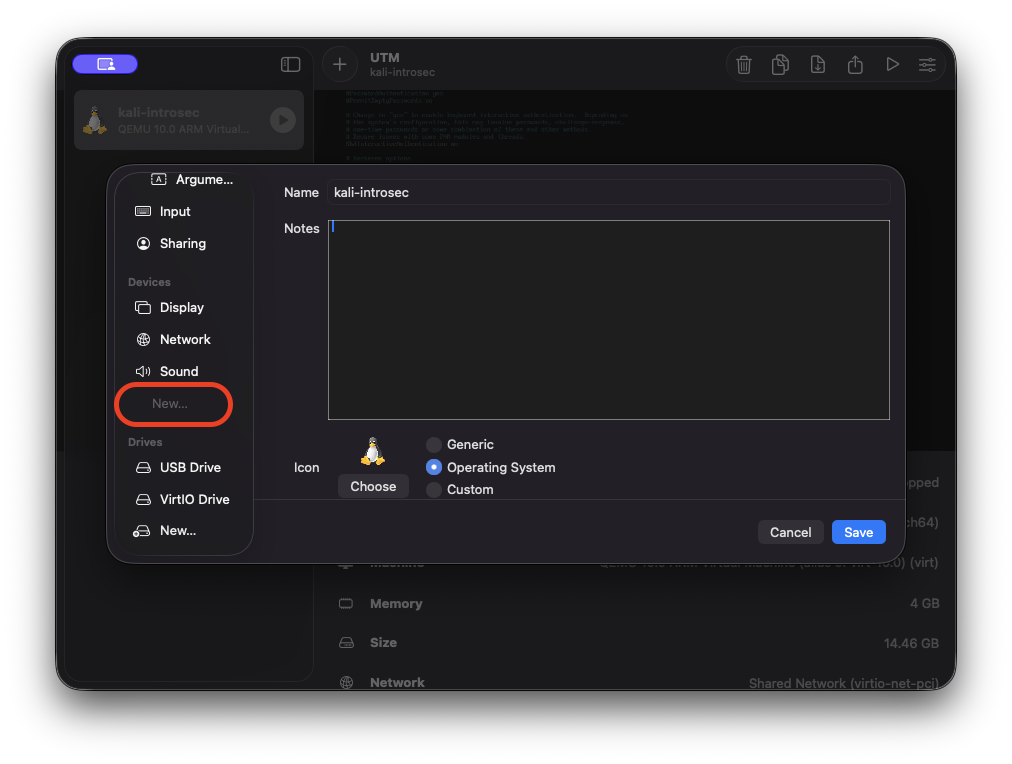
If you are on an M series Mac, before booting the VM, we need to make a change. First, select the VM in the list, and then select “Edit” from the right side of the window. Scroll down and Select “New” under devices, and then select “Serial Port”.
-
When the VM boots, you’ll select “Install”. It will open on the Serial window. Follow the prompts to install Ubuntu. The defaults are fine. Once it’s done, you can delete the serial port, and the display will work fine.