VM Setup on Windows (Hyper-V)
VM Setup on Windows without paying for virtualization software
NB: ONLY USE ONE OF THE TWO FOLLOWING SECTIONS. I actively discourage using Hyper-V, but you may have reasons to do so. WSL is easier to set up and use, but has some limitations. If you don’t know which to use, use WSL.
Requirements for WSL
WSL is an optional component of Windows 10 (2004 and up) and Windows 11. It is not installed by default, but you can do it quickly and easily. Open a PowerShell prompt as an Administrator and run the following command:
❯ wsl --install -d Ubuntu-24.04
If this does not work, try the following:
- Open PowerShell as an Administrator
- Run
❯ Enable-WindowsOptionalFeature -online -FeatureName Microsoft-Windows-Subsystem-Linux -All - Reboot your computer
- Once back, open an admin powershell and run the command from above.
A nice GUI
On Windows 11, WSLg is built in — GUI apps run natively without any extra setup. Just install a GUI app and launch it from the WSL prompt.
On Windows 10, or if you want a full desktop environment, install a lightweight DE and xrdp:
$ sudo apt update && sudo apt upgrade -y
$ sudo apt install -y ubuntu-desktop-minimal xrdp
$ sudo systemctl enable --now xrdp
Then connect via Windows Remote Desktop (mstsc) to localhost.
Some useful configuration options
-
Make sure systemd is enabled
-
If you use ssh on both WSL and Windows, there’s a neat trick to share the same configuration:
foo@bar:~$ echo "C:\Users\<your Windows username>\.ssh\ /home/$(whoami)/.ssh drvfs rw,noatime,uid=1000,gid=1000,case=off,umask=0077,fmask=0177 0 0" | sudo tee /etc/fstabThe only issue at this point is that if you use
ssh-agent, WSLAF_LOCALsockets can’t be created on a mounteddrvfsfilesystem. To fix this, make suressh-agentis invoked with the-aoption with an alternative path. One way to do this is to use thekeychaintool, with settings like this in~/.zshrc:if [ ! -e ~/.ssh_agent.sock ]; then ssh-agent -a ~/.ssh_agent.sock fi SSH_AUTH_SOCK=~/.ssh_agent.sock; export SSH_AUTH_SOCK; plugins=(git keychain gpg-agent) zstyle :omz:plugins:keychain options --inherit any zstyle :omz:plugins:keychain agents gpg,ssh zstyle :omz:plugins:keychain identities id_ed25519 id_rsa
Requirements for Hyper-V
ONLY DO THIS IF YOU DO NOT WANT TO USE WSL FOR SOME REASON.
AGAIN, DO NOT USE THIS SECTION UNLESS YOU FEEL YOU NEED TO.
You will need at least 60GB or so of free space on your hard drive for this class. We won’t likely use it all, but it needs to be there.
In order to use Hyper-V, you need to be running Windows 10 or Windows 11 in Pro, Enterprise, or Education form. If you are using Windows Home (10 or 11), you need to upgrade your license to one of the higher tiers. “But that costs money!” you say? Normally. But not for you!
Go to the Microsoft Software for Students page, and follow the instructions for obtaining an account on the Azure Portal. Once you have access, you can obtain a new license key for Windows 10 or 11 Education, allowing you to use Hyper-V.
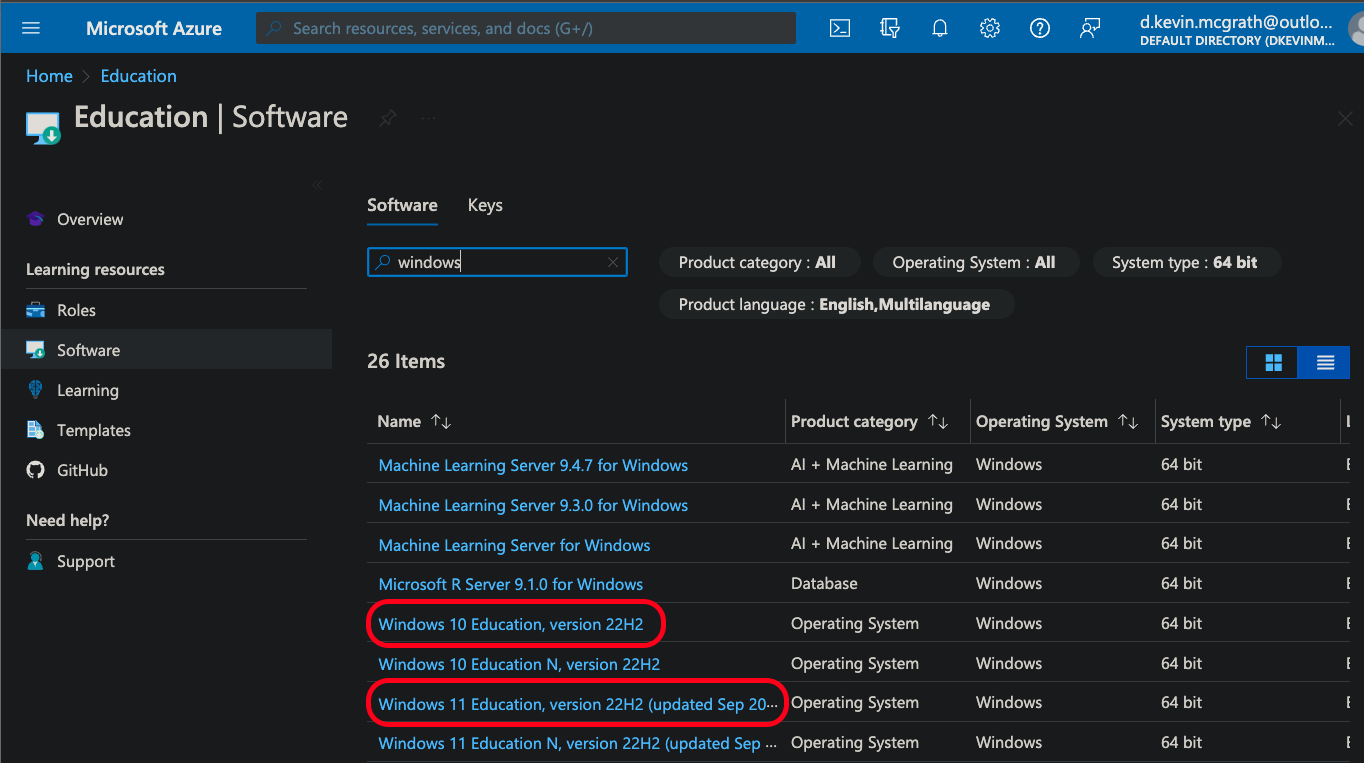
I would strongly encourage you to move to Windows 11, but that’s ultimately your decision.
The commands below will install some useful tooling and then enable the Hyper-V features you need. You’ll need to reboot after running it, but once you do, you’ll be ready to go! Copy this script into a file with extension .ps1 and run it via an Administrator PowerShell prompt. You’ll need to change your execution policy in order to do so:
$ Set-ExecutionPolicy Bypass -Scope Process -Force; ./install.ps1
#install chocolatey
Write-Host "Installing chocolatey..."
Set-ExecutionPolicy Bypass -Scope Process -Force; [System.Net.ServicePointManager]::SecurityProtocol = [System.Net.ServicePointManager]::SecurityProtocol -bor 3072; Invoke-Expression ((New-Object System.Net.WebClient).DownloadString('https://community.chocolatey.org/install.ps1'))
Set-ExecutionPolicy -ExecutionPolicy RemoteSigned
refreshenv

Write-Host "Installing packages via chocolatey..."
#feel free to edit the below to only install the parts you want
choco install -y 7zip notepadplusplus chocolatey-core.extension powershell-core git microsoft-windows-terminal terminal-icons.powershell nerdfont-hack inconsolata firanf powertoys vscode
# The below installs texlive if you want a more unix-like tex install
Write-Host "If you want to install a full texlive instance, run the following command:"
$s = 'choco install -y texlive --params "' + "'" + "/scheme:full'" + '"'
Write-Host $s
# choco install -y texlive --params "'/scheme:full'"

Write-Host "Installing modules via PowerShell..."
# The below is to setup the PowerShell prompt to be more useful to you
Install-Module -Name ImportExcel
Install-Module -Name Pansies -AllowClobber
Install-Module -Name Pscx -AllowPrerelease
Install-Module -Name PowerColorLS
Install-Module -Name Posh-Git
Install-Module -Name PSReadLine -AllowPrerelease -Force

Write-Host "Installing oh-my-posh via winget (you may have to accept a license)..."
# This may or may not work on the version of windows you have installed:
winget install JanDeDobbeleer.OhMyPosh
# if the above failed, install https://www.microsoft.com/en-us/p/app-installer/9nblggh4nns1?rtc=1&activetab=pivot:overviewtab and try again

Write-Host "Enabling Hyper-V features..."
if (!((Get-WindowsOptionalFeature -online -FeatureName Microsoft-Hyper-V).State -eq 'Enabled')) {
  Enable-WindowsOptionalFeature -online -FeatureName Microsoft-Hyper-V -All -NoRestart
}
if (!((Get-WindowsOptionalFeature -online -FeatureName VirtualMachinePlatform).State -eq 'Enabled')) {
  Enable-WindowsOptionalFeature -online -FeatureName VirtualMachinePlatform -All -NoRestart
}
if (!((Get-WindowsOptionalFeature -online -FeatureName HypervisorPlatform).State -eq 'Enabled')) {
  Enable-WindowsOptionalFeature -online -FeatureName HypervisorPlatform -All -NoRestart
}
VM Installation, Step by Step
-
Download your image:
❯ Invoke-WebRequest -Uri "https://releases.ubuntu.com/noble/ubuntu-24.04.4-desktop-amd64.iso" -OutFile "ubuntu-24.04.4-desktop-amd64.iso" -
Checksum your image:
❯ Get-FileHash -Algorithm SHA256 -Path ubuntu-24.04.4-desktop-amd64.iso | Format-List

   Algorithm : SHA256
   Hash      : 3A4C9877B483AB46D7C3FBE165A0DB275E1AE3CFE56A5657E5A47C2F99A99D1E
   Path      : ubuntu-24.04.4-desktop-amd64.iso
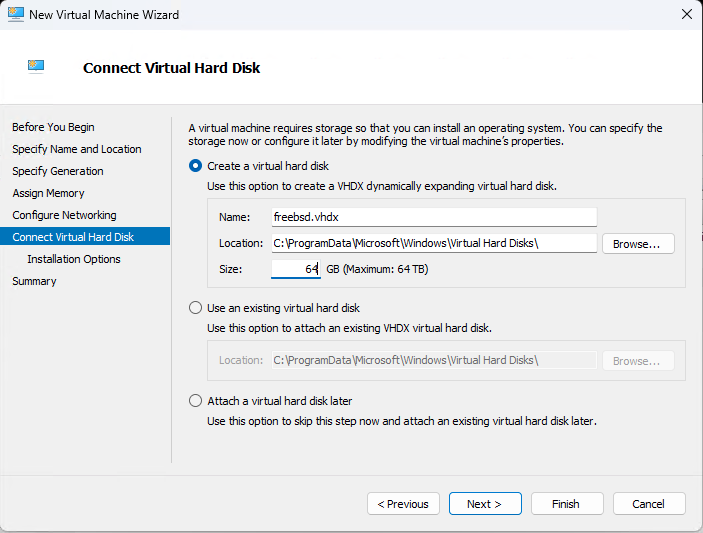
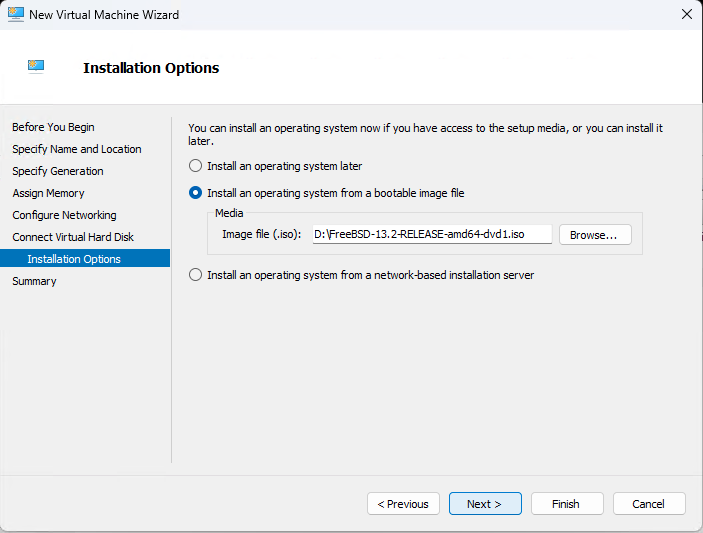
In the instructions below, ignore the mentions of freebsd. I simply don’t have a system handy with which to take new screenshots. The process is the same, regardless.
-
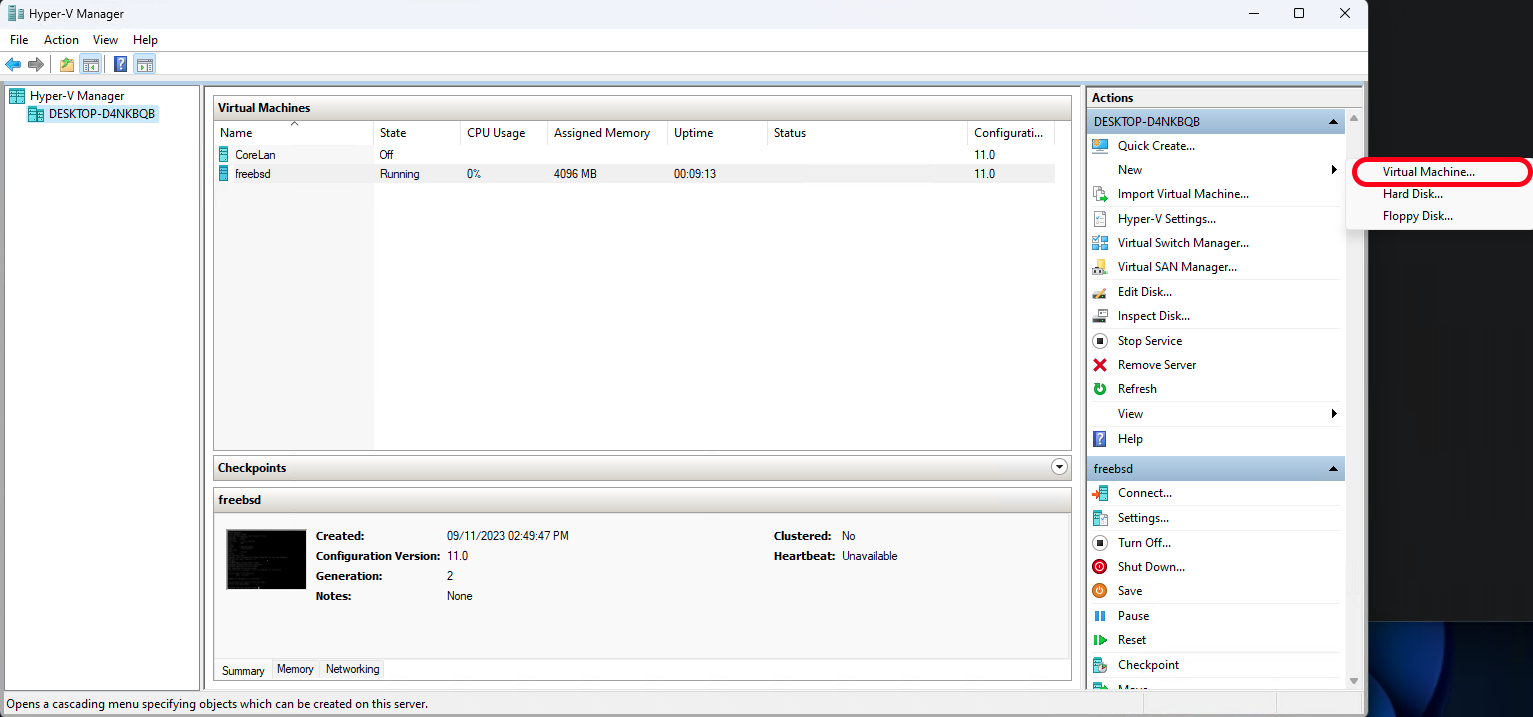
Create a new VM in Hyper-V by selection “New” and “Virtual Machine” from the right side of the Hyper-V Manager window.
-
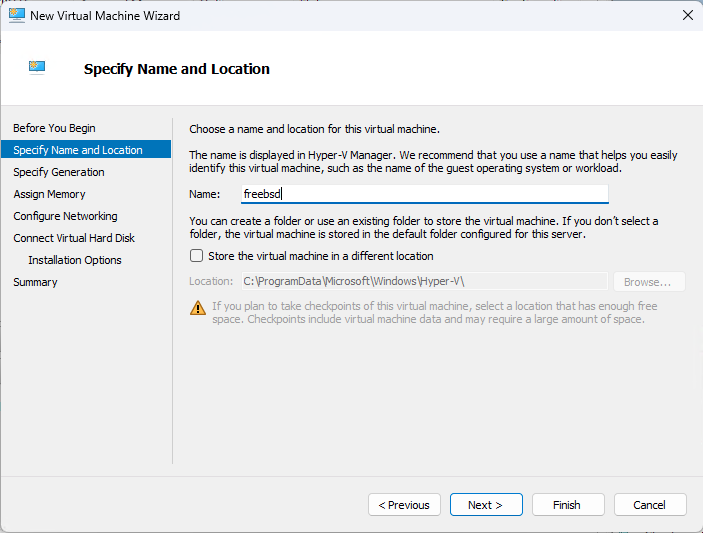
Give it a name (and possibly change the storage location if necessary), then click “Next”.
-
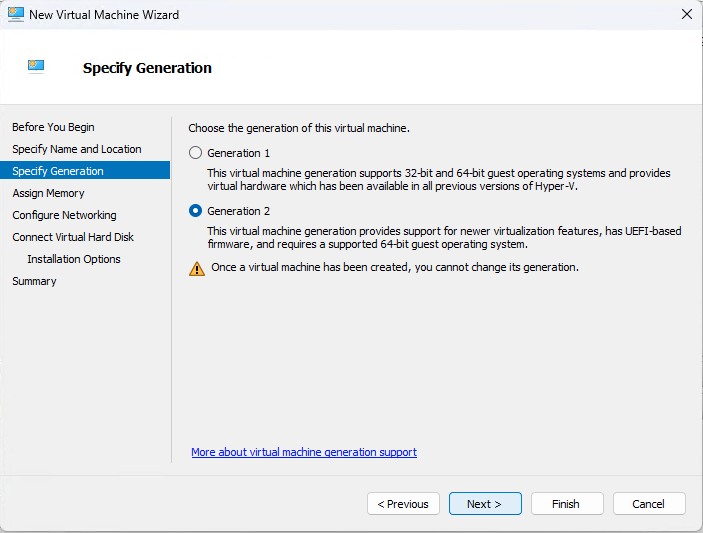
Select “Generation 2” for the generation of the VM. Click “Next”.
-
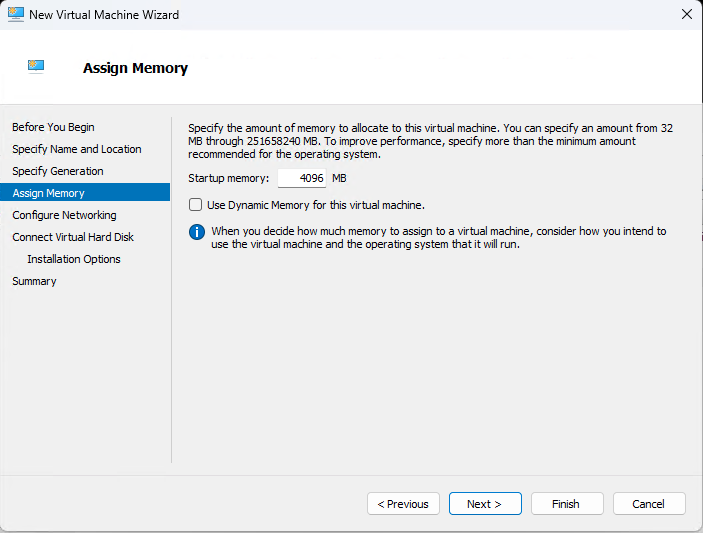
Assign at least 4096 MB of memory to the VM. Click “Next”.
-
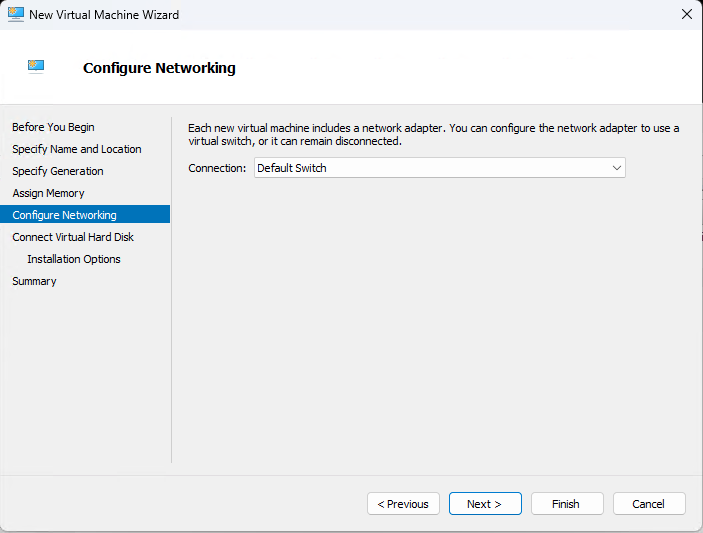
Set “Connection:” to “Default Switch”. Click “Next”.
-
Create a new virtual hard disk, and set the size to 64GB. Click “Next”.
-
Select “Install an operating system from a bootable image file” and browse to the ISO you downloaded. Click “Next”.
-
Before launching the VM, click on “Settings” on the right side of the Hyper-V Manager window.
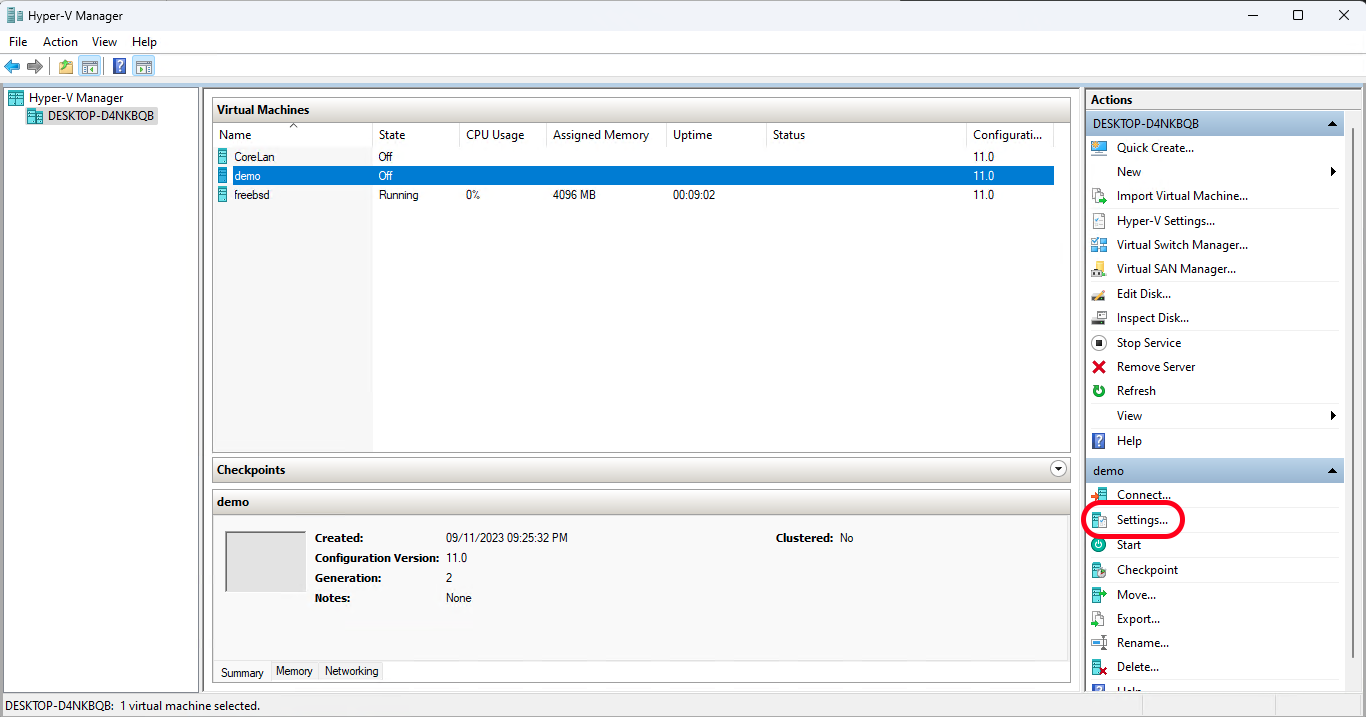
Click “Security” and uncheck the box for “Enable Secure Boot”. Click “Apply”.
Click “OK”. Now run the VM.
-
When the VM boots, select “Try or Install Ubuntu”. Follow the installer prompts — the defaults are fine. When asked about the installation type, “Normal installation” is recommended. Once complete, reboot into your new Ubuntu VM.
Hyper-V Enhanced Session Mode for Ubuntu VM
Hyper-V has two modes for interacting with VMs. The default for a Linux guest is the standard console mode, which is what you get when you run a VM. The second is Enhanced Session Mode, which allows you to use RDP to connect to the VM. This is useful if you want to use a GUI on the VM, or if you want to copy/paste between the VM and your host system, or share resources in some other fashion. So how do we enable this on our Ubuntu VM?
There’s a setup script that I use to configure my VMs. It’s not perfect, but it works: setup.sh. You may or may not have copy/paste working at this point, but you can just use wget to download the script from github. Then run this script. It will install the packages we need in this class.
Once you have a DE in place and running, run the below script to enable Enhanced Session Mode from the VM side. You’ll need to reboot the VM after running it.
#!/bin/bash

#
# This script is for Ubuntu 24.04 Noble Numbat to download and install XRDP+XORGXRDP via
# source.
#
# This script originally from Github user Hinara (https://github.com/Hinara/linux-vm-tools/blob/ubuntu20-04/ubuntu/22.04/install.sh) with modifications to work for us

# To download from the ubuntu VM:
# curl -LO https://raw.githubusercontent.com/dkmcgrath/sysadmin/main/enhanced_session.sh

# tweaked to remove some stuff that wasn't necessary.
###############################################################################
# Update our machine to the latest code if we need to.
#

if [ "$(id -u)" -ne 0 ]; then
    echo 'This script must be run with root privileges' >&2
    exit 1
fi

apt update && apt upgrade -y

if [ -f /var/run/reboot-required ]; then
    echo "A reboot is required in order to proceed with the install." >&2
    echo "Please reboot and re-run this script to finish the install." >&2
    exit 1
fi

###############################################################################
# XRDP
#

# Install hv_kvp utils for XRDP
# Install the xrdp service so we have the auto start behavior
if apt install -y xrdp linux-tools-virtual linux-cloud-tools-virtual >/dev/null 2>&1; then
    echo "Successfully installed xrdp."
else
    echo "Failed to install xrdp." >&2
    exit 1
fi

systemctl stop xrdp
systemctl stop xrdp-sesman

# Configure the installed XRDP ini files.
# use vsock transport.
sed -i_orig -e 's/port=3389/port=vsock:\/\/-1:3389/g' /etc/xrdp/xrdp.ini
# use rdp security.
sed -i_orig -e 's/security_layer=negotiate/security_layer=rdp/g' /etc/xrdp/xrdp.ini
# remove encryption validation.
sed -i_orig -e 's/crypt_level=high/crypt_level=none/g' /etc/xrdp/xrdp.ini
# disable bitmap compression since its local its much faster
sed -i_orig -e 's/bitmap_compression=true/bitmap_compression=false/g' /etc/xrdp/xrdp.ini

# rename the redirected drives to 'shared-drives'
sed -i -e 's/FuseMountName=thinclient_drives/FuseMountName=shared-drives/g' /etc/xrdp/sesman.ini

# Changed the allowed_users
sed -i_orig -e 's/allowed_users=console/allowed_users=anybody/g' /etc/X11/Xwrapper.config

# Blacklist the vmw module
if [ ! -e /etc/modprobe.d/blacklist-vmw_vsock_vmci_transport.conf ]; then
  echo "blacklist vmw_vsock_vmci_transport" > /etc/modprobe.d/blacklist-vmw_vsock_vmci_transport.conf
fi

#Ensure hv_sock gets loaded
if [ ! -e /etc/modules-load.d/hv_sock.conf ]; then
  echo "hv_sock" > /etc/modules-load.d/hv_sock.conf
fi

# Configure the policy xrdp session
cat > /etc/polkit-1/localauthority/50-local.d/45-allow-colord.pkla <<EOF
[Allow Colord all Users]
Identity=unix-user:*
Action=org.freedesktop.color-manager.create-device;org.freedesktop.color-manager.create-profile;org.freedesktop.color-manager.delete-device;org.freedesktop.color-manager.delete-profile;org.freedesktop.color-manager.modify-device;org.freedesktop.color-manager.modify-profile
ResultAny=no
ResultInactive=no
ResultActive=yes
EOF

# reconfigure the service
systemctl daemon-reload
systemctl start xrdp

#
# End XRDP
###############################################################################

echo "Install is complete."
echo "Reboot your machine to begin using XRDP."
After the VM is back up and running, you’ll need to enable Enhanced Session Mode on the host side. To do this, open PowerShell as an Administrator and run the following command:
❯ Set-VM -VMName <your_vm_name> -EnhancedSessionTransportType HvSocket
Now, when you connect to your VM from the Hyper-V manager, you’ll be able to use Enhanced Session Mode!