
This page last updated: December 2018.
Fall 2018
This page describes a short series of IA32 assembly language exercises that were inspired by techniques for generating textual output on a basic display screen in computer systems with video RAM buffers. For testing purposes, we simulate the effect of running these programs by generating images in a regular terminal window, using ANSI escape sequences to set foreground and background color attributes as appropriate. Nevertheless, code like this could also be very useful in a real, bare metal system.
These instructions assume that you are using a standard x86 Linux machine with standard tools for compiling and running C programs. No special hardware is required: a simple terminal window should be sufficient for running these programs, so long as it has (at least) 25 rows and 80 columns.
We suggest that you develop your solutions to these and future exercises in a folder called ~/Documents/llp, and we will assume that you have used that path in what follows, and in other documents. But of course you are welcome to use a different directory, with corresponding adjustments to these instructions, if that suits your needs better.
A set of files that provide a starting point for these exercises can be downloaded as vram.tar.gz. We suggest that you download this file and then unpack its contents using the following sequence of commands (of course, you will need to make adjustments if you are using a different folder (in Line 1) or if your downloads are stored in a different location (Line 2)):
  cd ~/Documents/llp
  tar xvzf ~/Downloads/vram.tar.gz.
  cd vram
The last command here moves you in to a newly created vram folder, which means that you are ready to begin. (You are welcome to take a look at the files in your new vram folder right now of course, but further details will be presented as they are needed in the following.)
Background
The video systems on early PCs supported a simple text display mode with 80 columns and 25 lines. Programs on these machines generated output to be displayed on the screen by writing an appropriate sequence of values in to a special block of memory known as video RAM. As such, video RAM is a simple example of memory-mapped I/O. (In this case, of course, there is mostly just O(output) and not much I(input)!) In fact, although the machines we typically use today have much more powerful graphics systems, many of them still support a very basic graphics mode using video RAM; on some machines, you might even catch a very brief glimpse of this if you watch your computer boot, or if you interrupt that boot process to access and potentially change configuration settings in its BIOS.
In practical terms, the video RAM on these systems was organized as a contiguous block of memory containing two bytes for each character on the screen. The first of those two byte holds an eight bit "character code" using an extended version of ASCII codes. For example:
| Code | ... | 32 | ... | 48 | 49 | ... | 65 | 66 | ... | 97 | 98 | ... |
|---|---|---|---|---|---|---|---|---|---|---|---|---|
| Character | ... | ' ' | ... | '0' | '1' | ... | 'A' | 'B' | ... | 'a' | 'b' | ... |
The second byte for each character specifies a video attribute; this determines which foreground and background colors should be used to display the character on screen. The attribute byte works as a bitmap:
| ||||||||||||||||
|
The following table, for example, documents the foreground colors that can be achieved by using different combinations of the least four bits in each attribute byte:
|
|
The complete video RAM area of memory can be treated as an array with 25 rows, each of which has 80 columns, each with two characters. A suitable (external) declaration for this array in C might look something like the following:
extern char video[25][80][2];
In principle, this is enough to start writing programs that
use video RAM; we can set the character code for any given
pair of row (r) and column (c) coordinates
by writing to video[r][c][0], and the corresponding
video attribute by writing to video[r][c][0], as in
the following example:
    video[2][38][0] = 'h';  video[2][40][0] = 'i';  video[2][42][0] = '!';
    video[2][38][1] = 0x51; video[2][40][1] = 0x43; video[2][42][1] = 0x35;
Nevertheless, in many practical applications, it would be
preferable if we could treat video RAM as a simple character
device that receives and displays an arbitrary sequence of
characters, scrolling as necessary to ensure that the most
recent output is always visible.
A Library for Video RAM Output
In the rest of this document, we will focus on the implementation of a small library that lets programmers treat video RAM as a conventional, character-oriented output stream. Our specific library provides four main features:
- cls()
- Purpose: Clear the screen, setting every character code to ' ' and reseting all of the video attributes to some default value. For the purposes of our library, we'll use attribute 0x2e, which gives a bright foreground color, and a background color that is as close to PSU Green as our limited palette will allow!
- outc(c)
- Purpose: Output a single character on the screen; the implementation of this function will need to maintain a current cursor position, recording the row and column numbers in which the next output character will be placed. When the caller asks to output a newline, we can move the cursor immediately to the start of the text line. When the cursor reaches the end of the screen, we will need to scroll the display on screen. In essence, this last step requires us to overwrite the first line on the screen with the text from the second line, then overwrite the second line with the text from the third, and so on, until we reach the end of the screen and overwrite the last line with a blank (empty) line.
- setAttr(a)
- Purpose: Set the video attribute that will be used for all characters that are displayed using calls to outc() (until a different attribute is specified by a subsequent setAttr() call, of course).
- outhex(n)
- Purpose: Output an eight character string with the hexadecimal representation for the unsigned argument n. For example, the number 10 would be displayed as 0000000A, while the number 1024 would be displayed as 00000400.
The video.h file that is included in the vram folder is a C header file that provides declarations for these functions. This file can be included in any program that makes use of the library, such as the following example (video1.c in the vram directory):
    #include "video.h"

    int main(int argc, char** argv) {
        int i, j;
        cls();
        video[2][38][0] = 'h';  video[2][40][0] = 'i';  video[2][42][0] = '!';
        video[2][38][1] = 0x51; video[2][40][1] = 0x43; video[2][42][1] = 0x35;
        display();
        return 0;
    }
This code uses the cls() call to clear the screen and generates
a very brief greeting at specific screen coordinates using direct array
writes, as described previously. The display() call at the end
of the program is a reference to a function defined in videodisp.c,
which uses ANSI escape code sequences to display an approximation of what
the image in video RAM might look like on a conventional terminal (assuming
that the terminal is at least 80 columns wide). You are welcome to look
at the code in videodisp.c, of course, but doing so should not be
strictly necessary to complete these exercises.
The vram folder also includes the beginnings of an assembly language implementation for the library in the file videoasm.s ... although, as you will soon see when you look at the files, all of the functions are implemented by simple stubs that do not actually do anything. We can compile and link all of these pieces together using the following command line:
gcc -m32 -o video1 video1.c videodisp.c videoasm.s
For convenience, you may also use the provided Makefile,
in which case you can generate the video1 executable by
typing make video1. Whichever option you choose, however,
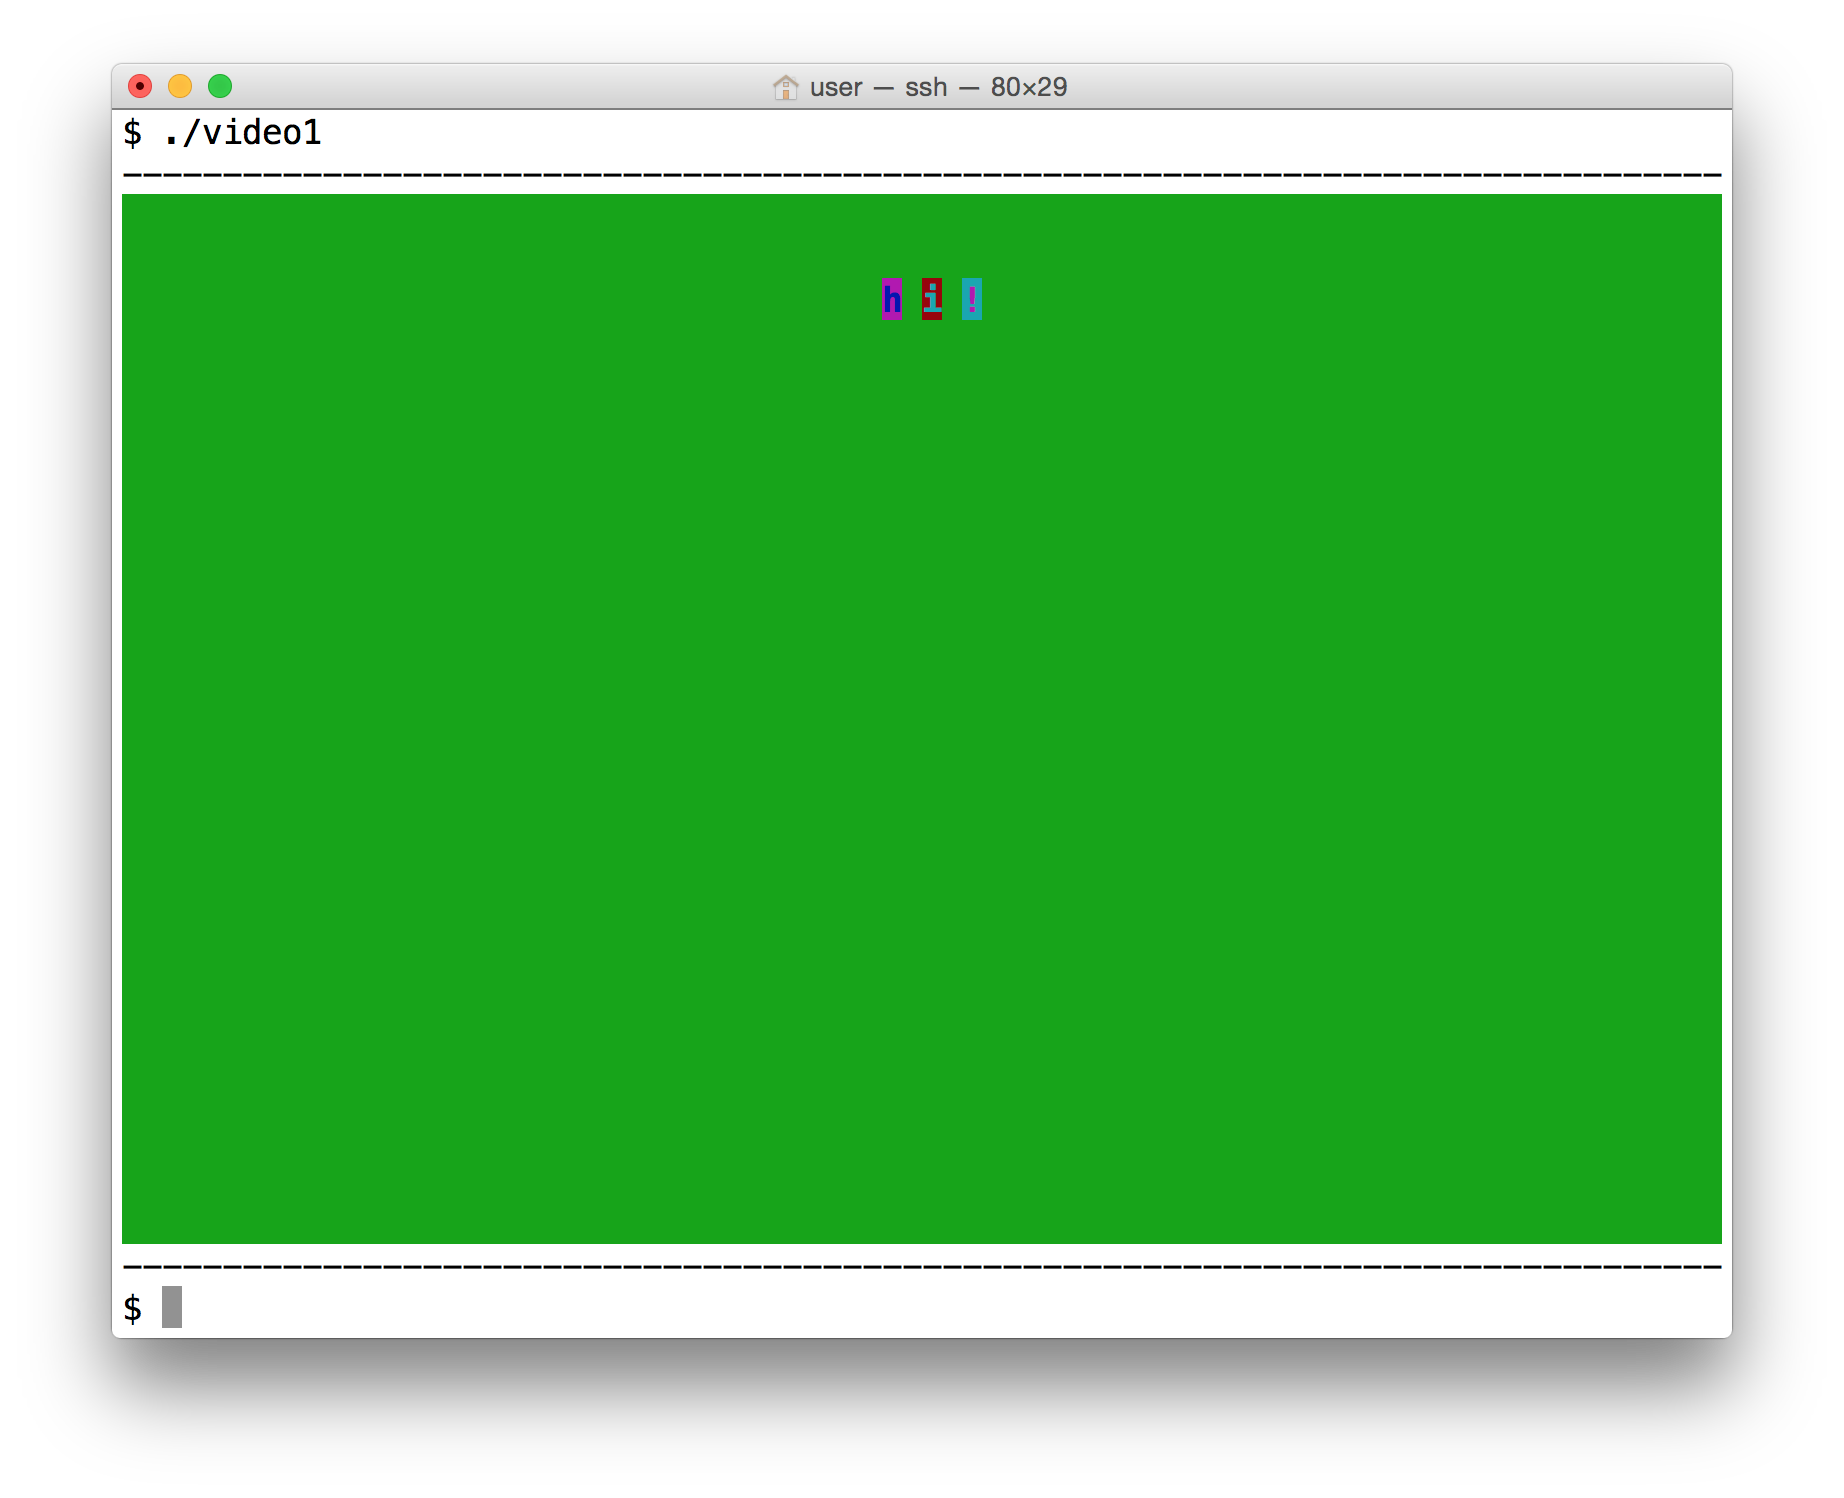
should produce something like the following output (click the image,
if necessary, for a larger version):

By looking at details like the terminal window size that is displayed at the top of the image, we can see that the dark block shown here corresponds to an 80x25 display with the three expected characters displayed close to the center of the third row.
Exercise 1: Clearing the Screen
Given our earlier description of the cls() function, you might have been expecting to see a green background in the previous image. The black background appears instead because the initial value of the attribute bytes in our video buffer is zero (which corresponds to black text on a black background) and because the implementation of cls() is just a stub that doesn't actually modify the contents of video RAM; that is, it doesn't do anything to initialize the video RAM to set a green background for each character.
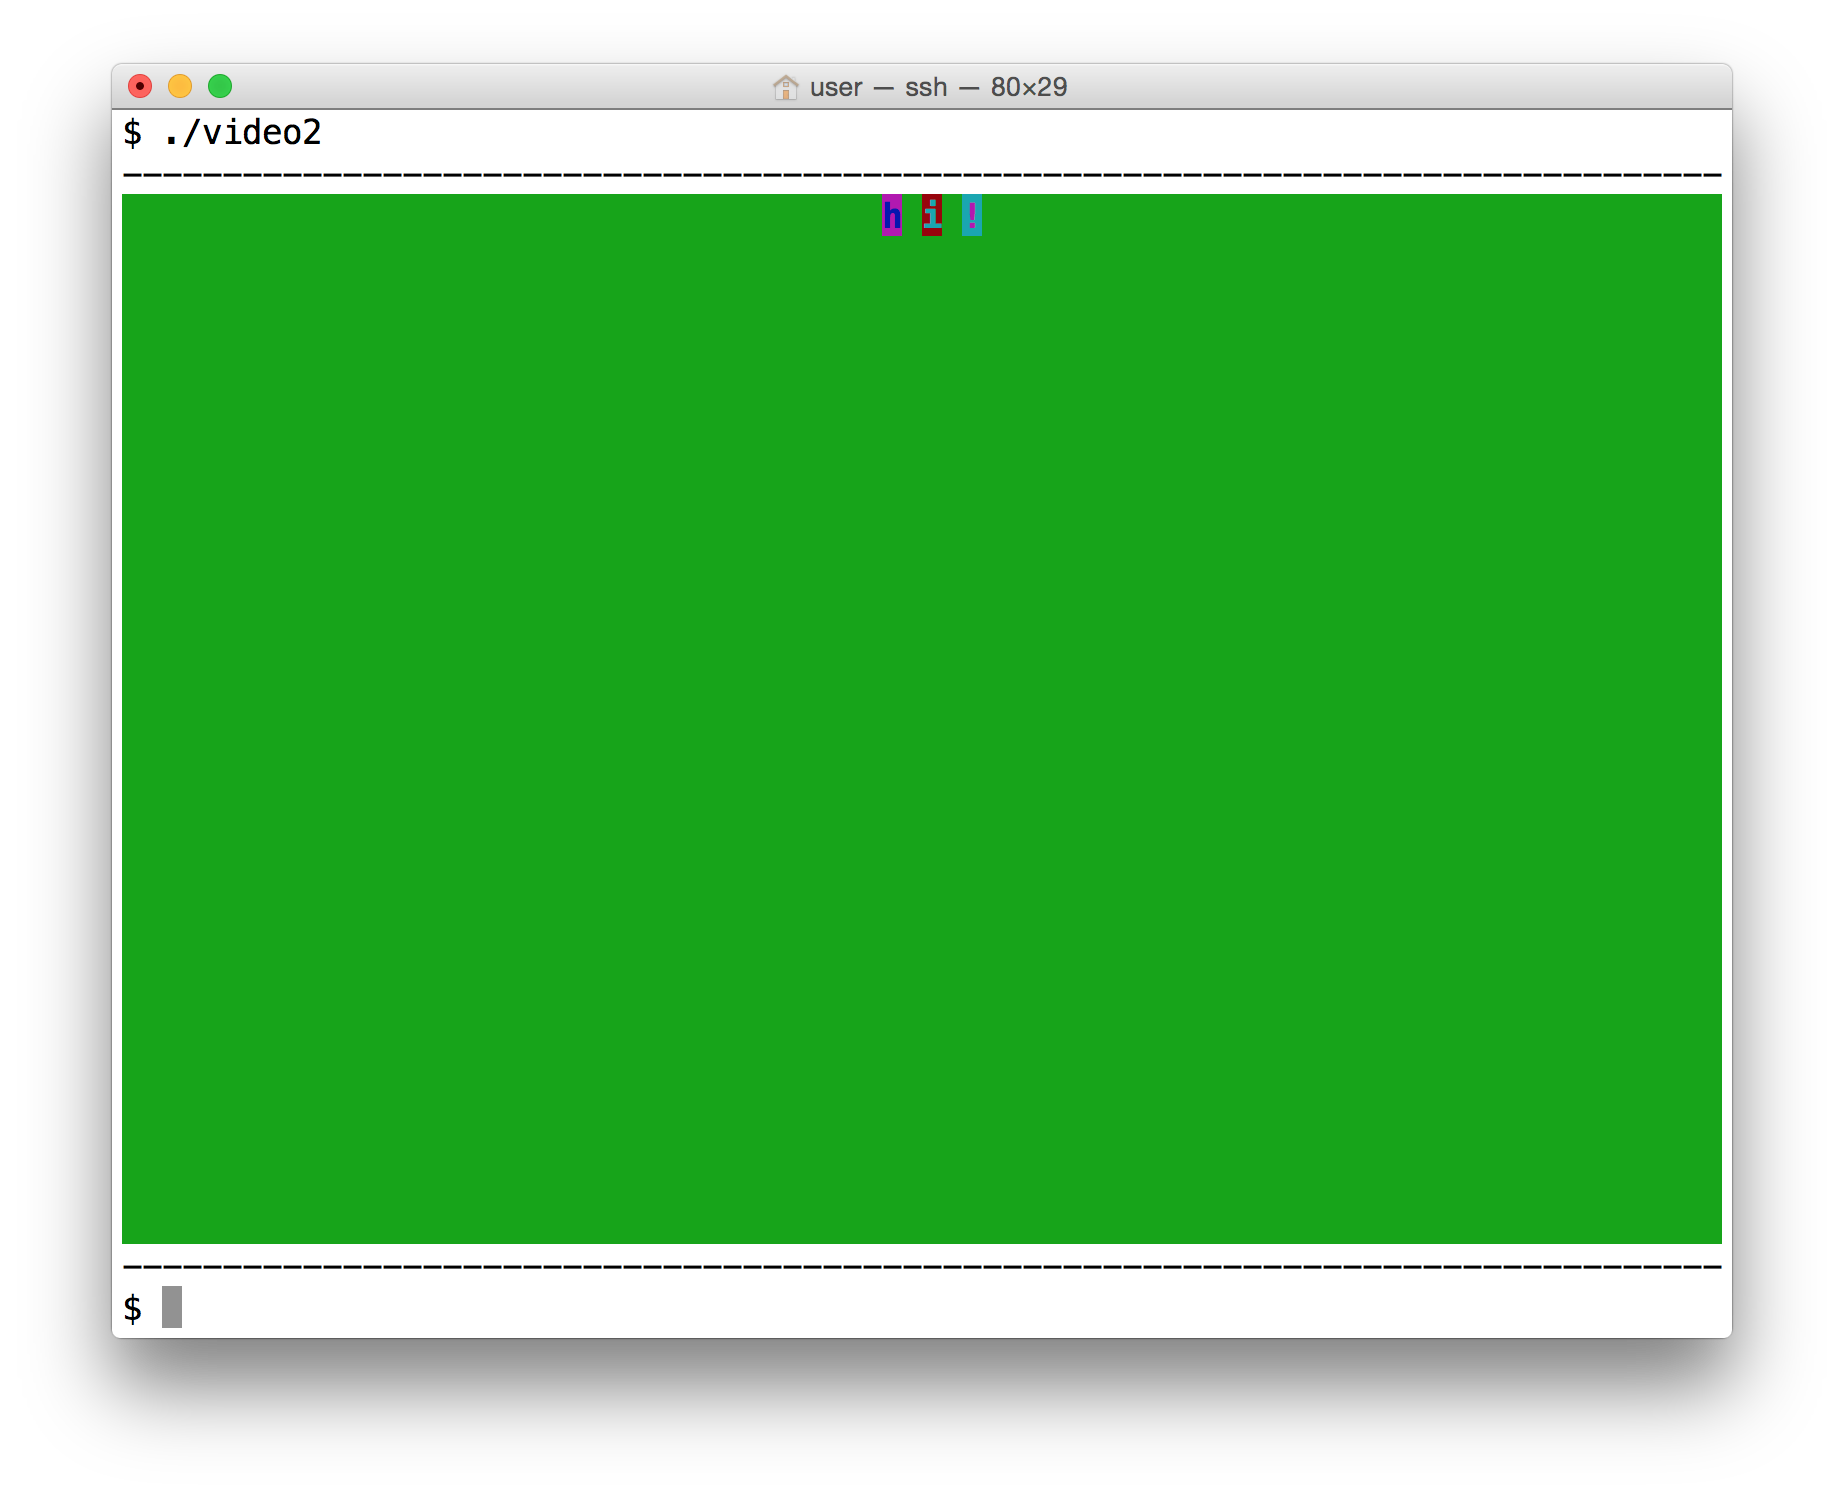
Your first task is to provide a working implementation for cls() so that the output produced when you run video1 looks something like the following:
Given the earlier C declaration of video as a multi-dimensional array of characters, you might be tempted to implement this function using a pair of nested loops, with one loop using indices from 0 to 24 to scan different rows, and another using indices from 0 to 79 to scan different columns, and an inner loop body that initializes each character and attribute byte to an appropriate value. A solution that works that way is acceptable here, but there are simpler ways to code this up. In addition, from a performance perspective, you might consider methods that allow you to write more than one byte value at a time, reducing the total number of writes that are needed to complete the task. Again, however, handling this detail is not a strict requirement for completing this exercise!
Exercise 2: Scrolling
As a first step to implementing the outc() function, your next task will be to write some code that will scroll the screen up by one line. For now, you can put this code in the stub for outc() in videoasm.s so that you can test your implementation by using a short sequence of outc() calls. For example, you might use the following program (included as video2.c in the vram folder) as a test case:
    #include "video.h"

    int main(int argc, char** argv) {
        int i, j;
        cls();
        video[2][38][0] = 'h';  video[2][40][0] = 'i';  video[2][42][0] = '!';
        video[2][38][1] = 0x51; video[2][40][1] = 0x43; video[2][42][1] = 0x35;

        setAttr(7);
        outc('h');
        outc('i');

        display();
        return 0;
    }
If your outc() implementation handles scrolling correctly
but otherwise ignores the argument provided, then the output that you
get when you run video2 should look something like this:
Note, in particular, that the three character greeting that was originally displayed on the third line has now been shuffled up to the top line as a result of the two calls to outc(). Yay for scrolling!
Exercise 3: Character Output
Once you have scrolling working, you'll want to complete the implementation of outc() by adding support for character output. This will require you to use and modify the values that are stored in the row and col variables that are declared at the start of videoasm.s and used to track the "current cursor position", as well as the "current attribute" setting from the attr variable. You'll also need to access the argument to outc() that specifies which character should be output (it will be on the stack, and can be read using indexed addressing with a suitable offset from %ebp). Note that you should make a special case when the newline character is passed as input to outc(), moving the cursor immediately to the next line instead of advancing to the next column. Finally, make sure that you don't advance either the row or col variables beyond their allowed limits of 25 and 80, respectively. If the column number passes 79, you can just move to the next row, of course. If you reach the last row of the display, however, then you'll want to scroll the display instead of further incrementing the row number. The logic that you need here is not really as complicated as the preceding description might make it sound, but don't be shy about sketching it out as a small flowchart if that helps you to get a clearer picture of what is required!
When you've finished this, you should get something like the following as output when you run video2:
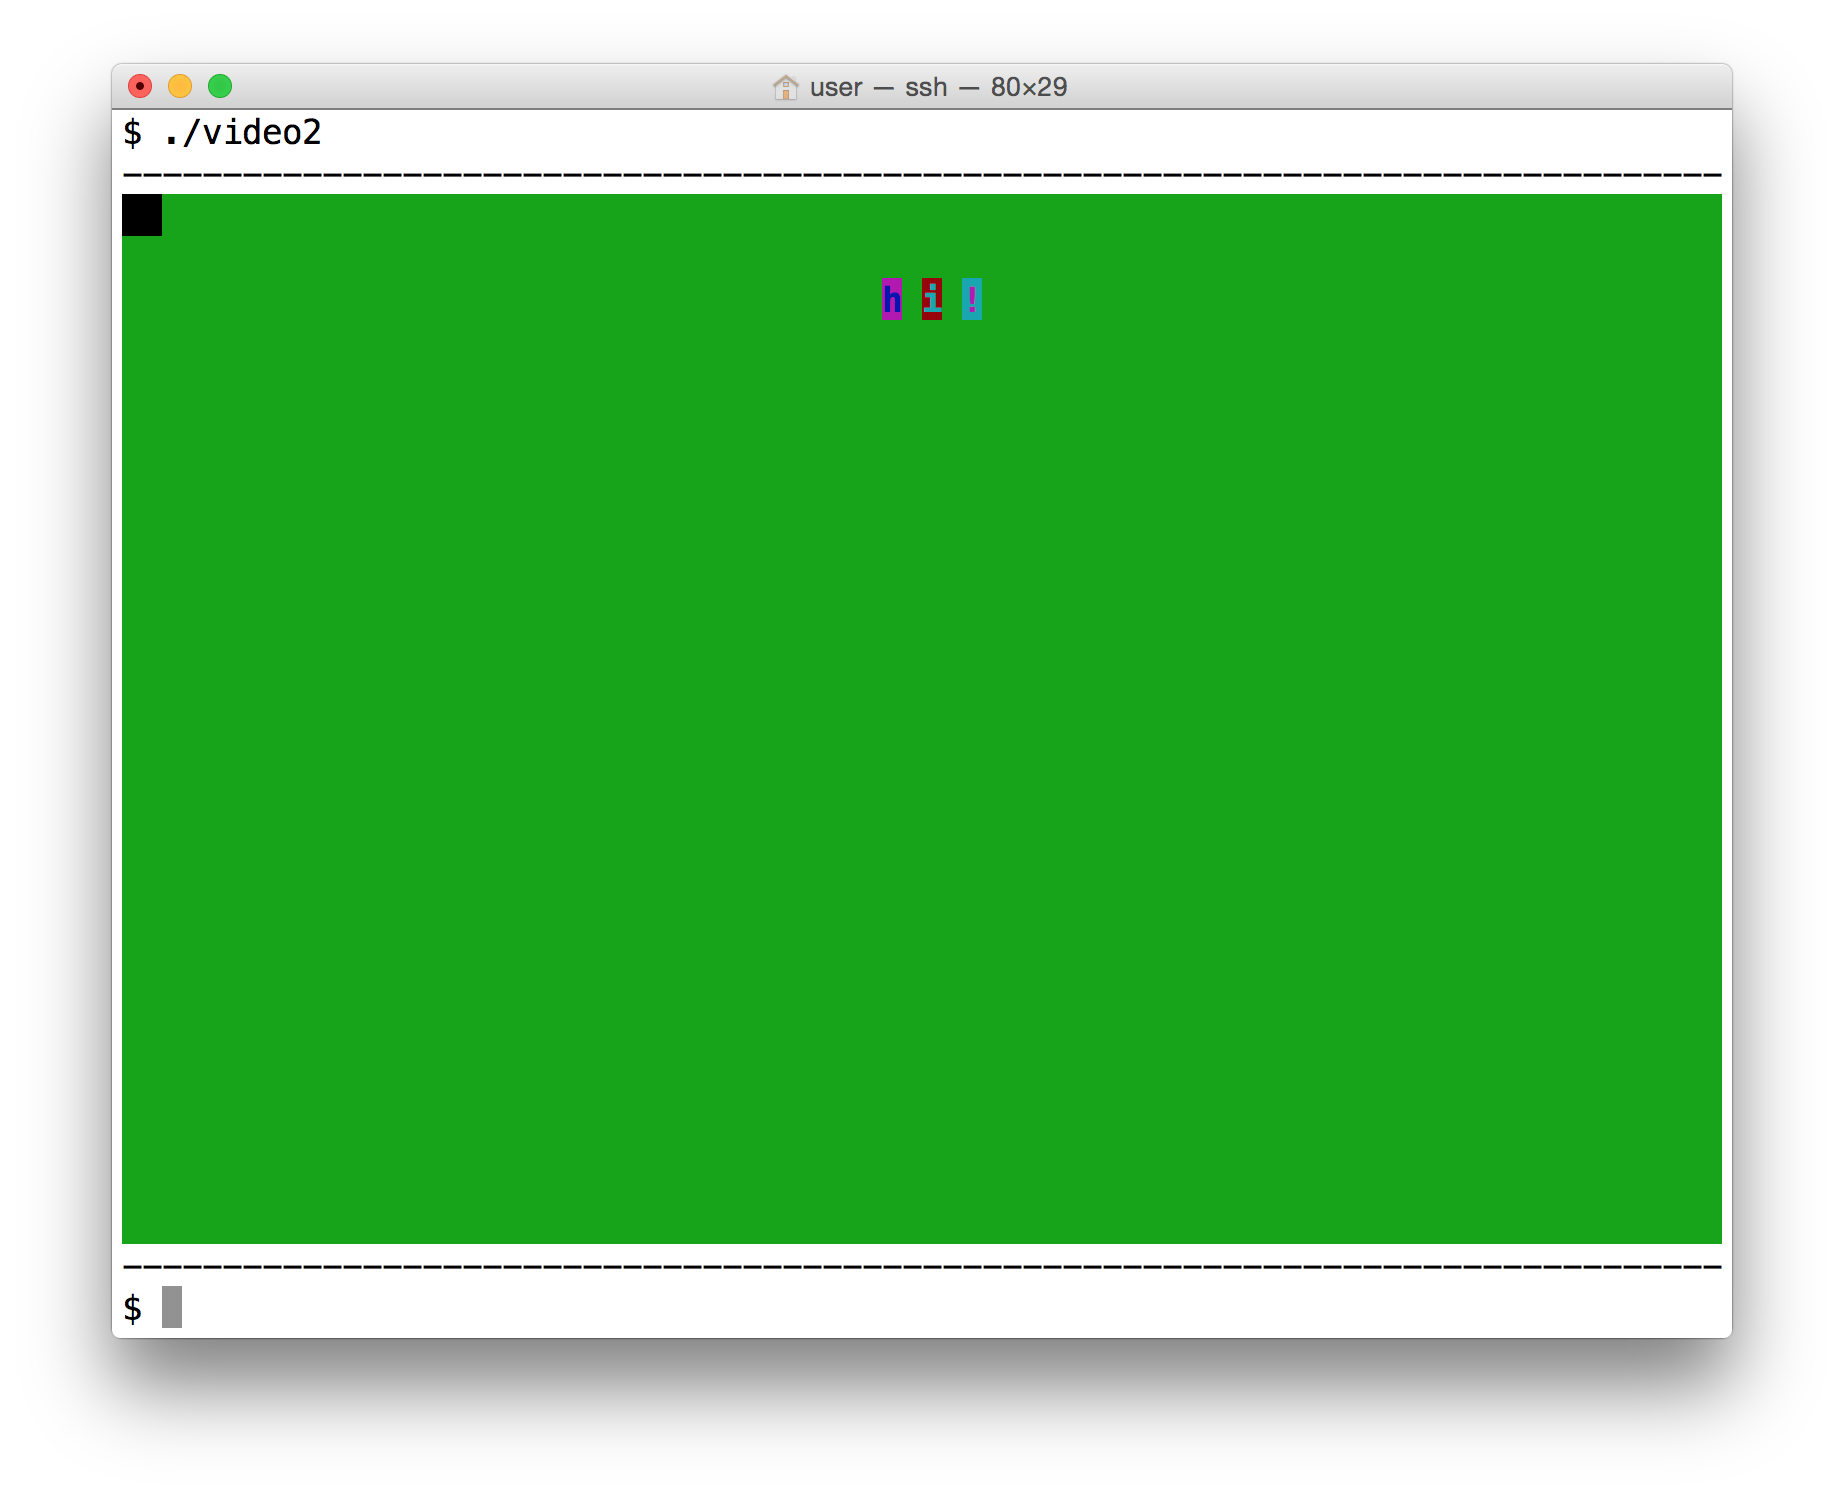
This output isn't quite as satisfying as might be hoped: the two outc() calls are responsible for the two black boxes seen at the top left of the output display. But we can't actually see the characters here because the default video attribute is black text on a black background! We'll fix that in the next step ...
Exercise 4: Setting the Current Attribute
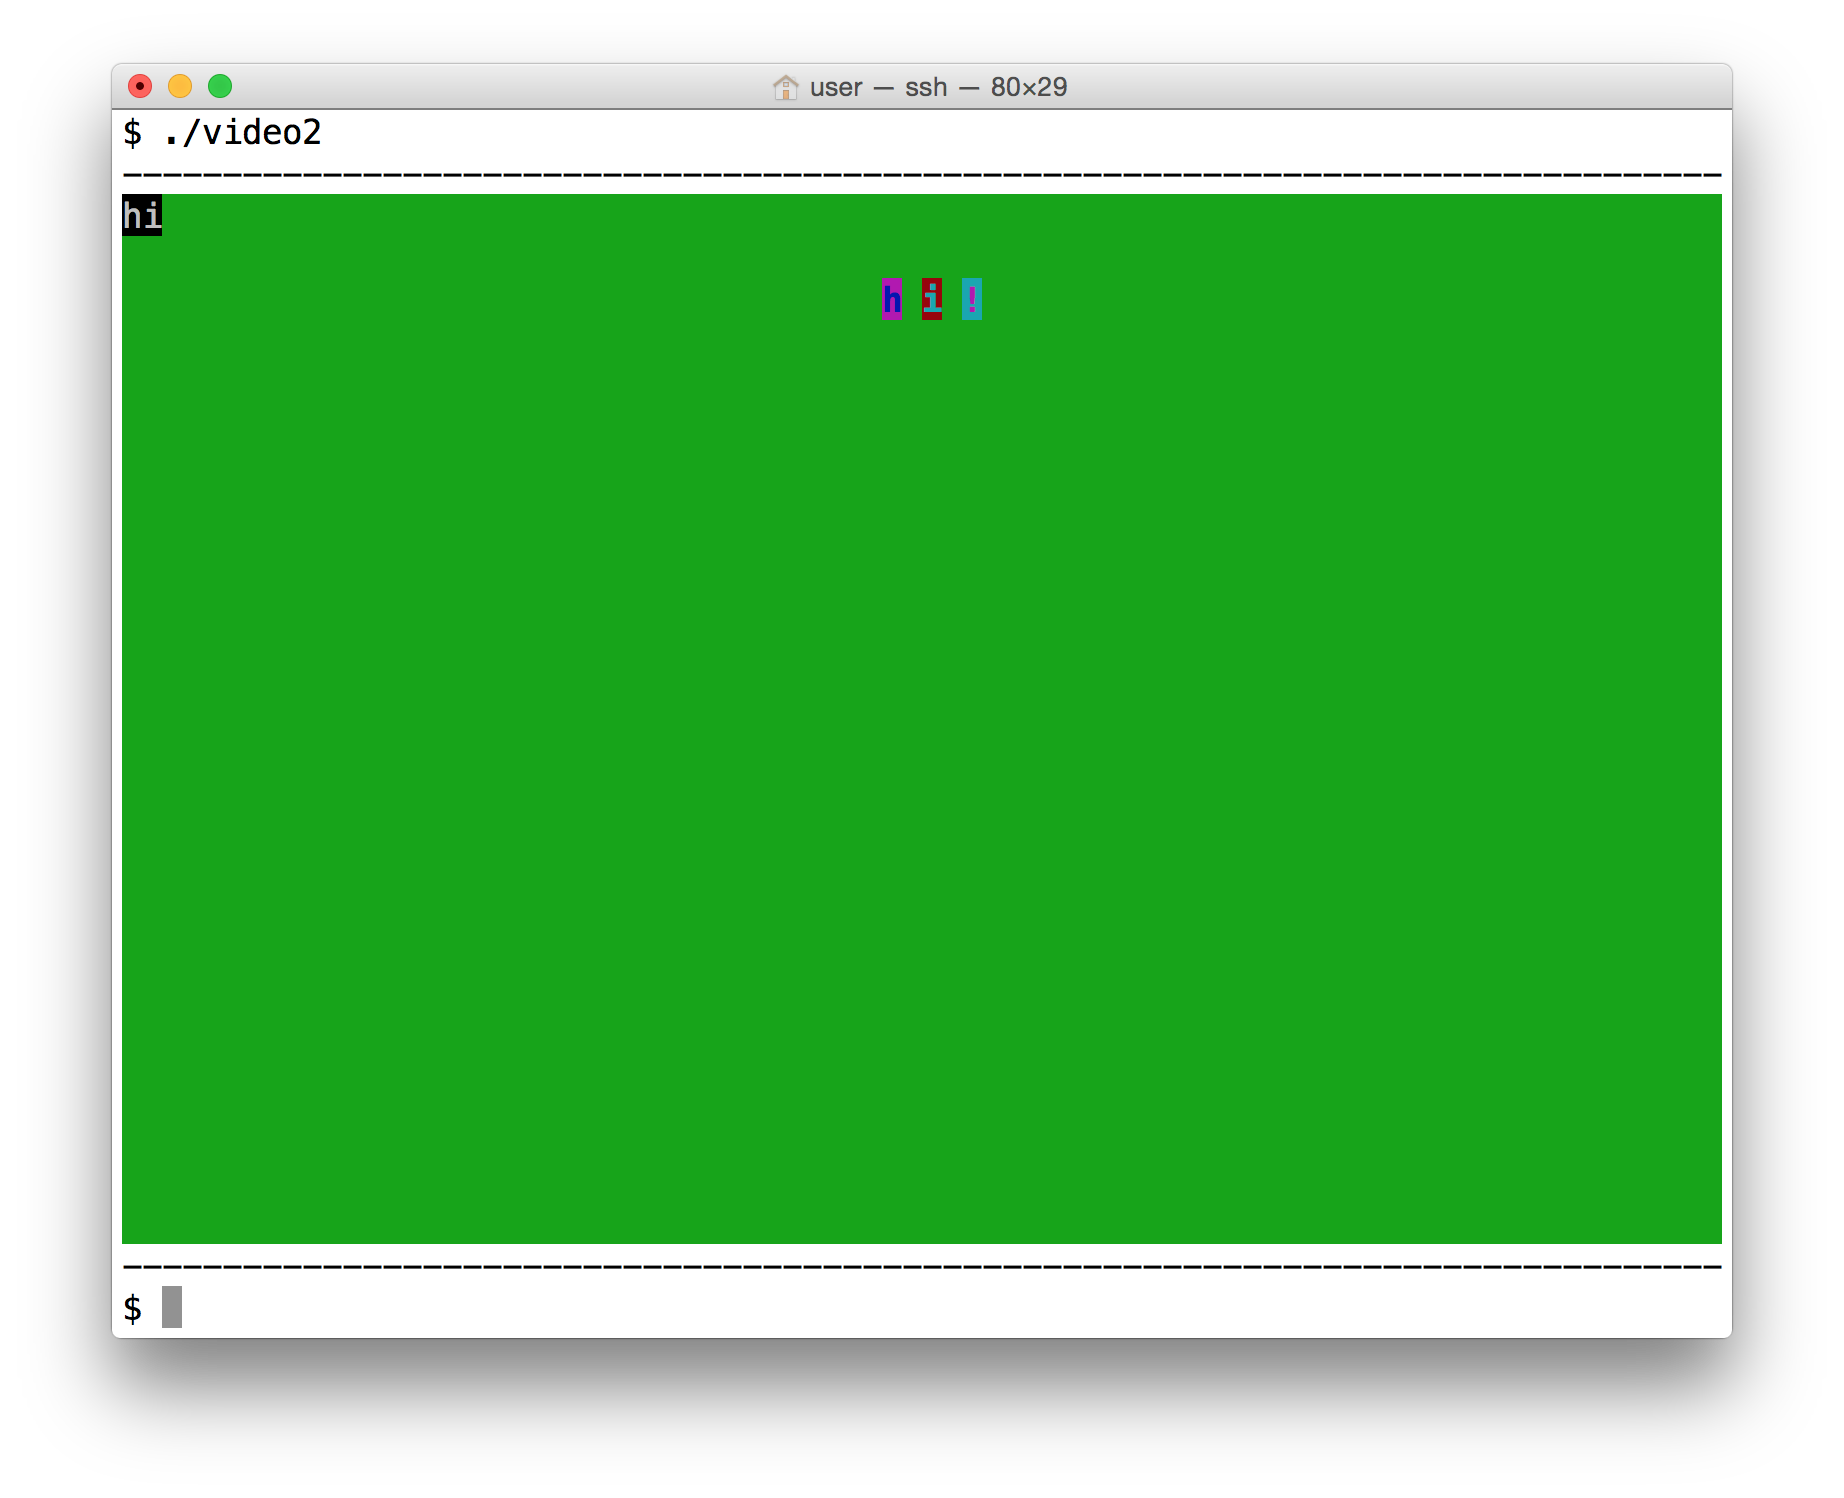
Your next task is to fill in an implementation for the setAttr() function; you should find that this is a very simple task—as long as you've properly understood how arguments are passed in to functions—so don't be alarmed if you manage to implement this with just a couple of lines of code! Once you've handled this, the setAttr(7) call in the code for video2 will work some minor magic in specifying white text on a black background—much easier to read!—and you should be rewarded with an output that looks something like the following:
Exercise 5: Hexadecimal Output
For our final exercise, we'll turn to the implementation of the outhex() function. Conceptually, this is a fairly simple function: we're not going to worry about sign bits or leading zeros— every number will be output with exactly 8 digits—and we're not going to try converting to decimal, or doing anything else that might require using a buffer of some kind. Nevertheless, this will still be a good exercise to test your comfort level with classic "bit twiddling" operations like bitwise rotate, and, etc...
For testing purposes, you can use the following program (which, once again, is already provided for you, this time in video3.c):
    #include "video.h"

    int main(int argc, char** argv) {
        int i, j;
        cls();
        unsigned val = 1;
        for (i=0; i<26; i++) {
            setAttr((i&7)<<4);
            for (j=0; j<i; j++) {
                outc(' ');
            }
            outc(65+i);
            outc(97+i);
            outc(' ');
            outhex(val);
            val += val;
            outc('\n');
        }
        display();
        return 0;
    }
If you've completed all of the previous steps, but have yet to modify
the stub for outhex(), then you should see output like the
following when you run this program:
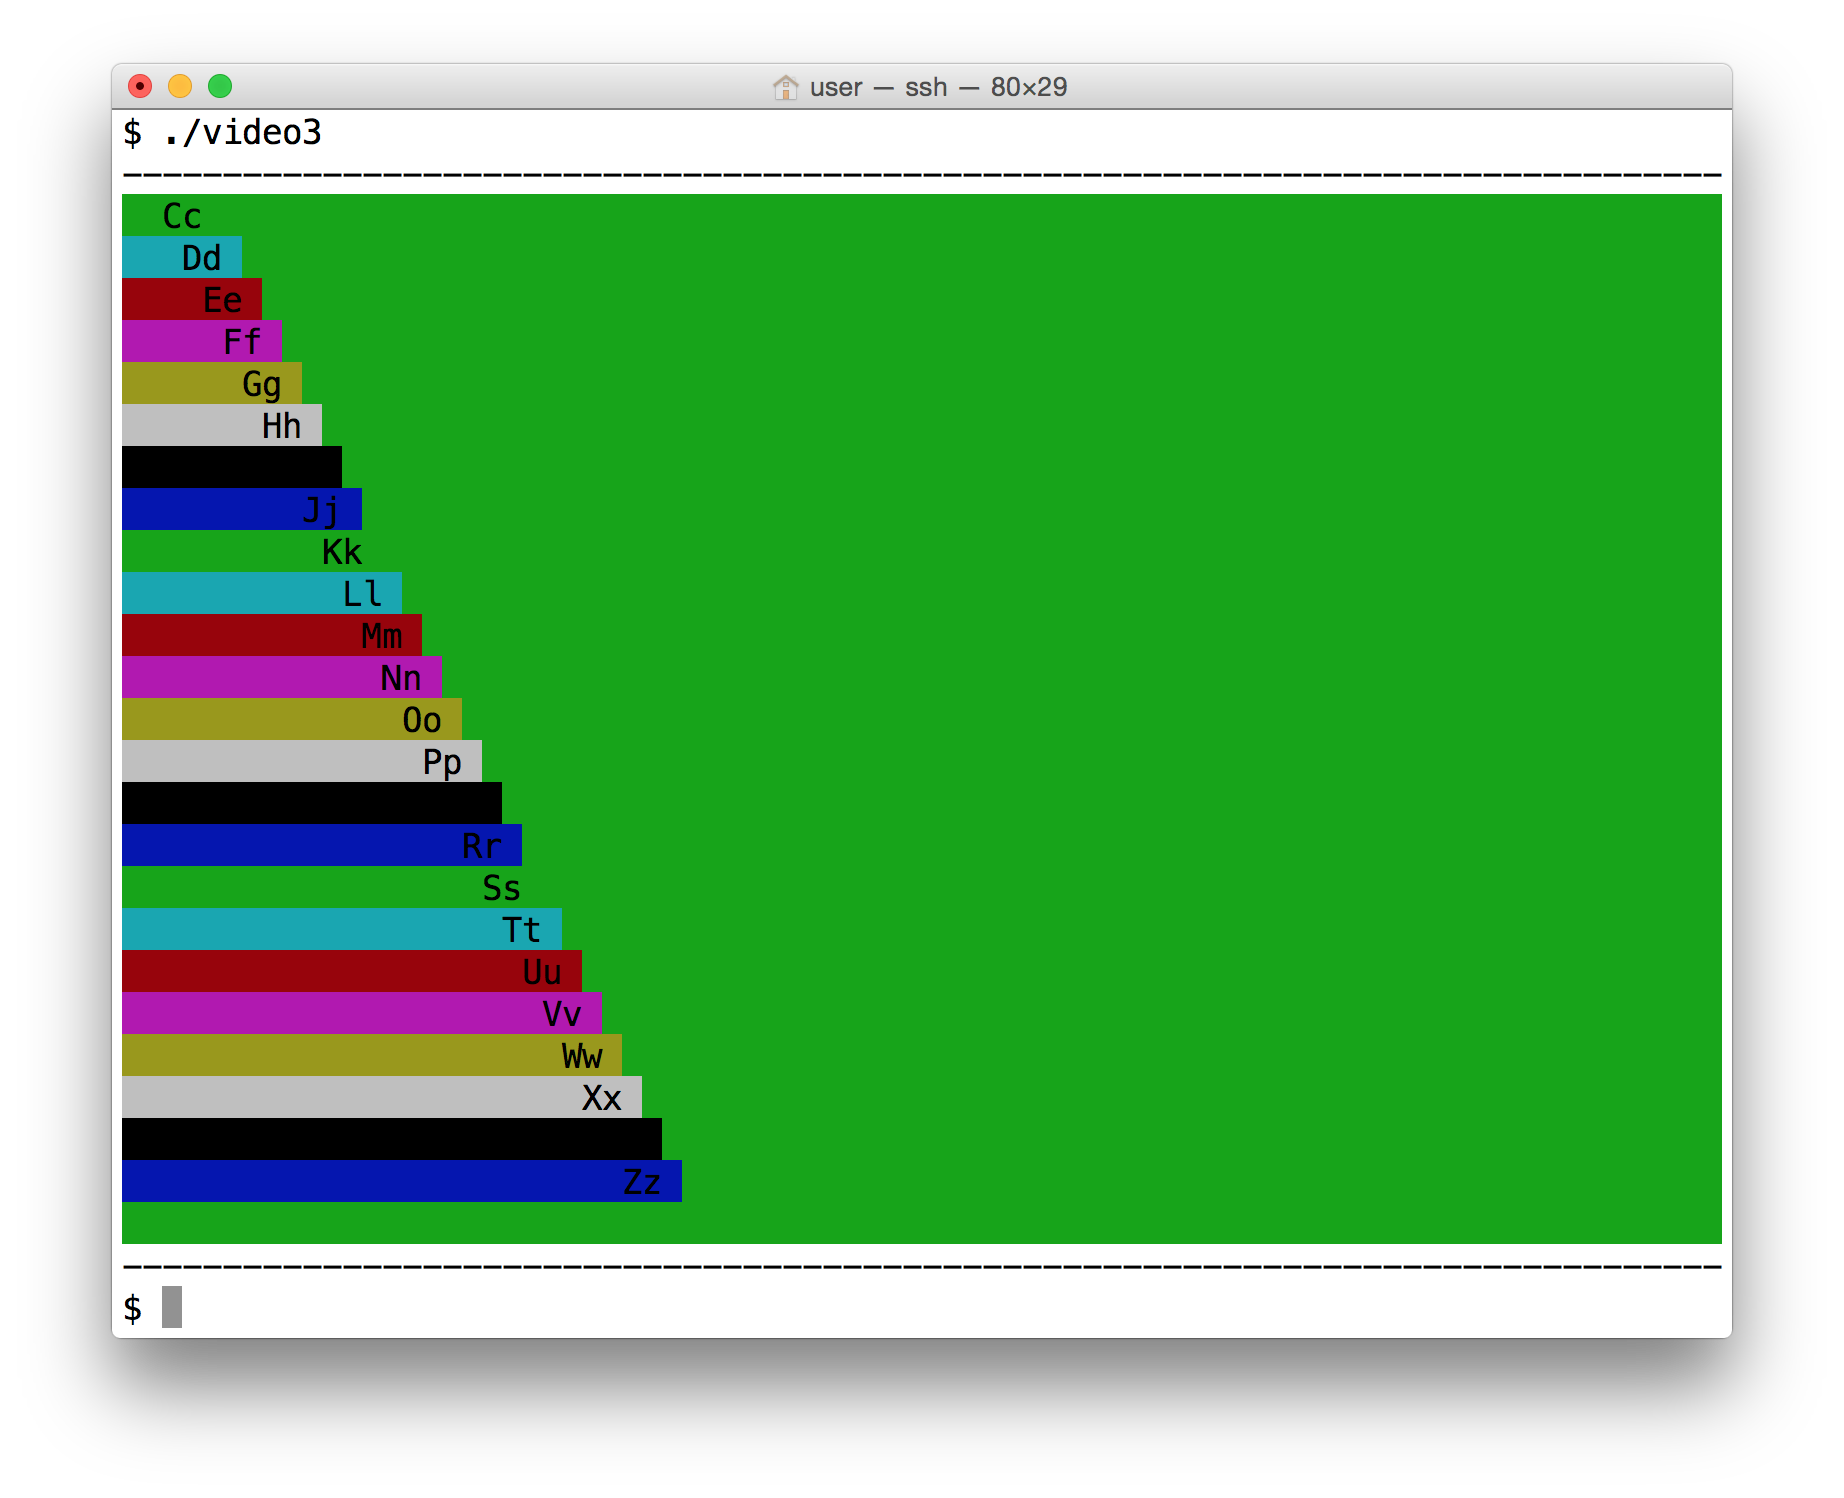
[This example also provides some further opportunities for testing your ealier implementation of scrolling and outc(); note how the lines for Aa and Bb are missing in the display above, having been scrolled off the top of the display by the remaining 24 letters of the alphabet and the one extra blank line at the end.]
Once your implementation of outhex() is complete, you should see output that looks something like the following instead:
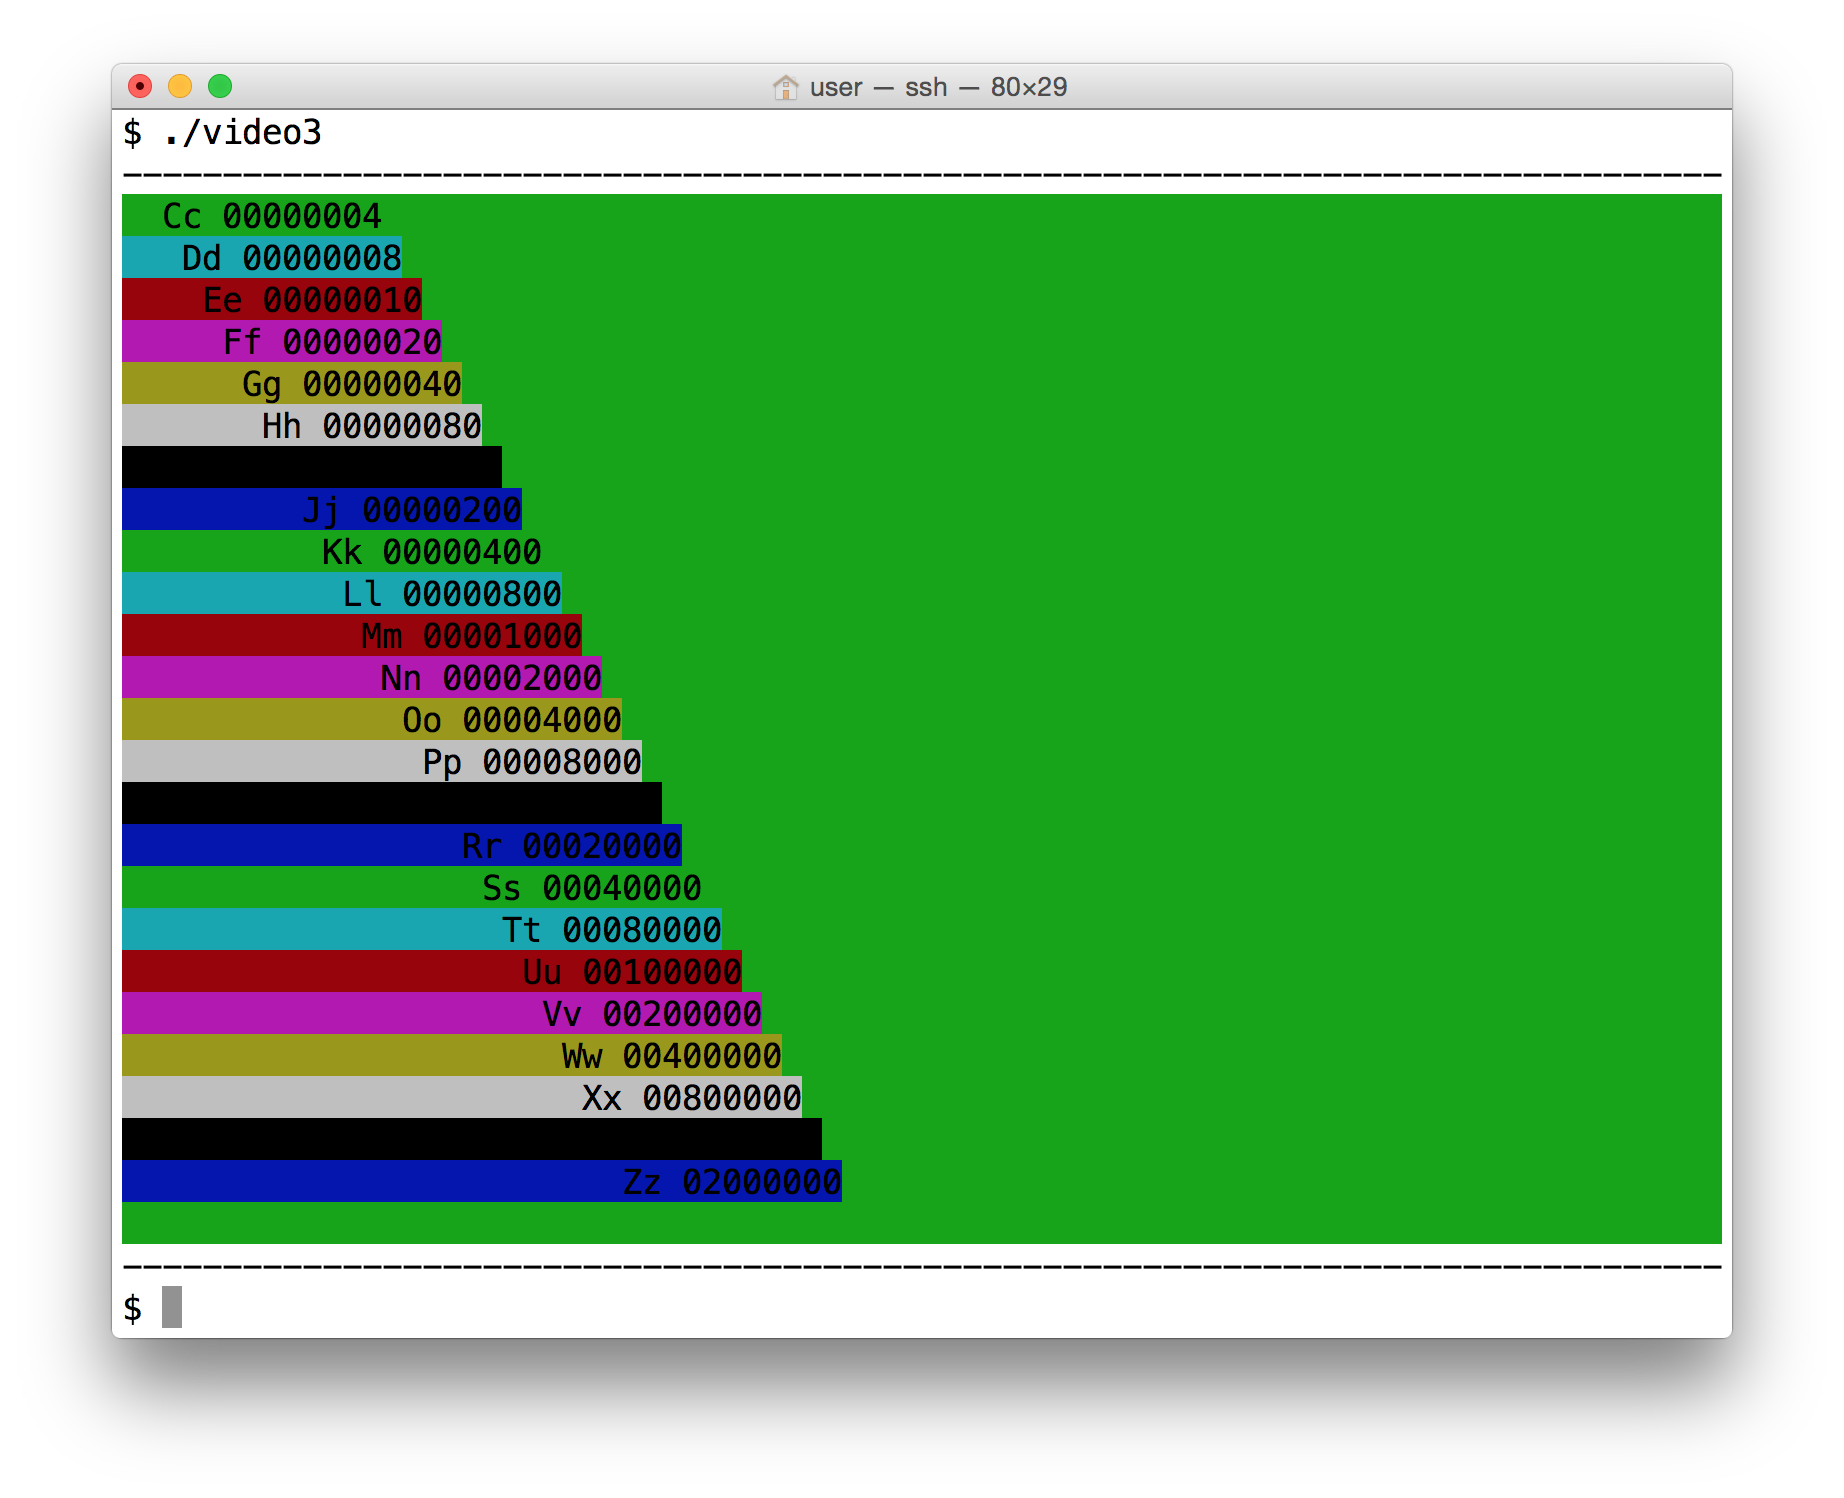
Notice that the numbers seen here correspond to powers of two in hexadecimal notation: this reflects the fact that the program outputs the value in the variable val at each step, having initialized it to 1 at the start of the program, and then doubling it with each subsequent loop iteration.
It's reasonable to assume (I hope!) that your implementation of outhex() will take the form of a loop whose body is executed eight times, with each iteration involving a separate call to outc(). As a result, you might start to run in to problems here if you haven't taken the steps that are expected and, in general, needed to save and restore specific registers in outc(). In particular, following the System V ABI conventions, if your implementation of outc()—or any one of the other functions for that matter—uses the registers %ebx, %esi, or %edi, then you must take appropriate steps to make sure those registers contain the same value at the end of the function as they did on entry. This is typically accomplished by inserting an appropriate pushl instruction at the start of the function and a matching popl at the end. Similarly, if your code for outhex() is using any of the %eax, %ecx, or %edx registers at the point where it calls outc(), then you should take appropriate steps to ensure that the values in those registers cannot be "clobbered" (i.e., overwritten) while the outc() code is running.
Other Ideas
Congratulations, you've reached the end of this set of exercises! But if you've enjoyed working on this, then there are still plenty of opportunities to continue by adding new functions or features to the library. For example, you could add:
- A function for setting the cursor position to specific coordinates (be sure to check that the coordinate values are in range!)
- A function for outputing numbers in decimal notation.
- A mechanism that allows you to specify a "window" within the 80x25 text display where new output will be displayed and scrolled, without changing the text that appears in other parts of the display.
- A function for drawing a rectangular block of characters on the screen with a given height, width, and starting coordinates.
- ...
- Come to think of it, we could even try running a program like this in a bare metal environment with real video RAM! In theory, that would allow us not only to see the final state, but also to watch intermediate steps along the way. (Just don't expect to see much of that intermediate work in detail as it flashes by unless you've taken some steps to slow the code down in significant ways, such as by inserting explicit delays, for example.)