Volume 3, Chapter 15:
The Method for Putting on the Strings
Translator’s note: This chapter presents a general
method for the traditional way of putting on one string using both hands, where
the left hand has several tasks including tuning the new string to a previous
string, and the right hand focuses on pulling and wrapping the string around a
wild goose foot. The next chapter talks
about how to put the strings on in succession and how to tune the “next” string
to a previously strung string, usually string five. It should be noted that this methodology is
non-trivial in the extreme. The
translator is not fond of this procedure and has memories of watching
previously placed strings be knocked askew about the time the last string is
put on. In this case, practice will indeed make perfect. Some current qin makers using nylon/metal
hybrid strings provide a “machine” that uses zither pins from the piano
world. This machine does make the act of
putting on new strings or changing individual strings much easier. It may however not be safe for the
traditional silk string as the edges of the zither pins may be too sharp. Stephen Dydo has built equivalent boxes for
silk strings using violin pegs.
First thread the
string so that the “fly-head” becomes tight against the fastener.[1] Make the upper part (of the “fly-head”) face
up, and make the back face down. [The part with a nose faces up and the crossed-over
part faces down]. It is best if the
fastener reaches the inside of the bridge (towards the nut). If it goes over too far then the strings when
played will be mute and not clear.[2] If (the fastener) does not reach (the
bridge), then the tones will be too strong and not smooth.
The technique
starts with first taking the qin and standing it up straight on the middle of a
stool. The tail is up and the head is
down. Use a cloth to protect the head
(on the stool) so it does not slip. Take
the strings and hang them up on the mouth of the dragon gums (fn: nut area).[3] Arrange them in an equal and separated
fashion in their respective positions.
Pull them towards the wild geese foot area. Take the end of a string and wrap it first
around the right-hand little finger, coming out beyond the ring finger,
entering in by the middle finger, and then finally employ the thumb and index
finger to pinch the string tight. [If two fingers pinch a string, it cannot
hurt the fingers].[4] Using your strength pull down. Use the thumb and index finger of the left
hand to tightly hold the string at the front of the qin and gently pull towards
the area of the nut. This helps the
string go in the direction of the qin back and makes it easier for the right
hand to pull the string tight. Some may
use a goose feather tube to protect the nut and thereby avoid sharp places on
the nut harming the string, or to avoid having the string harm the nut. Moreover it makes (the string) slippery, and
much easier to move. To check the
strings, use the left hand ring finger to press a string and the thumb for
plucking. Examine the sound (to see if
it is high enough) and then fix the string accordingly. The left hand is also used to grasp the tail
of the qin. The right-hand takes the
string and pulls it tight on the wild goose foot. Do not let the string slip. With this method, although the string is
wrapped around the little finger, the main strength resides with the thumb,
index, and middle fingers pulling the string tight. Therefore the small finger will not be hurt. Some use cloth or a handkerchief for wrapping
the strings. Follow the method to place
the strings. When you start out to
study, you may not know your string.
Avoid hurting yourself. With
every string wound on a wild goose foot, be sure and make it tight against the
qin bottom. Do not leave any space. At the conclusion of winding the string, take
the string tail and stick it through (other parts of the string), and pull
things tight. Do not let it become
knotted up.
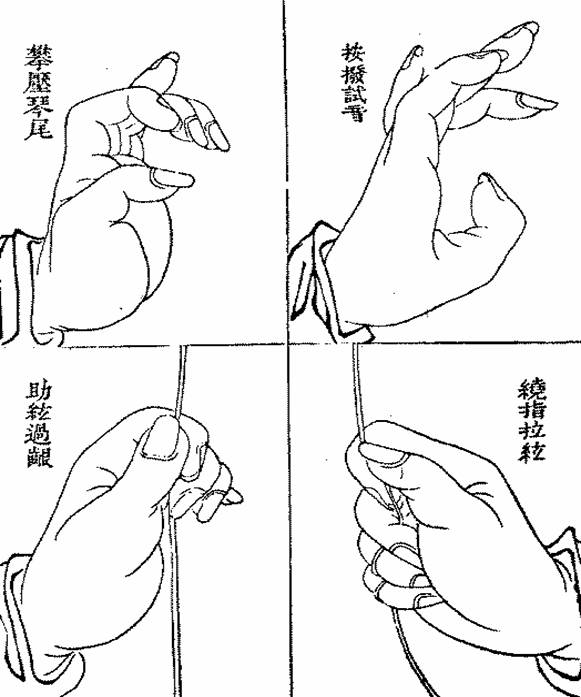
Figure 1: (From right top clockwise) Pressing and Plucking to Test the Sound, Wrapping the Fingers to Pull the String, Helping the String to Pass the Nut, Holding Down the Qin Tail.
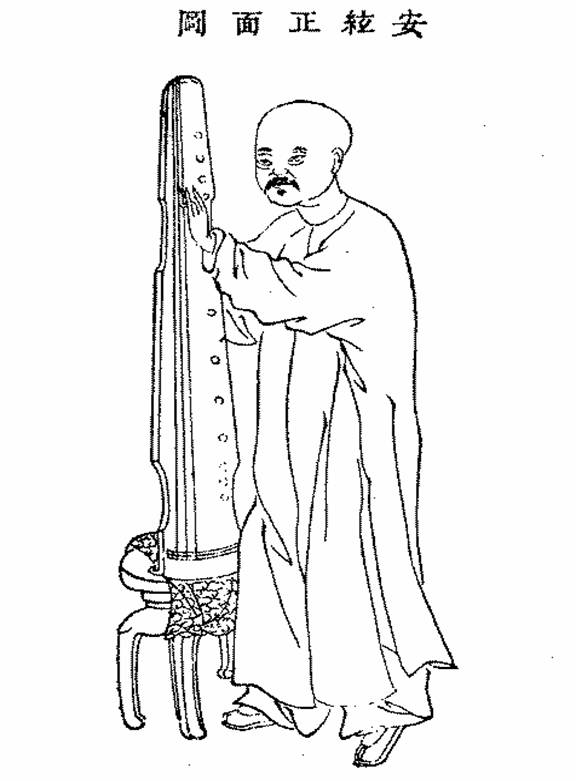
Figure 2: Putting on Strings – Front
View
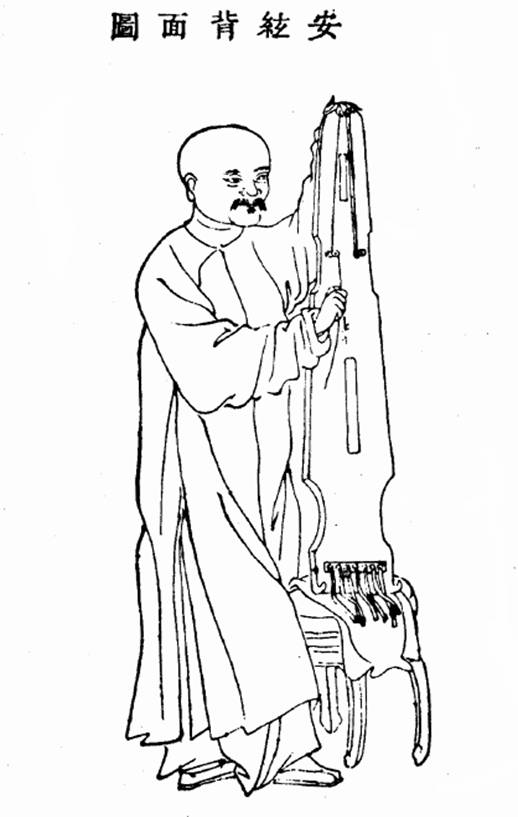
Figure 3: Putting on Strings – Back View