Assembly of the PVC Tank
This web page provides instructions for fabricating the PVC tank that holds salt water for the fish tank project. The objective is to glue two PVC pieces together and tap three holes for barbed fittings.
Although you will drill and tap holes for the barbed fittings, do not install the fittings at the end of the fabrication process. The barbed fittings are installed only after the tank is attached to the pump and located on the L bracket.
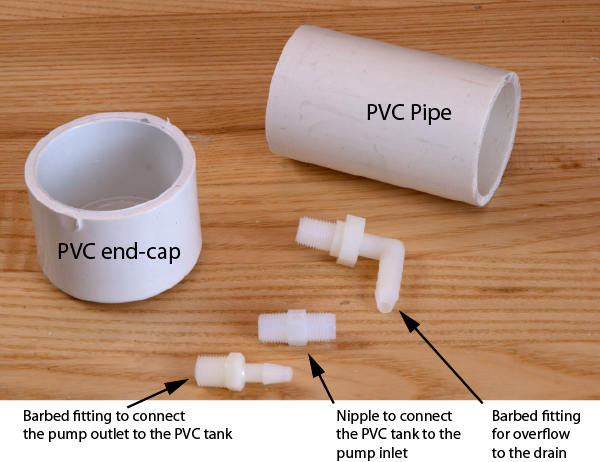
Parts
The tank is fabricated from a short length of PVC pipe and an end cap. Three holes are drilled and tapped in the tank assembly. A hole in the bottom of the tank is connected, via a nylon pipe nipple, to the inlet of the pump. The other tapped holes are connected to nylon tubing: one from the outlet of the pump and the other to the drain.
Glue the PVC Parts
Summary of the gluing process: The end cap is attached to the pipe with PVC solvent.
- Clear a workspace and place a length of paper towel on the workbench.
- Apply the purple primer to the outside of the pipe and to the inside of the end cap.
- Apply the clear solvent to the outside of the pipe (only).
- Working quickly, press the solvent-coated end of the pipe into the end-cap and twist slightly
- Inspect the joint
Be careful: The primer and solvent are toxic.
Be careful: The primer and solvent will stain your hands and damage your clothes.
Detailed instructions:
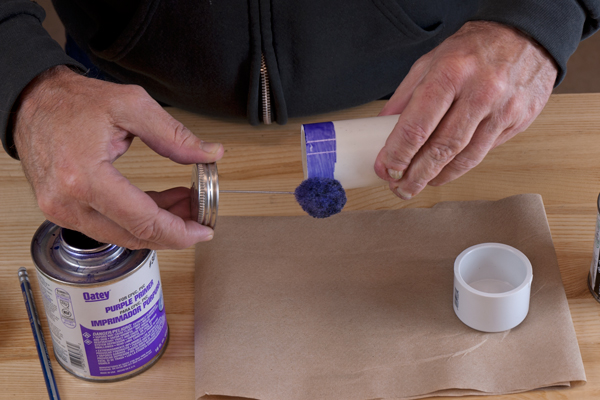
Twist the lid to remove the applicator brush for the purple primer. As you remove the brush, scrape the excess primer agains the inside edge of the top of the primer jar. The primer should not be dripping from the brush as you move it from the jar to the part.
Swipe the brush around the end of the pipe, leaving a thin coat of primer on one end of the pipe. Set the pipe, primed-end up, on the paper towel.
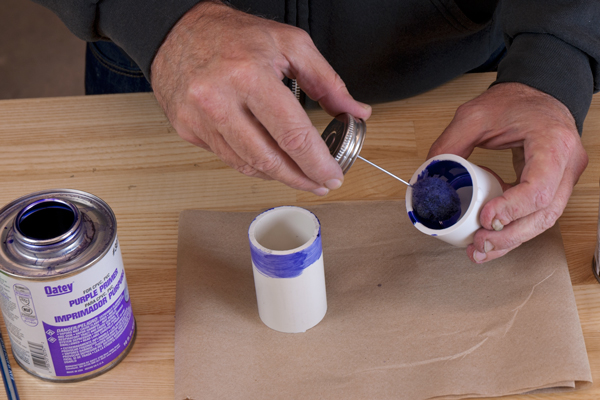
Swipe the brush along the inside of the end cap, leaving a thin coat of primer on the inner wall of the end cap. Replace the applicator brush in the primer can and tighten the lid.
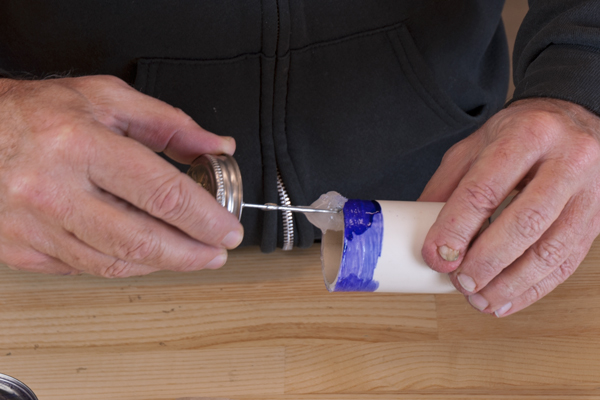
Twist the lid to remove the applicator brush for the clear solvent. As you remove the brush, scrape the excess solvent agains the inside edge of the top of the primer jar. The solvent should not be dripping from the brush as you move it from the jar to the part.
Swipe the brush around the end of the pipe, leaving a thin coat of solvent over the primed end of the pipe.
Working quickly, press the solvent-coated end of the pipe into the end-cap and twist slightly. The twisting motion will improve the chances of complete coverage of the joint. The solvent will set quickly and prevent you from turning the pipe relative to the end cap.
Drilling and Tapping Holes for the Barbed fitting
Mark the location of the two holes at the top of the PVC pipe.
The holes should be about one half inch from the top of the pipe. The front hole is the overflow to the drain, so it must be a little lower than the side hole, which is the inlet to the tank from the pump.
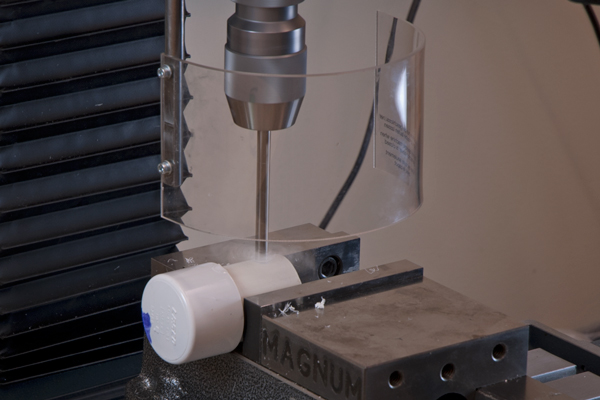
Place the PVC pipe assembly in a vise on your assigned milling machine. Tighten the vise enough to secure the pipe. Do not over-tighten so that you deform or crack the PVC.
Select the Q bit (0.332 inch dia.) and insert it into the chuck.
With the drill turned off, adjust the x-y table on the mill so that the drill is aligned with one of the two marks on the pipe.
Rotate the safety shield into place, and drill the hole through one side of the tank.
Loosen the vice and rotate on part 90 degrees. Adjust the location of the x-y table so that the drill is directly above the mark. Drill the second hole through one side of the drill material.
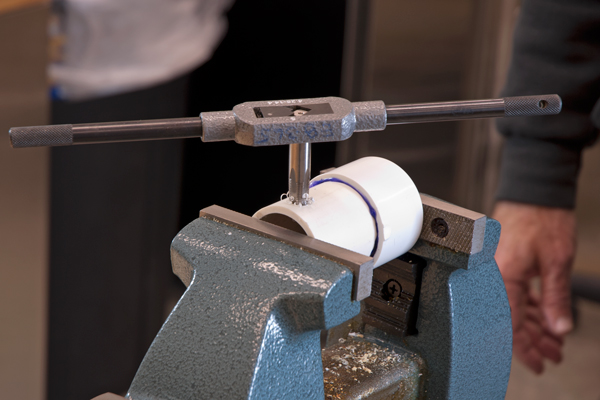
Remove the tank from the vise on the milling machine, and place it in a vice on the workbench. Tap both holes in the side of the tank.
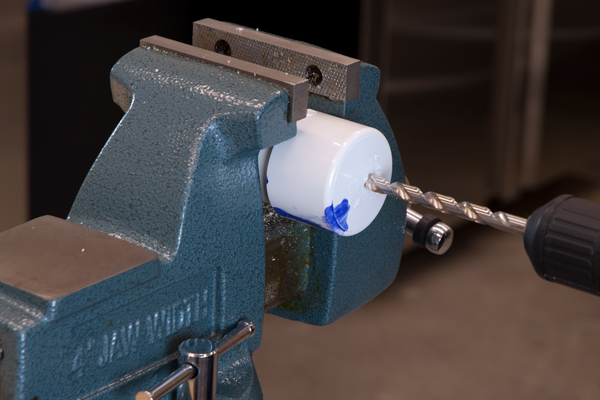
Remove the tank from the vise and rotate it so that the end cap is clearly exposed. Note that each vise has a second set of jaws for holding pipes.
Drill through the end cap. This operation is a bit tricky because the bit will tend to wander over the surface. Maintain a secure grip on the drill and apply modest pressure so that the drill bit starts in the center of the cap.
If you are having difficulty starting the hole with the Q bit, choose a smaller bit to create a pilot hole.
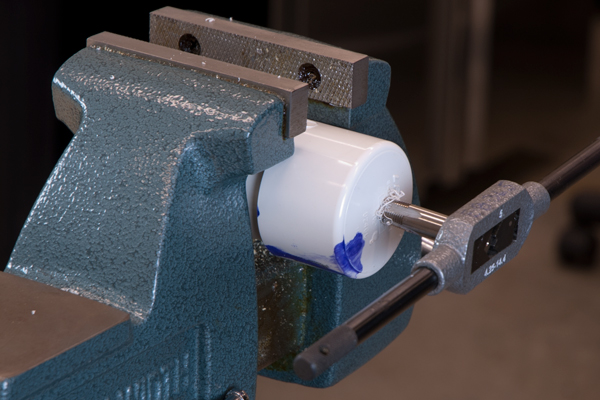
Tap the hole in the end cap.
You are done with this stage in the fabrication of the fish tank. Store your PVC tank and the three fittings in a secure location.