Texturing


This tutorial will build on the previous tutorial, adding OpenGL texturing to our lit cube.
  1. Setup Texturing
  2. libtarga and TargaImage
  3. Load and Bind a Texture
  4. Add Texture Coordinates
  5. Build and Run the Program
Lets get started.


Step 1:  Setup Texturing

The first thing to do is to enable texturing and set the texture application mode.  We only need to do this once so we'll do it at the end of InitializeGL().  We enable 2D texturing and set the texture mode to modulate.  Modulation will basically multiply the color calculated by the lighting equations by the color from our texture map. 

   . . .
   glColorMaterial(GL_FRONT_AND_BACK, GL_DIFFUSE);

   glEnable(GL_TEXTURE_2D);
   glTexEnvf(GL_TEXTURE_ENV, GL_TEXTURE_ENV_MODE, GL_MODULATE);
}

Step 2:  libtarga and TargaImage

We'll need to load an image to use as our texture map and we're going to rely on the TargaImage class again for our image handling needs.  Grab the TargaImage files if you don't already have them as well as libtarga files from the previous tutorial which dealt with images.

Add these files into the project as described in the previous tutorial.

  • Step 3:  Load and Bind a Texture

    Ok we're ready to load our image and use it as a texture.  We're going to add a couple of helper methods to make this easier, one to load the image and one to resize it for us.  We'll also need a member variable to track the id number of the texture object we'll need to use the texture in OpenGL.  Add the following method declarations and the member variable declarations to MyWindow.h.

    . . .
          void DrawCube();
          virtual int handle(int event);
          bool ResizeImage(TargaImage* image);
          void LoadTexture(const char* filename);

          float          rotation,
                         rotationIncrement;
          bool           animating;
          unsigned int   textureId;
    };


    If we're going to use the TargaImage class we'll have to include its declaration.  We'll add it near the top of MyWindow.h.

    #ifndef MY_WINDOW_H
    #define MY_WINDOW_H

    #include <Fl/Fl_Gl_Window.h>
    #include "TargaImage.h"

    class MyWindow : public Fl_Gl_Window
    {
       public:
    . . .


    We need to add definitions for our two helper functions.  Let's look at LoadTexture() first.  You'll need to add it to the bottom of MyWindow.cpp.

    void MyWindow::LoadTexture(const char* filename)
    {
       TargaImage* image = TargaImage::Load_Image(filename);
       if (!image)
       {
          std::cerr << "Failed to load texture:  " << filename << std::endl;
          return;
       }

       // reverse the row order
       TargaImage* reversedImage = image->Reverse_Rows();
       delete image;
       image = reversedImage;

       if (!ResizeImage(image))
       {
          std::cerr << "Failed to resize texture." << std::endl;
          return;
       }

       glGenTextures(1, &textureId);
       glBindTexture(GL_TEXTURE_2D, textureId);
       glTexParameteri(GL_TEXTURE_2D, GL_TEXTURE_WRAP_S, GL_REPEAT);
       glTexParameteri(GL_TEXTURE_2D, GL_TEXTURE_WRAP_T, GL_REPEAT);
       glTexParameteri(GL_TEXTURE_2D, GL_TEXTURE_MAG_FILTER, GL_LINEAR);
       glTexParameteri(GL_TEXTURE_2D, GL_TEXTURE_MIN_FILTER, GL_LINEAR);

       glTexImage2D(GL_TEXTURE_2D, 0, GL_RGBA, image->width, image->height, 0, GL_RGBA, GL_UNSIGNED_BYTE, image->data);
    }


    We'll take a quick look at what LoadTexture() does for us, however I won't be covering the OpenGL functions in detail.  I'd recommend the "red book" (OpenGL Programming Guide) for an explanation of texture mapping and how it is achieved in OpenGL.  LoadTexture() takes the filename of the targa to load as its only argument.  It attempts to load the image via TargaImage and quits if this fails.  Image formats generally place the origin in the upper left corner of the image, where as texture coordinates assume the origin is in the lower left.  To account for this difference we're going to flip the image after we load it.  TargaImage provides a method to do this, Reverse_Rows().

    OpenGL places some restrictions on the format of images which will be used as textures. First the minimum size of each dimension of the texture must be at least 64.  Textures must also have dimensions that our powers of two.  The textures need not be square only a power of two in each dimension.  We'll add a helper method, ResizeImage(), to make our images comply with these restriction.

    Once we've resized the image we create and bind an OpenGL texture object via glGenTextures() and glBindTextures().  We then load our image as a texture with glTexImage2D().  Our texture can now be referenced via the texture object we've bound it to.  Please refer to the "red book" (OpenGL Programming Guide) for help with these functions.

    Below is the code for the ResizeImage() method.  I won't cover this code other than to say that it utilizes a function from the OpenGL utility library, gluScaleImage() to actually resize the image.  You'll need to add the function definition to the bottom of MyWindow.cpp.


    bool MyWindow::ResizeImage(TargaImage* image)
    {
       int newWidth = pow(2.0, (int)ceil(log((float)image->width) / log(2.f)));
       int newHeight = pow(2.0, (int)ceil(log((float)image->width) / log(2.f)));

       newWidth = max(64, newWidth);
       newHeight = max(64, newHeight);

       if (newWidth != image->width && newHeight != image->height)
       {
          unsigned char* scaledData = new unsigned char[newWidth * newHeight * 4];
          if (gluScaleImage(GL_RGBA, image->width, image->height, GL_UNSIGNED_BYTE, image->data, newWidth, newHeight, GL_UNSIGNED_BYTE, scaledData) != 0)
          {
             delete[] scaledData;
             return false;
          }// if

          delete image->data;
          image->data = scaledData;
          image->width = newWidth;
          image->height = newHeight;
       }// if

       return true;
    }


    We'll need to add a couple of includes to MyWindow.cpp.

    . . .
    #include <Fl/Fl.h>
    #include <Fl/Gl.h>
    #include <Gl/Glu.h>
    #include "MyWindow.h"
    #include <iostream>
    #include <math.h>

    . . .


    Add add an actual call to LoadTexture() to the end of InitializeGL().

    . . .
       glEnable(GL_TEXTURE_2D);
       glTexEnvf(GL_TEXTURE_ENV, GL_TEXTURE_ENV_MODE, GL_MODULATE);
       LoadTexture("graphics.tga");
    }

    Also grab the image we'll be using as our texture and save it in your project's directory.
    Note: you need to put graphics.tga in the right path depending on your project settings.

    Step4:  Add Texture Coordinates

    The only thing left to do is add texture coordinates to each of our quads that form the cube.  Texture coordinates range from (0, 0) to (1, 1) for a single copy of the texture.  So we'll modify DrawCube() to include texture coordinates which result in our texture being mapped to fit exactly once on each face.

    void MyWindow::DrawCube()
    {
       glBegin(GL_QUADS);
          // front
          glNormal3f(0, 0, 1);
          glColor3f(1, 0, 0);
          glTexCoord2f(0, 1);      glVertex3f(-1, 1, 1);
          glTexCoord2f(0, 0);      glVertex3f(-1, -1, 1);
          glTexCoord2f(1, 0);      glVertex3f(1, -1, 1);
          glTexCoord2f(1, 1);      glVertex3f(1, 1, 1);

          // back
          glNormal3f(0, 0, -1);
          glColor3f(0, 1, 0);
          glTexCoord2f(1, 1);      glVertex3f(-1, 1, -1);
          glTexCoord2f(0, 1);      glVertex3f(1, 1, -1);
          glTexCoord2f(0, 0);      glVertex3f(1, -1, -1);
          glTexCoord2f(1, 0);      glVertex3f(-1, -1, -1);

          // top
          glNormal3f(0, 1, 0);
          glColor3f(0, 0, 1);
          glTexCoord2f(0, 1);      glVertex3f(-1, 1, -1);
          glTexCoord2f(0, 0);      glVertex3f(-1, 1, 1);
          glTexCoord2f(1, 0);      glVertex3f(1, 1, 1);
          glTexCoord2f(1, 1);      glVertex3f(1, 1, -1);

          // bottom
          glNormal3f(0, -1, 0);
          glColor3f(1, 1, 0);
          glTexCoord2f(0, 0);      glVertex3f(-1, -1, -1);
          glTexCoord2f(1, 0);      glVertex3f(1, -1, -1);
          glTexCoord2f(1, 1);      glVertex3f(1, -1, 1);
          glTexCoord2f(0, 1);      glVertex3f(-1, -1, 1);

          // left
          glNormal3f(-1, 0, 0);
          glColor3f(0, 1, 1);
          glTexCoord2f(0, 1);      glVertex3f(-1, 1, -1);
          glTexCoord2f(0, 0);      glVertex3f(-1, -1, -1);
          glTexCoord2f(1, 0);      glVertex3f(-1, -1, 1);
          glTexCoord2f(1, 1);      glVertex3f(-1, 1, 1);

          // right
          glNormal3f(1, 0, 0);
          glColor3f(1, 0, 1);
          glTexCoord2f(0, 1);      glVertex3f(1, 1, 1);
          glTexCoord2f(0, 0);      glVertex3f(1, -1, 1);
          glTexCoord2f(1, 0);      glVertex3f(1, -1, -1);
          glTexCoord2f(1, 1);      glVertex3f(1, 1, -1);
       glEnd();
    }


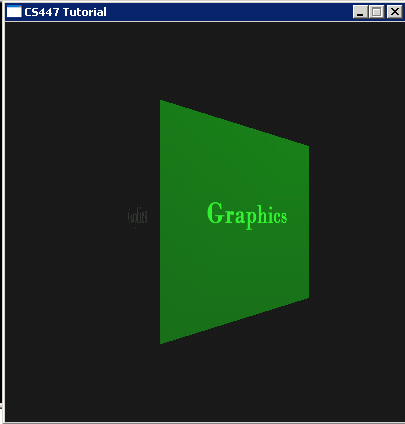
    Step 5:  Build and Run the Program


    Ok we're ready to build and run our program.

    Choose Build -> Build Solution to compile and link the program and Debug -> Start Without Debugging to run it.


    Source code for this tutorial.

    Go to the previous tutorial.