Overview of the Fish Tank Platform
This web page describes proper safety procedures for assembling the fish tank platform. It also gives an overview of the platform assembly. The entire assembly of the platform is divided into the following steps.
Safety First
Do not operate any machine unless you have
- completed a hold harmless form
- been trained to operate the machine
- been authorized to do so by the instructor or lab monitor
When using rotating equipment such as milling machines, drills and lathes,
- securely tie long hair back to remove the possibility of it falling below your face
- do not wear loose clothing
- remove lanyards or jewelry hanging from your neck or wrist
When using power tools like milling machines, drills and lathes,
- clamp the workpiece in a vise or chuck before drilling or cutting
- never hold or restrain the workpiece with your hand
- make sure all safety guards are closed before powering up machine
- never leave a running tool unattended
When working in the lab,
- always wear approved eye protection
- take common sense precautions and avoid horse play
- keep work area clean & organized
- never use your own power tools
- only use lab facilities to complete activities required for EAS 199A, 199B and 199C
- report damaged equipment, unsafe activities and accidents to the instructor
Materials
Each team of students will pick up a set of materials shown in the following photograph.
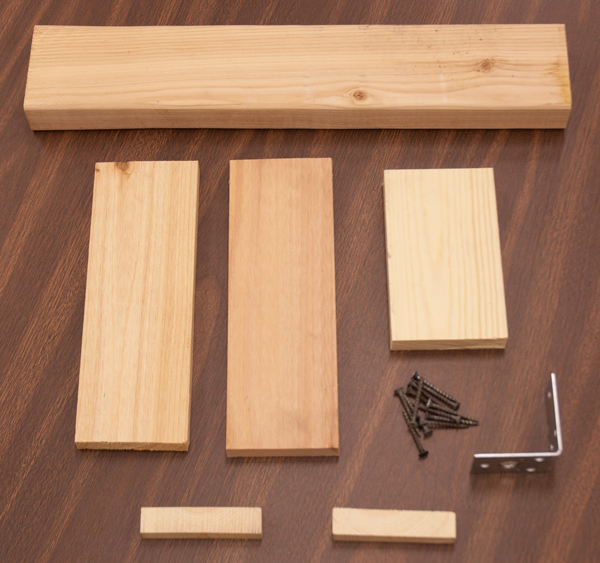
The wood has been rough cut to length. Be careful of splinters. Do not assume that the individual pieces of wood have square ends.
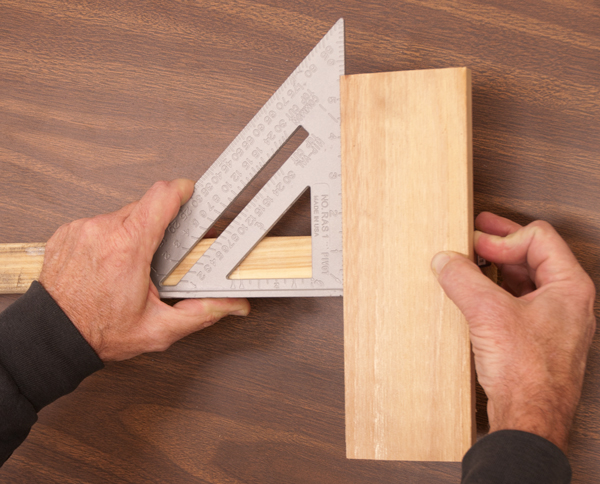
Using the square to align parts at 90 degree angles
Each workstation has a square. Use the square to make sure parts are perpendicular.
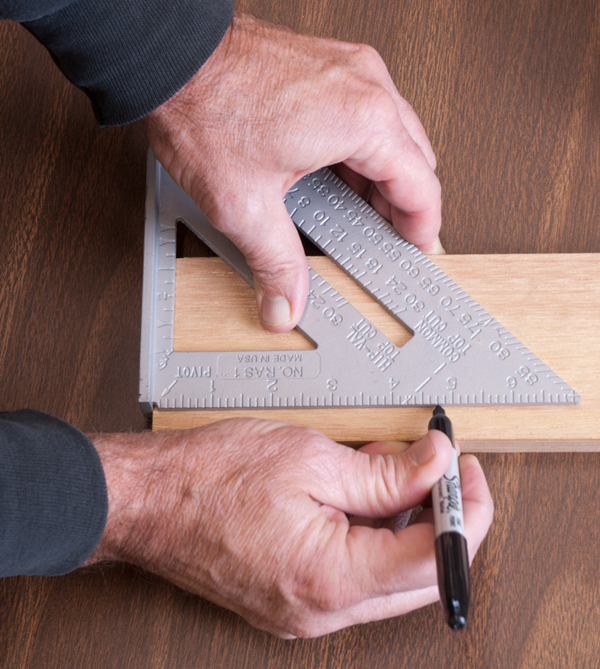
Using the square to measure
The square also has a measurement scale. Pressing the overhanging edge of the square agains the workpiece allows an accurate measurement of distance relative to that edge.
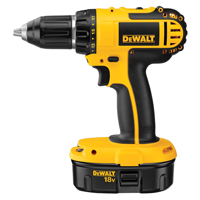
Using the drill
|
Always use common sense. The following techniques are also good practice.
|
|
Screw Joint
The platform is made from soft wood (cedar and pine) that is easily joined with dry wall screws or deck screws. The following diagram shows the basic screw joint used in the platform structure.
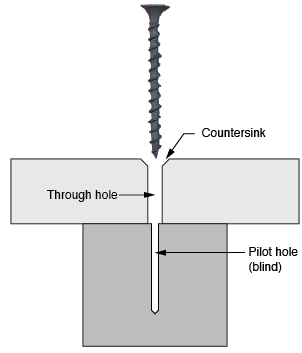
Each joint requires at least two drilling operations. One for the through hole in the top board, and one for the pilot hole in the bottom board. Because the wood used in the platform is so soft, a countersink is not necessary as long as you don't over-tighten the screw.
Pilot holes are essential to prevent the wood from splitting.
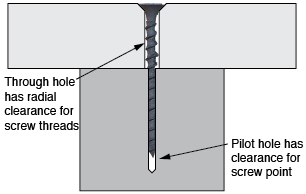
The two pieces of wood are held together by friction. The purpose of the screw is to provide a clamping force between the two boards. The screw must be loose in the top board. The through-hole is large enough that the screw threads do not engage the top board.
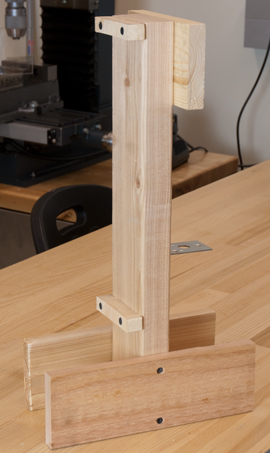
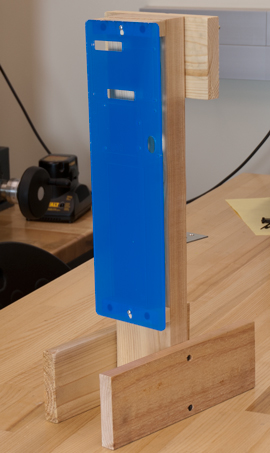
Completed Platform
The platform provides structure for the plumbing on one side and the Arduino control circuit on the other side. The arduino control circuit consists of an Arduino, and LCD panel, and a large breadboard, all of which are mounted on a sheet of acrylic. The acrylic sheet, which is called the circuit plate is visible in blue in the photograph below and to the right. The blue color is from a protective layer of blue film that will be removed when fabrication of the fish tank is completed. There is no circuit plate on the photo of the platform on the left, below.
Next Step
The next step is to attach the feet to the upright.